
This guide explains how to transfer products between warehouses when using SimplBooks inventory tracking.
How are inventory changes recorded?
When inventory products are purchased or sold, stock changes are recorded automatically through purchase and sales invoices. However, changes can also be made directly on the Inventory Documents page. From there you can record inventory additions, reductions, and transfers.
When inventory products are purchased or sold, stock changes are recorded automatically through purchase and sales invoices. However, changes can also be made directly on the Inventory Documents page. From there you can record inventory additions, reductions, and transfers.
📢 Note! Inventory tracking should only be used if you want to continuously monitor how much stock you have on hand. Using inventory tracking adds complexity to your bookkeeping, and we recommend using it only when it adds value to your business.
Quick guide
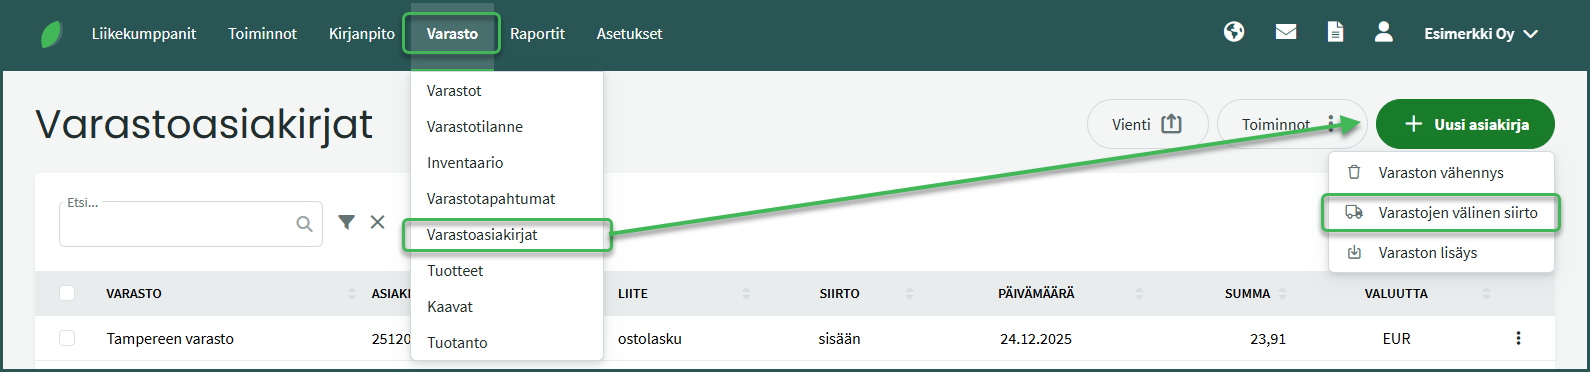
- Create the transfer at Inventory > Inventory Documents > New Document > Transfer Between Warehouses.
- Set the transfer date and select the source and destination warehouses.
- Add a line, select the product to transfer, and enter the quantity.
- Save.
DETAILED GUIDE
1. Products are transferred between warehouses at Inventory > Inventory Documents > New Document > Transfer Between Warehouses.
2. Fill in the required details
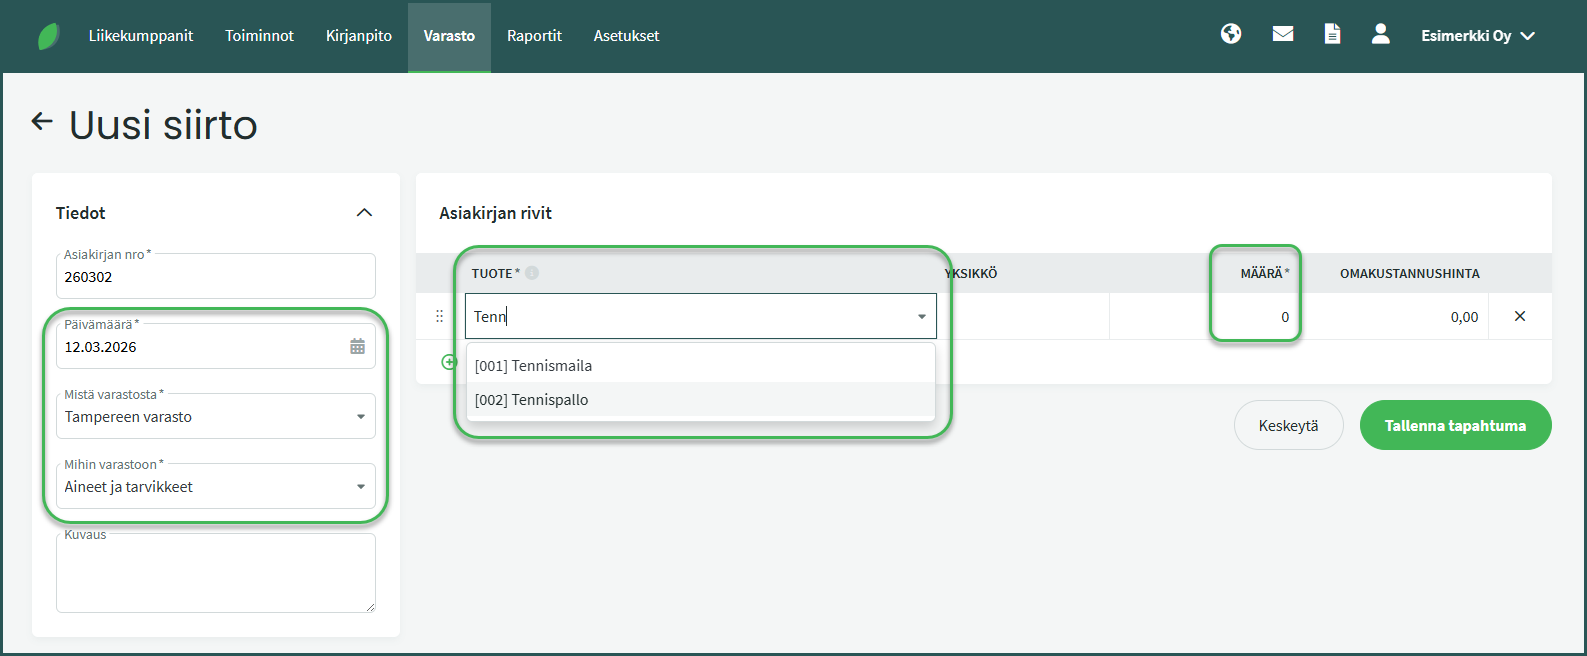
- Date – The date of the product transfer.
- From warehouse – The warehouse you are transferring products from.
- To warehouse – The warehouse the products are being transferred to.
- Product – The product to be transferred. You can search by part of the product name or code.
- Quantity – How many units to transfer.
📢 Note! The cost price cannot be changed here if the warehouse settings are configured to use average cost or batch-specific pricing. If needed, warehouse settings can be changed at Settings > Environment Settings > Warehouse Settings.
Leave A Comment?