
This guide explains how to import receipts from CostPocket into SimplBooks.
Importing receipts from CostPocket into SimplBooks is easy with the integration! You can photograph receipts using the CostPocket app, and they will be transferred automatically to SimplBooks accounting once per day. You can also import the data manually at any time.
CostPocket is an application designed for digitally storing and managing receipts, available as a mobile app or via a desktop browser. Whether you handle your own bookkeeping or have outsourced it to an accounting firm, CostPocket is a useful tool in both cases. You can read more about using CostPocket here.
QUICK GUIDE
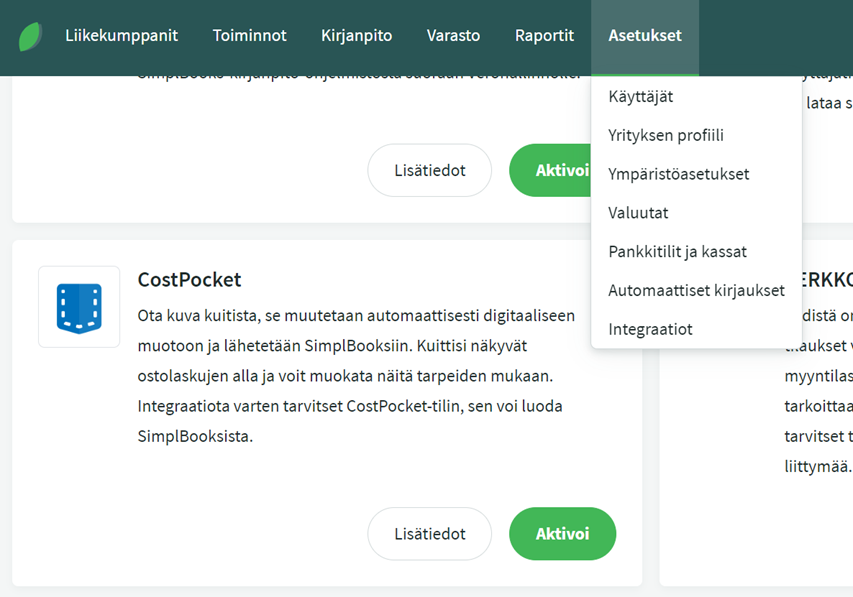
- Activate the integration in SimplBooks under Settings > Integrations > CostPocket > Activate.
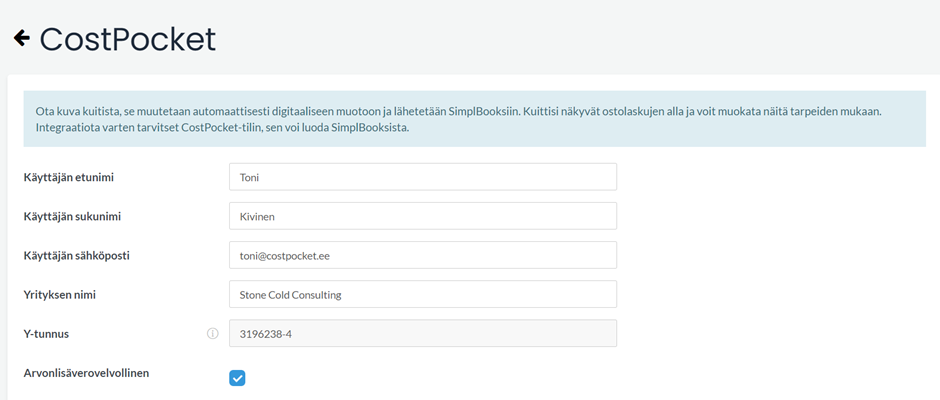
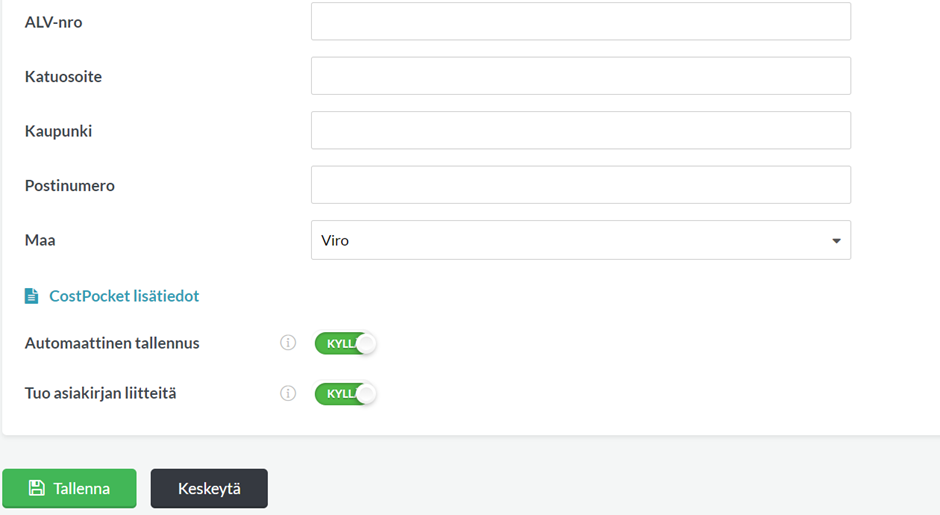
- Enter your company’s required details and choose whether imported documents are saved automatically.
- Save the details. The integration is now ready to use on the SimplBooks side.
- You will receive a confirmation email with a link to download the CostPocket app and instructions for activating your CostPocket account.
- You can photograph receipts with your phone and select “Send report”, after which the data is transferred to SimplBooks.
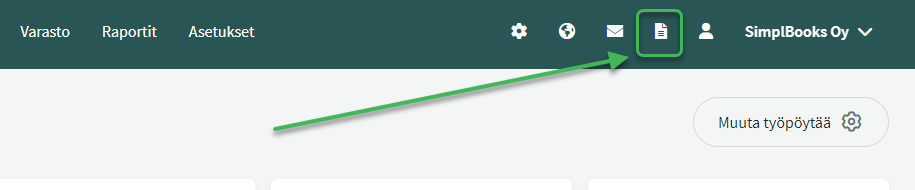
- In SimplBooks, you can process imported documents from the Imported Documents icon in the top menu.
Detailed guide
Activate the integration in SimplBooks under Settings > Integrations > Activate.
Next, enter your company’s required details and save them. The integration is now ready to use on the SimplBooks side.
After activation, you will receive a confirmation message at the email address you provided. The email contains links to download the CostPocket app and create your own CostPocket account.
Once the integration is set up, the previous day’s receipts are automatically transferred from CostPocket to SimplBooks for processing once per day. Data can also be imported manually, including retroactively.
Unsaved receipts imported into SimplBooks can be found via the Imported Documents icon on the right side of the top menu.
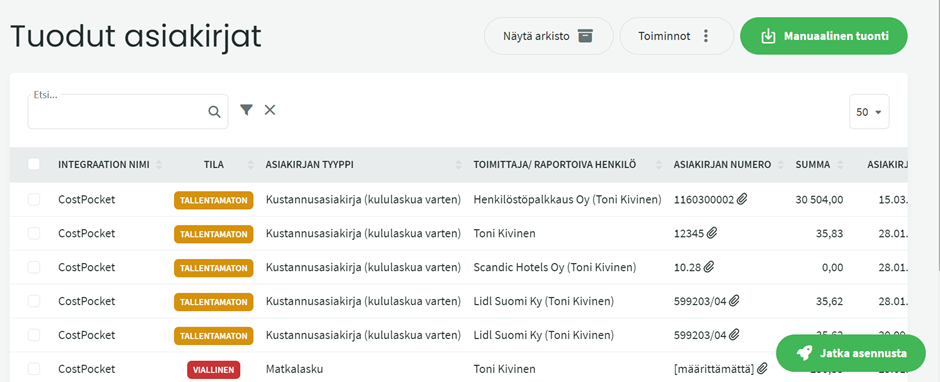
In the view that opens, you can click on a document to see its details, including an image of the original receipt. If an imported document has the status “unsaved” or “faulty”, check that the purchase invoice in SimplBooks has a supplier, expense account, and VAT rate assigned.
Using CostPocket
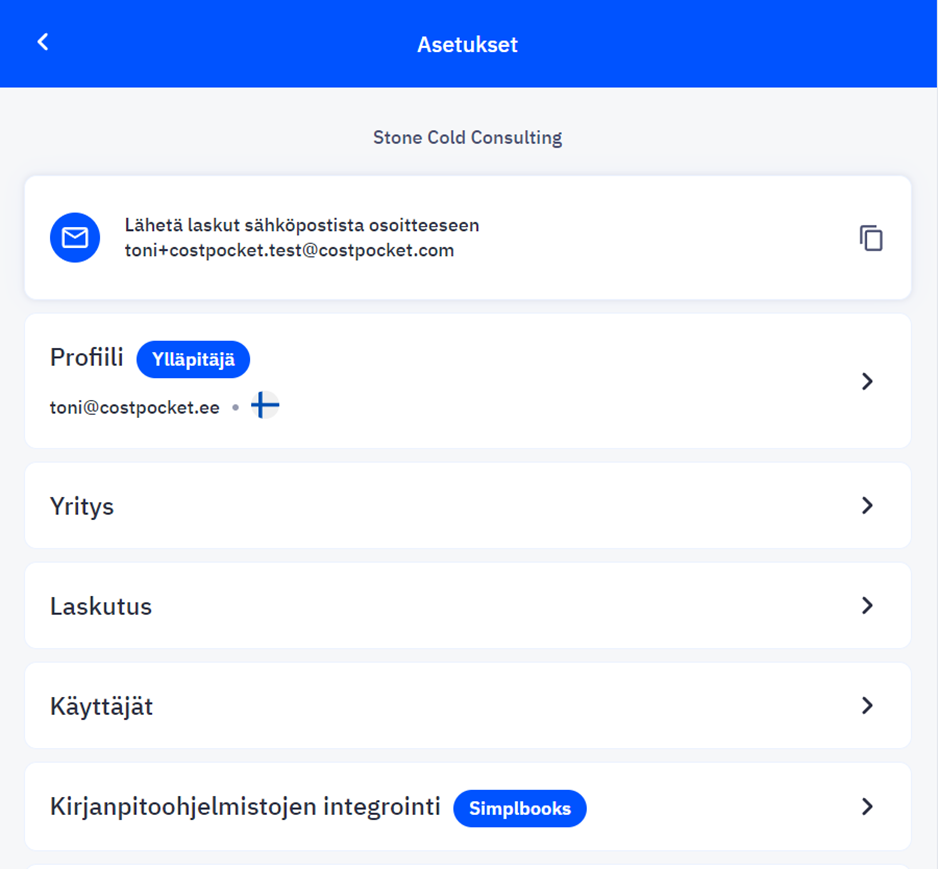
Once you are logged into the CostPocket app, you can access settings via the gear icon in the top right corner of the home screen, where you can customise the app to suit your needs.
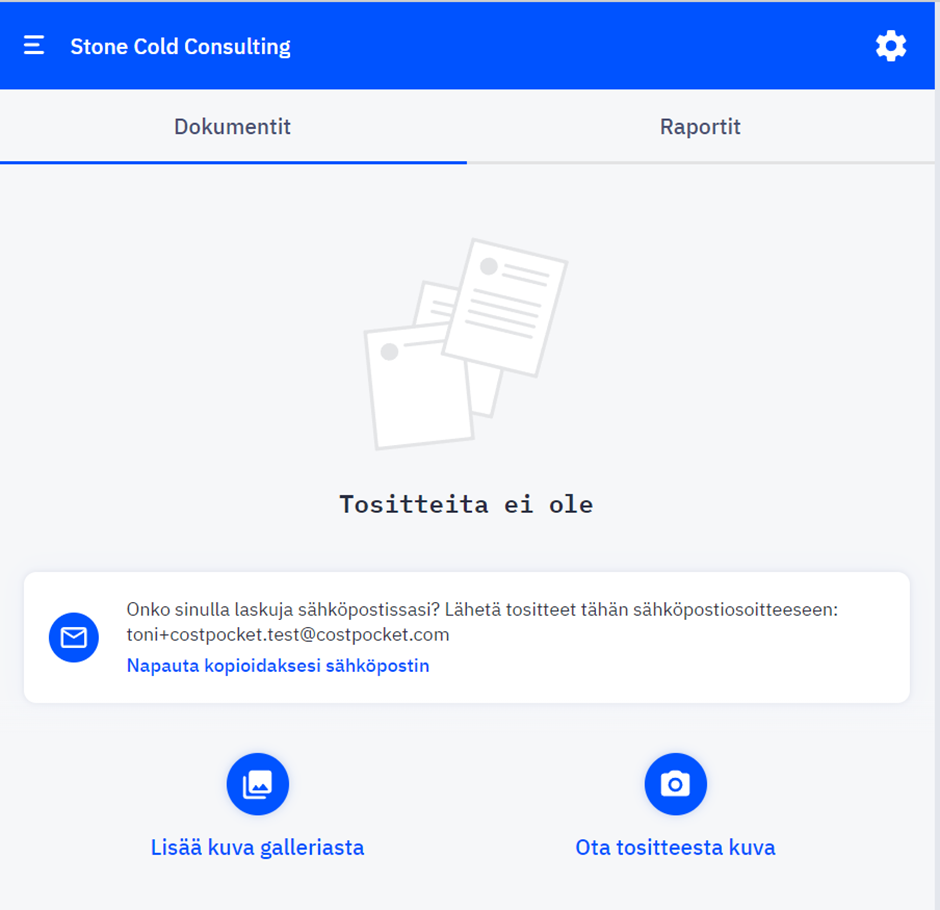
You can send receipts to SimplBooks individually under Documents, or you can compile them into a complete travel or expense report under Reports.
You can add a new receipt by:
- selecting “Add image from gallery” and choosing an image from your files
- selecting “Take a photo of receipt” and photographing the receipt
- sending the receipt to the CostPocket email address.
In the Reports view, you can add multiple items of information at once.
In CostPocket settings, you can manage billing, users, company details, and remove the integration.
Under “Accounting software integrations” in settings, you can see that SimplBooks is selected as the default integration. If you want to disconnect the integration, you can select “Bypass” under integrations. In that case, documents will be sent as a compiled report to the email address you provided.
When your receipt in CostPocket is ready, you can transfer it to SimplBooks by selecting Save or Send report, depending on whether you are in the Documents or Reports view. You can read more about using CostPocket here.
Tips:
- Automatic saving
When the automatic saving feature is activated in SimplBooks, error-free receipts are automatically saved to purchase invoices. - Invoice approval
In CostPocket, you can also set up an invoice approval workflow.
Leave A Comment?