
This guide explains how to add a new user.
Please note that additional users are charged according to the price list depending on your plan. You can check the details in our price list.
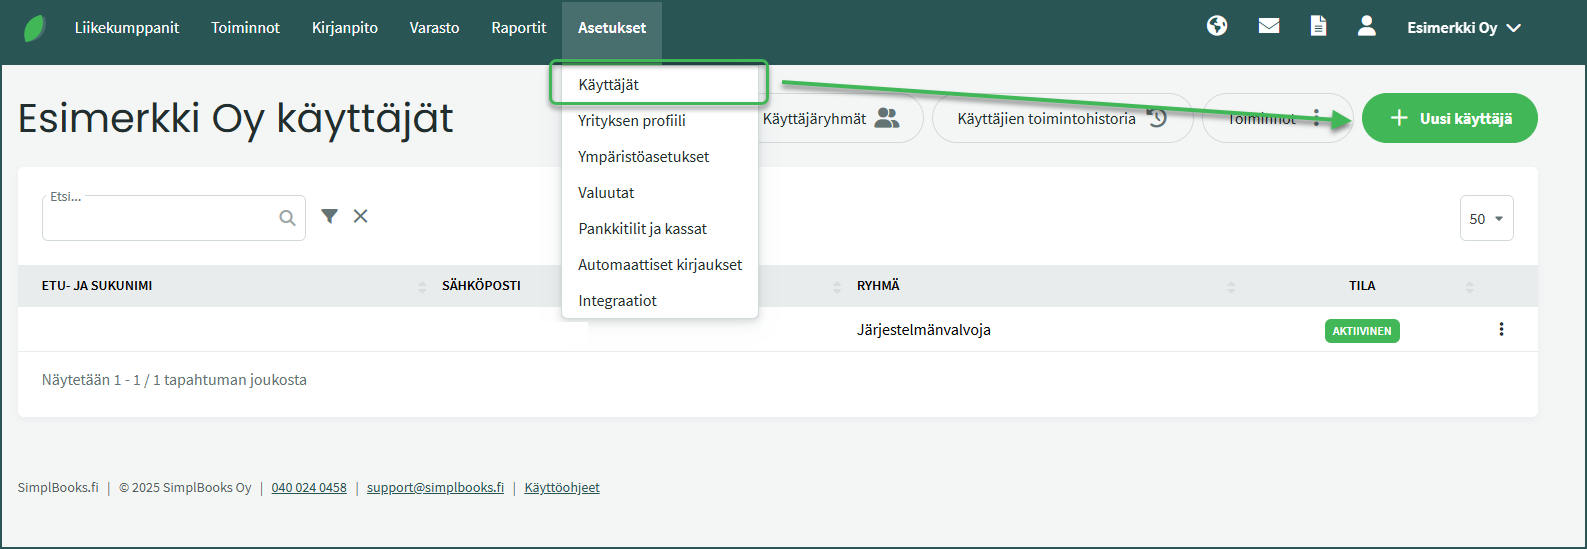
1. Add a new user under Settings > Users > New User.
2. Fill in the new user’s details
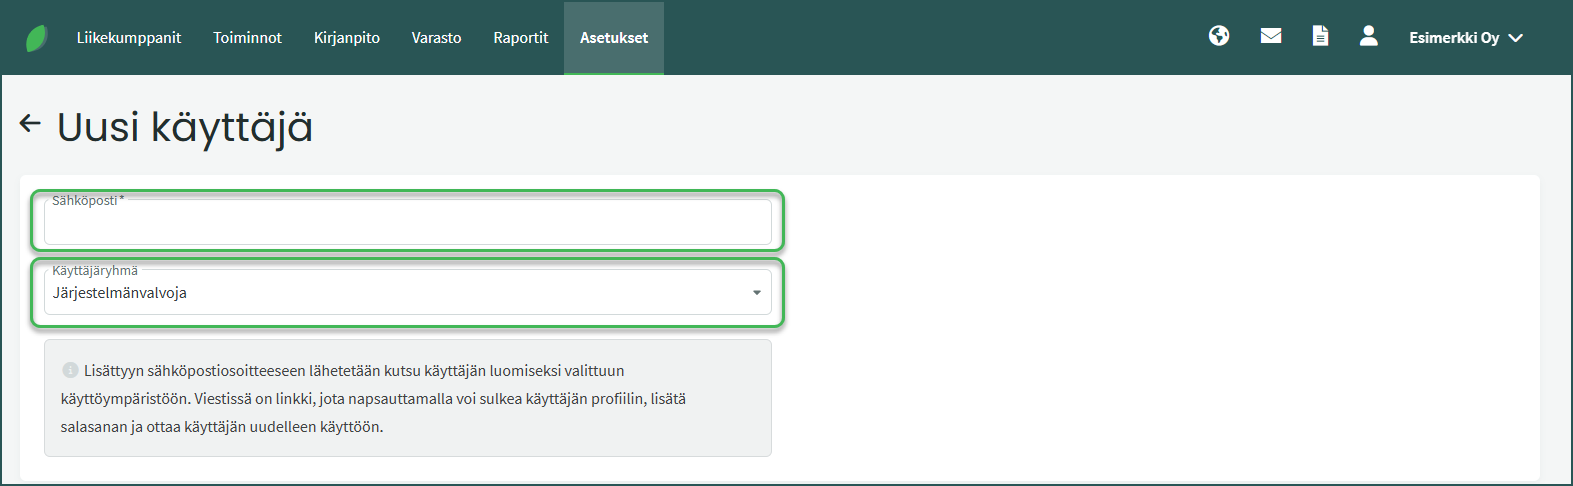
- Email address
The address serves as the username and an invitation will be sent to it when the new user is saved. - User group
The user group allows you to assign appropriate permissions to the user. Different permissions can be set for different user groups based on what information users are allowed to view or edit. Detailed instructions on user groups can be found here.
Once you have saved the new user, they will receive an invitation by email. Using the link in the invitation, the new user can activate their account, log in to the system, and set their own password.
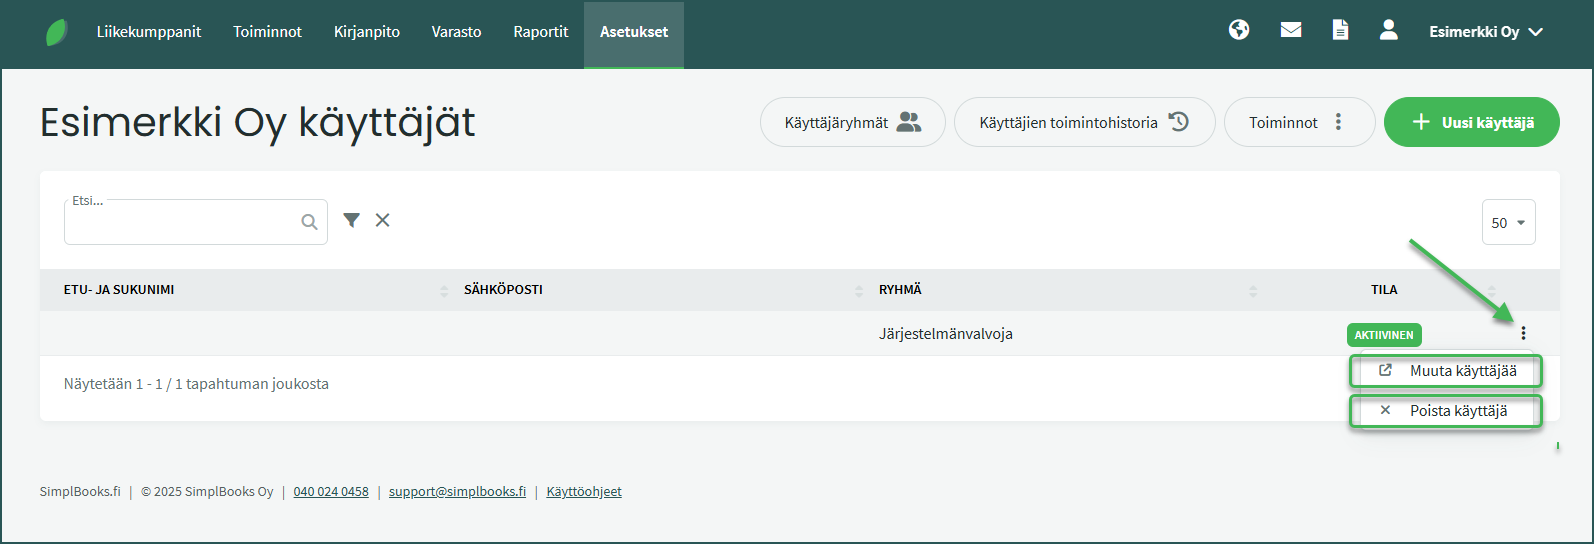
In the user list, you can use the menu at the end of each row to edit a user’s details or delete the user entirely. From the edit view, you can also activate or deactivate a user account. A deactivated user cannot log in to the system.
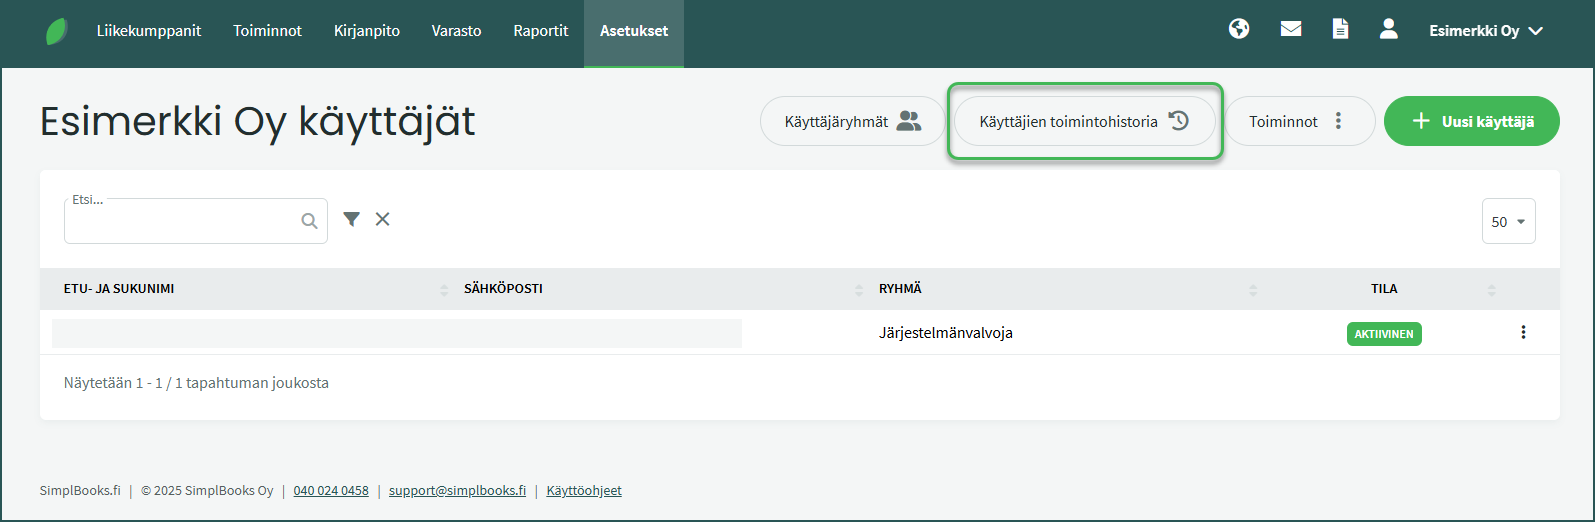
You can view users’ activity history on the Users page in the system. The page shows, for example, sent notifications, saved invoices, and other actions performed by the user.
Leave A Comment?