
This guide explains how to add and edit sales invoice templates.
SimplBooks comes with ready-made invoice templates, so you can start creating invoices immediately after setting up the program. However, you can create an unlimited number of your own sales invoice and quote templates. Custom templates are useful, for example, when:
- You want a unique invoice template for your business (e.g. incorporating your logo colours).
- You have trade names and need separate invoice templates for each.
- You sell services subject to special VAT arrangements (e.g. construction services) and want to include the required notes in advance.
- You want to add other recurring additional information to invoices.
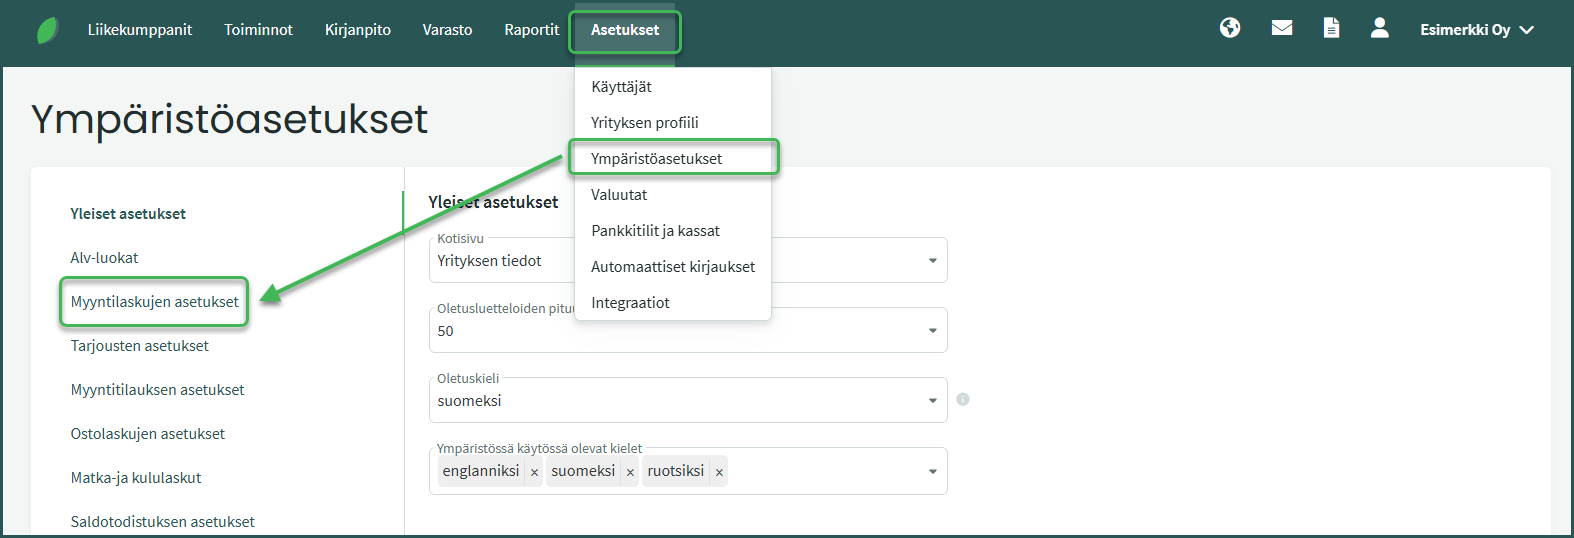
- Go to Settings > Environment Settings > Sales Invoice Settings.
- Scroll down to “Invoice Templates“.
- Create a new template by copying an existing invoice template or by clicking “Add new invoice template“. Note that default templates cannot be edited, but they can be copied and the copy can then be modified.
- Elements can be added to the invoice template by dragging, and the content of elements can be edited.
- You can download a preview of the invoice as a PDF file.
- Remember to save the invoice template.
DETAILED GUIDE
1. You can add and edit invoice templates under Settings > Environment Settings > Sales Invoice Settings > Invoice Templates.
2. Create a new template by copying an existing invoice template or by clicking “Add new invoice template“
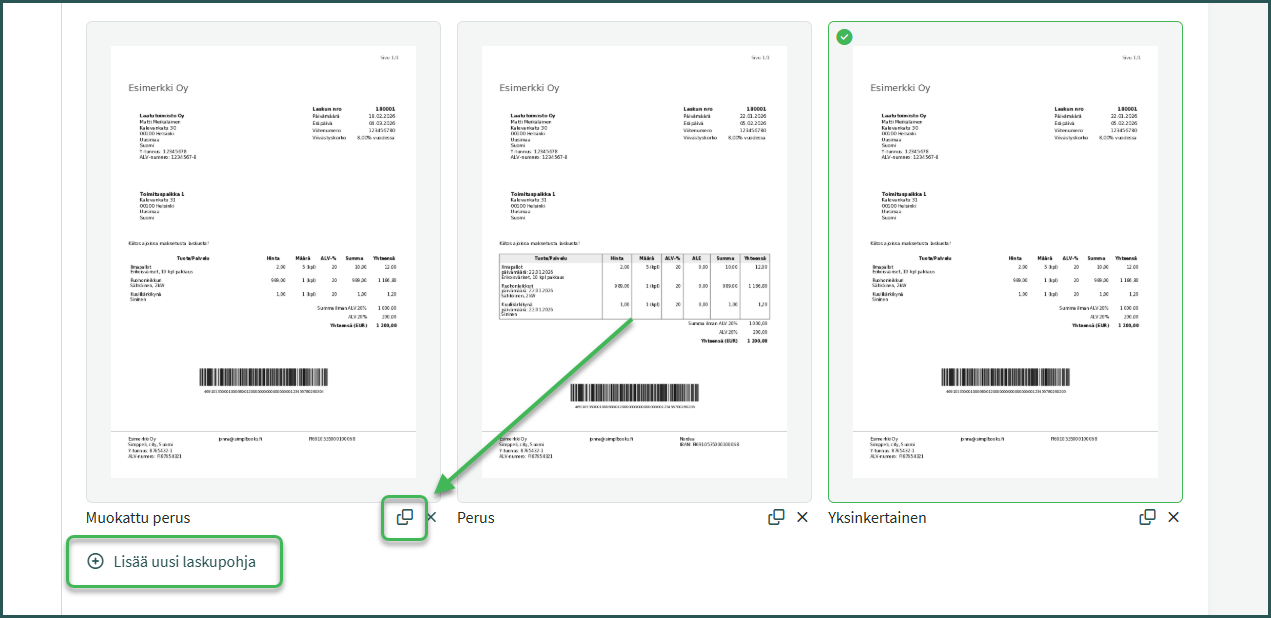
The easiest way to create a new invoice template is to use an existing one as a base by copying it from the bottom-right corner of the document preview.
If you want to create a completely new invoice template, you can do so by clicking “Add new invoice template“.

Once you have created a new invoice template or opened a previously created template for editing, you can:
- Add new elements to the invoice by dragging (e.g. a separate text field).
- Change the information displayed in different elements (e.g. choose to show the invoice total in the invoice details).
- Change the appearance of elements (e.g. add borders and a background colour).
- Remove elements (e.g. the barcode).
Clicking on an element opens a menu where you can edit its content and formatting, or remove it from the invoice template.
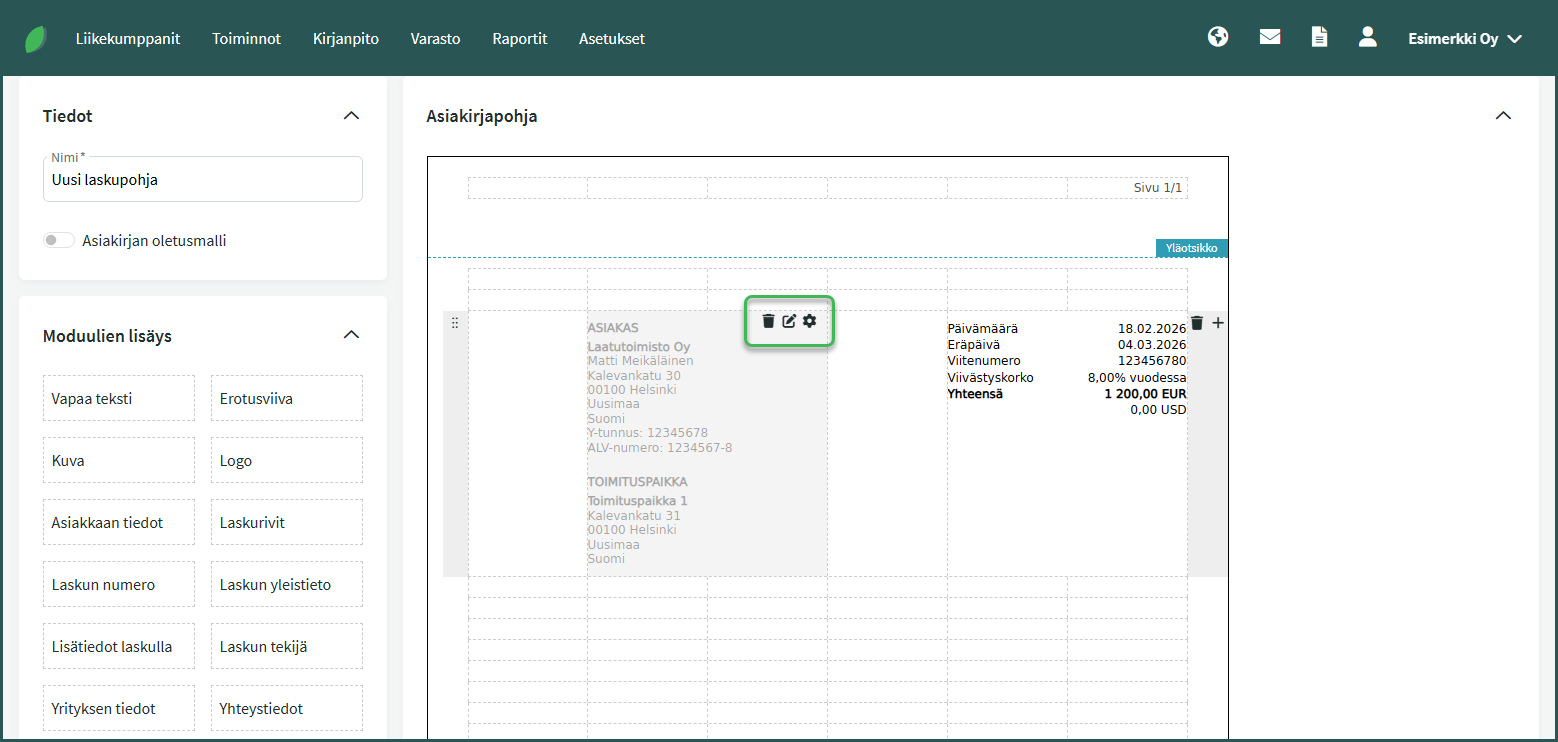
- Bin – Delete the element.
- Pencil and notepad – Edit the element’s data (e.g. what information is shown on the element)
- Cog – Edit the element’s formatting (e.g. text colour and background colour)
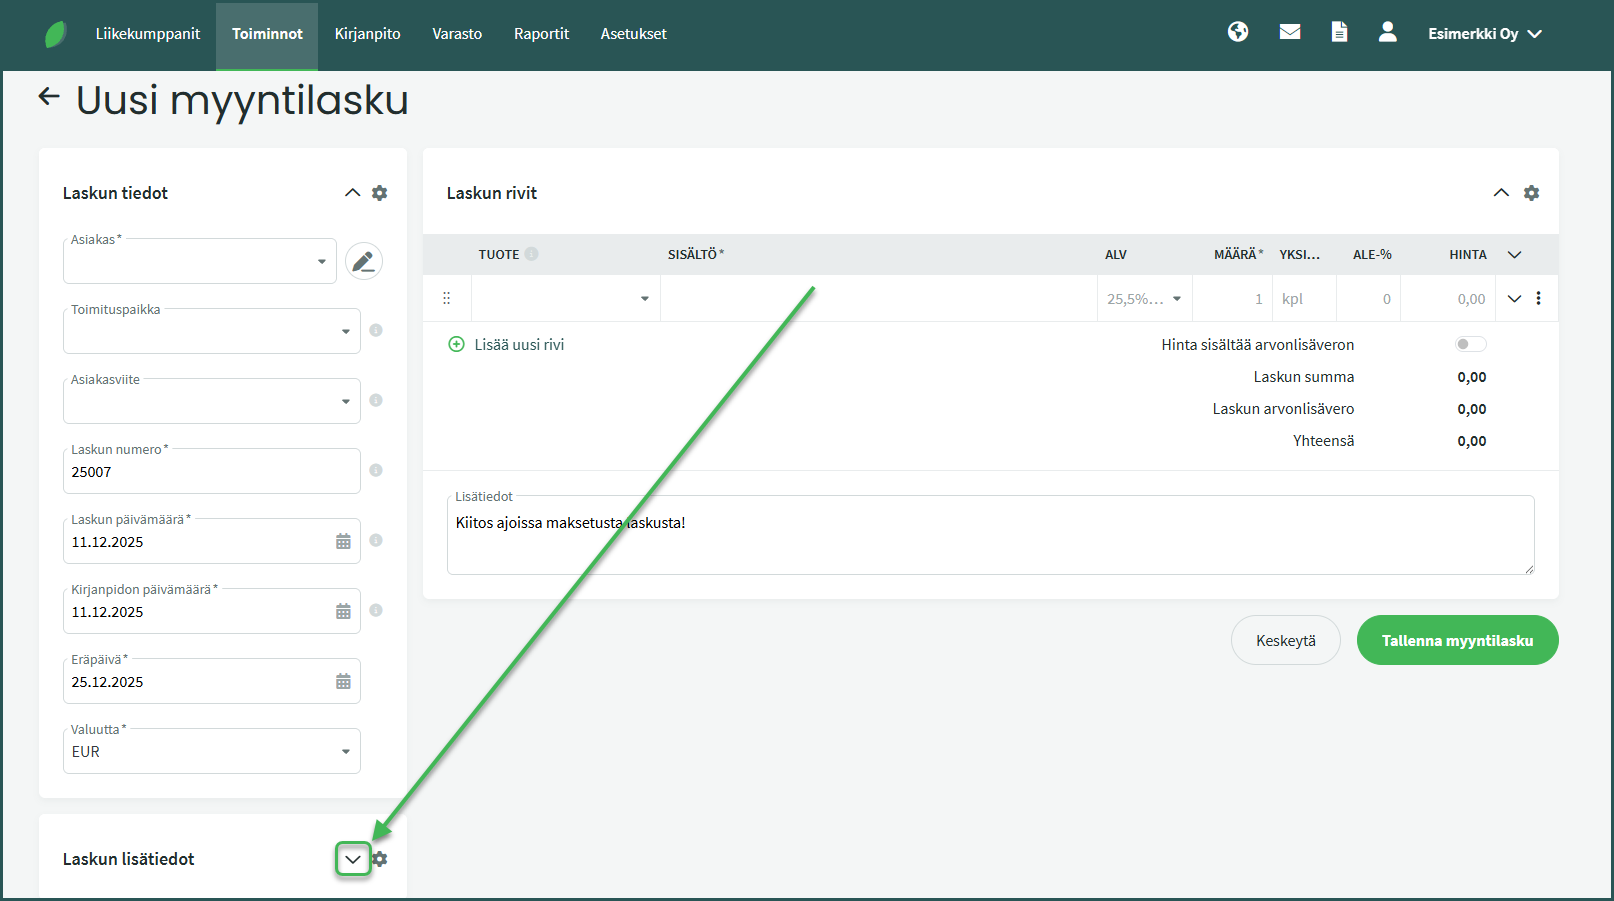
Select the invoice template for a sales invoice under Invoice Additional Details > Document Template
Leave A Comment?