
This guide explains how to create credit notes in SimplBooks and how to mark them as paid.
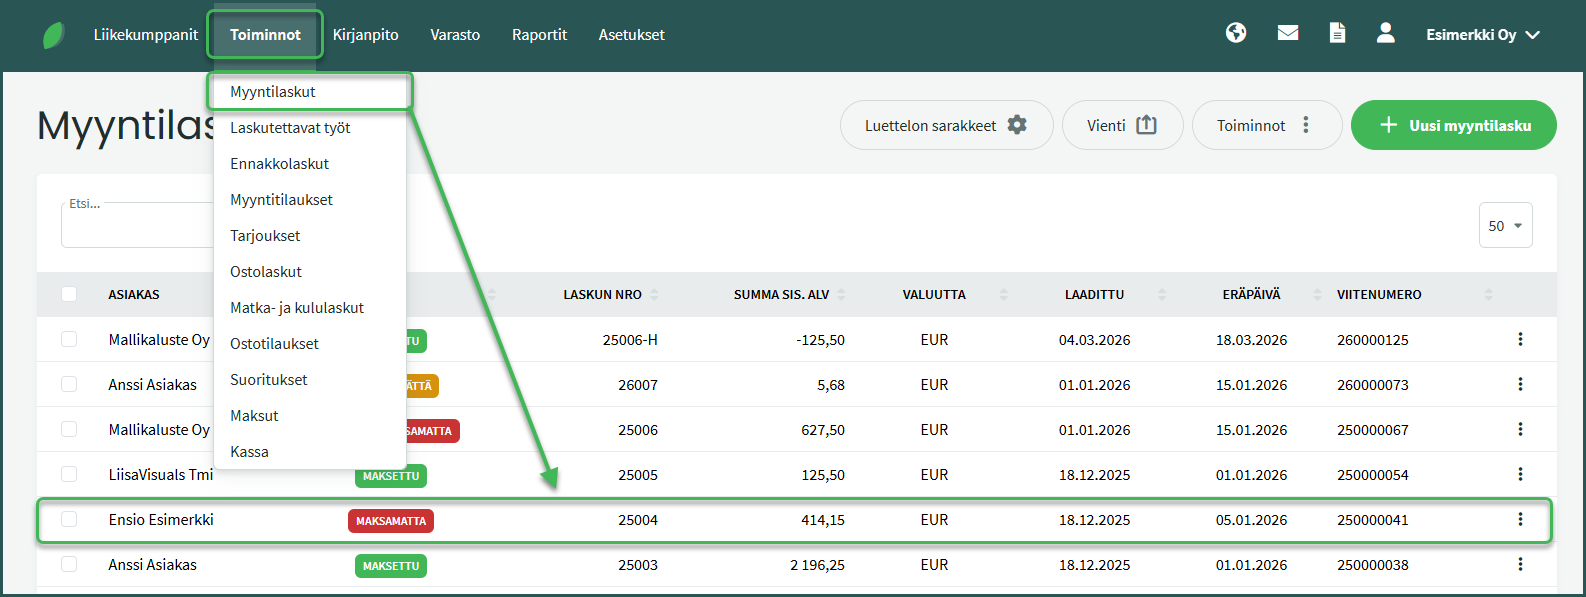
- Open the invoice you want to credit under Operations > Sales Invoices.
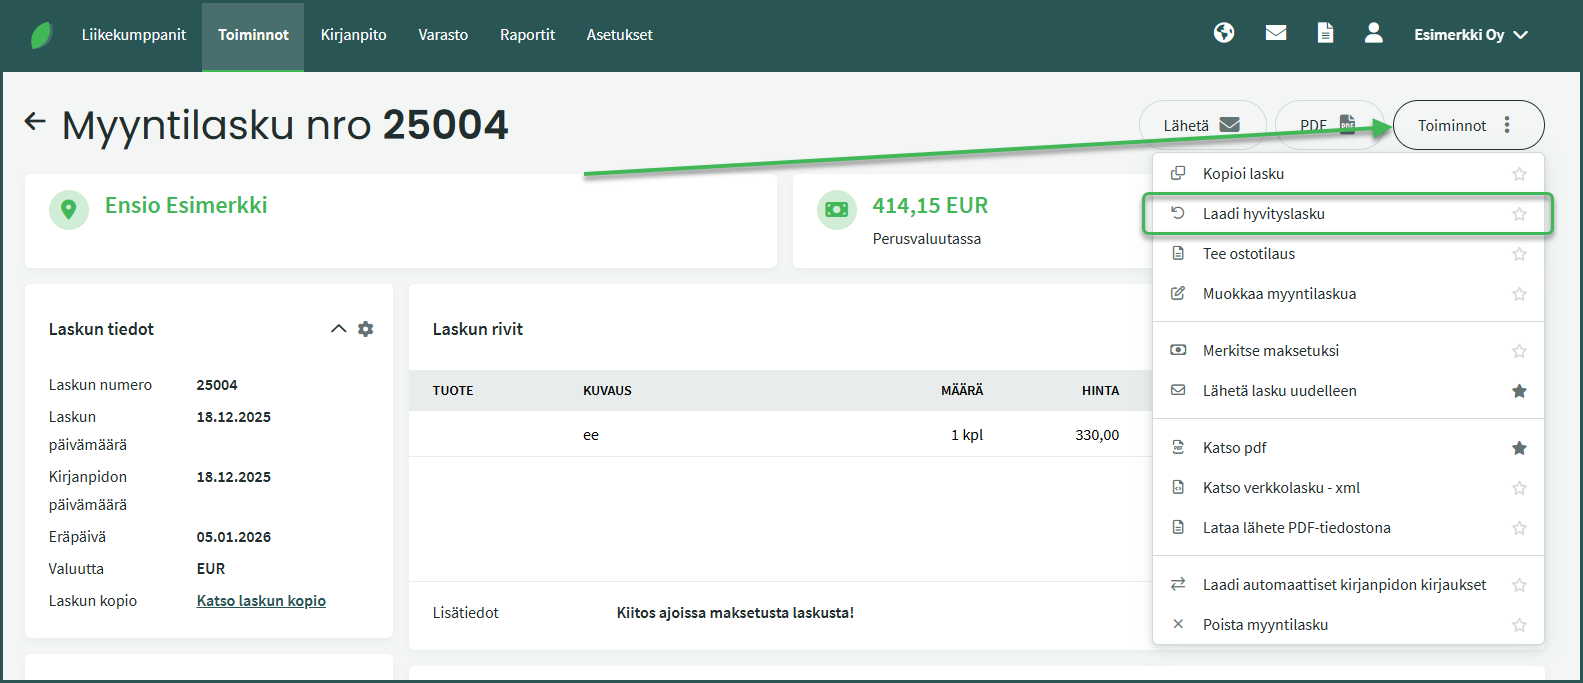
- Select Operations > Create Credit Note on the right.
- Fill in the required details and save the credit note.
- Mark both the original invoice and the credit note as paid on the same date.
DETAILED GUIDE
1. Select the invoice for which you want to create a credit note under Operations > Sales Invoices.
2. Select “Create Credit Note” from the Operations menu on the right.
3. Modify the details as needed.

- Invoice number – The sales invoice number combined with the letter H forms the credit note number.
- Amount – The system defaults to the amount of the sales invoice being credited. The amount can be changed if, for example, only part of the invoice is being credited.
4. Save and mark the original invoice as paid
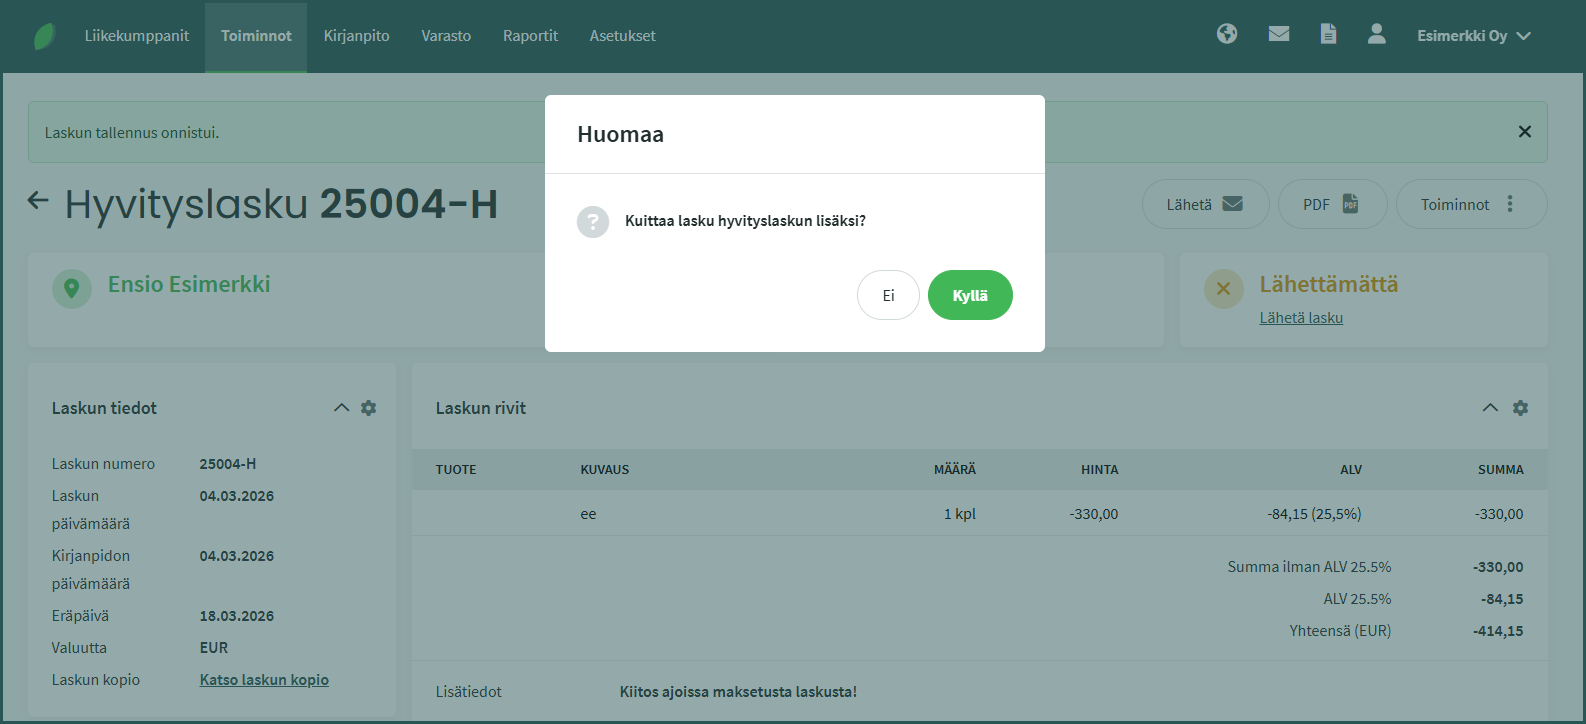
The default setting in SimplBooks is that the invoice and credit note are marked as paid at the same time.
When the automatic matching is enabled and you mark the credit note as paid, the system will ask whether you also want to mark the original invoice as paid. Both the invoice and the credit note will then be marked as paid on the same date and for the same amount. The credited portion of the invoices is posted through the Credits account.
Once the credits account has been created, it can be used to mark both the invoice (or the unpaid portion of the invoice) and the corresponding credit note as paid. This ensures that invoices are shown with the correct paid status in the system and that all credits appear under a single account.
Setting up a credits clearing account:
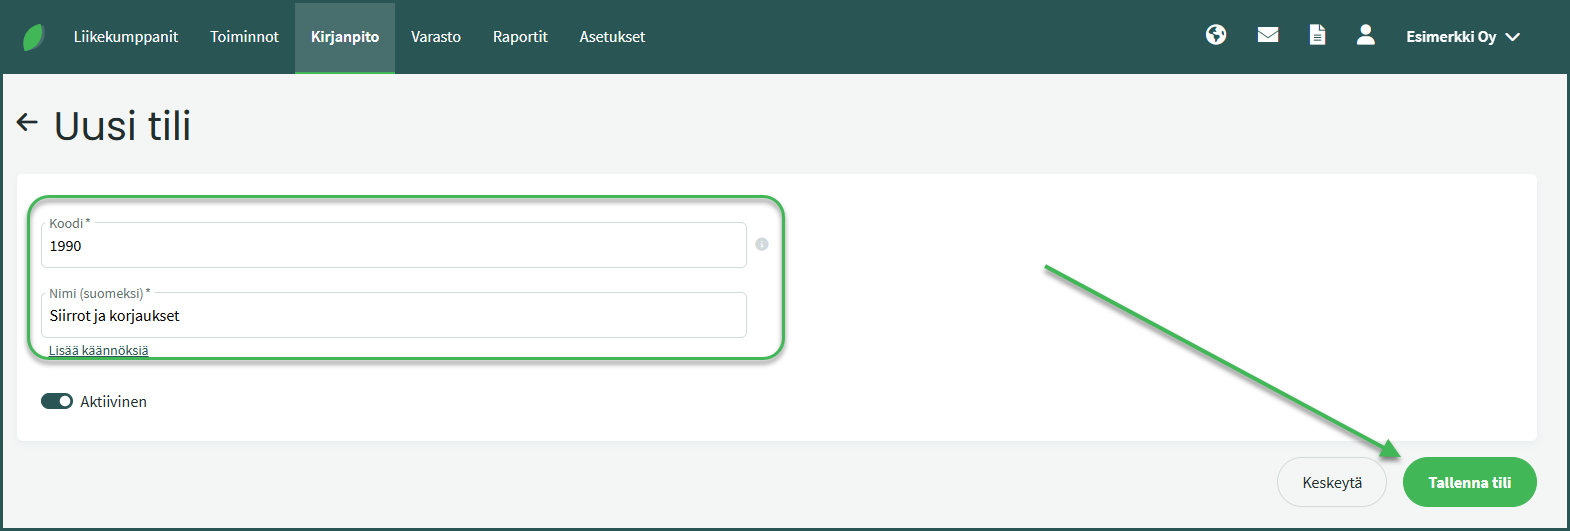
1. Create a new ledger account “1990 Transfers and Adjustments” if it does not yet exist in the system. A new account is created under ACCOUNTING > Accounts > New Account.
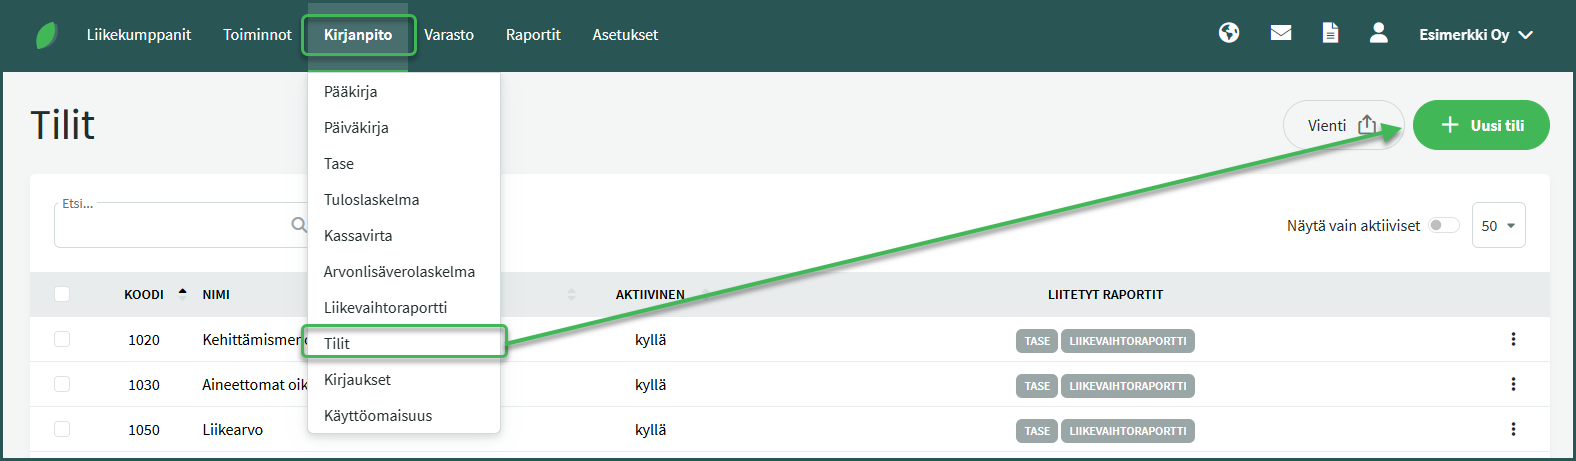
2. Set the account code to “1990” and the name to “Transfers and Adjustments“
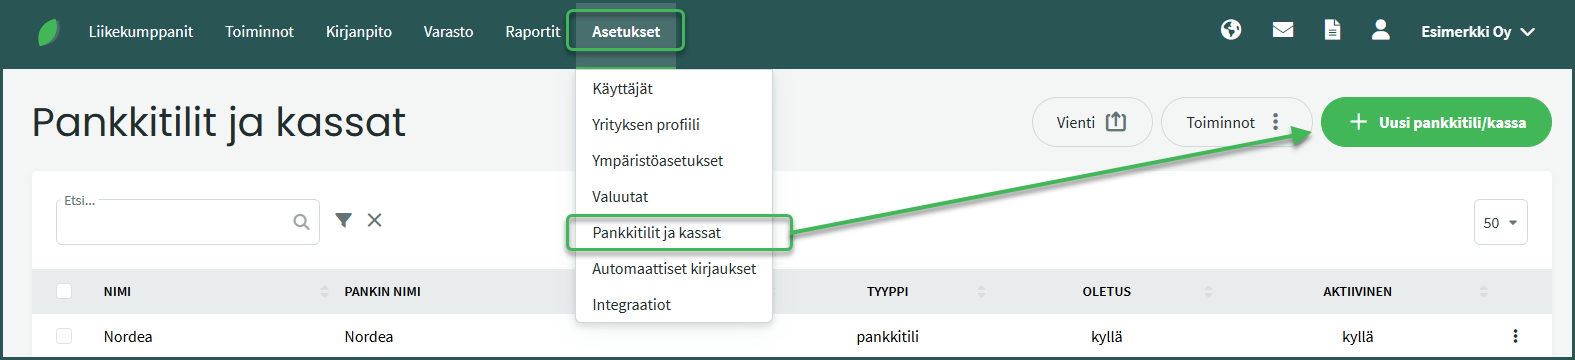
3. Create a new “Credits” account under Settings > Bank Accounts and Cash Registers > New Account/Cash Register.
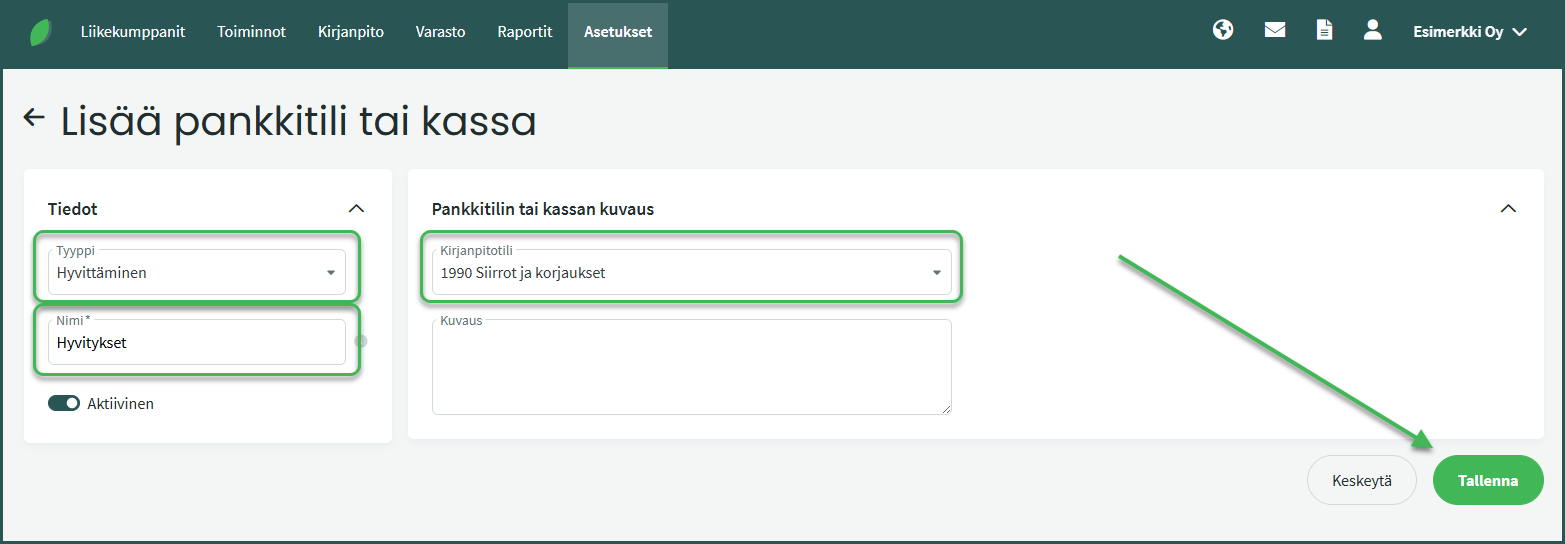
4. Set the account type to “Crediting” and give it a name such as “Credits” and set the ledger account to “1990 Transfers and Adjustments“.
5. Mark both the invoice and the credit note as paid from the new “Credits” account.
If you do not want the system to automatically mark the original invoice as paid, you can mark the invoices as paid manually. Open the credit note under Operations > Sales Invoices and select “Mark as Paid” on the right.
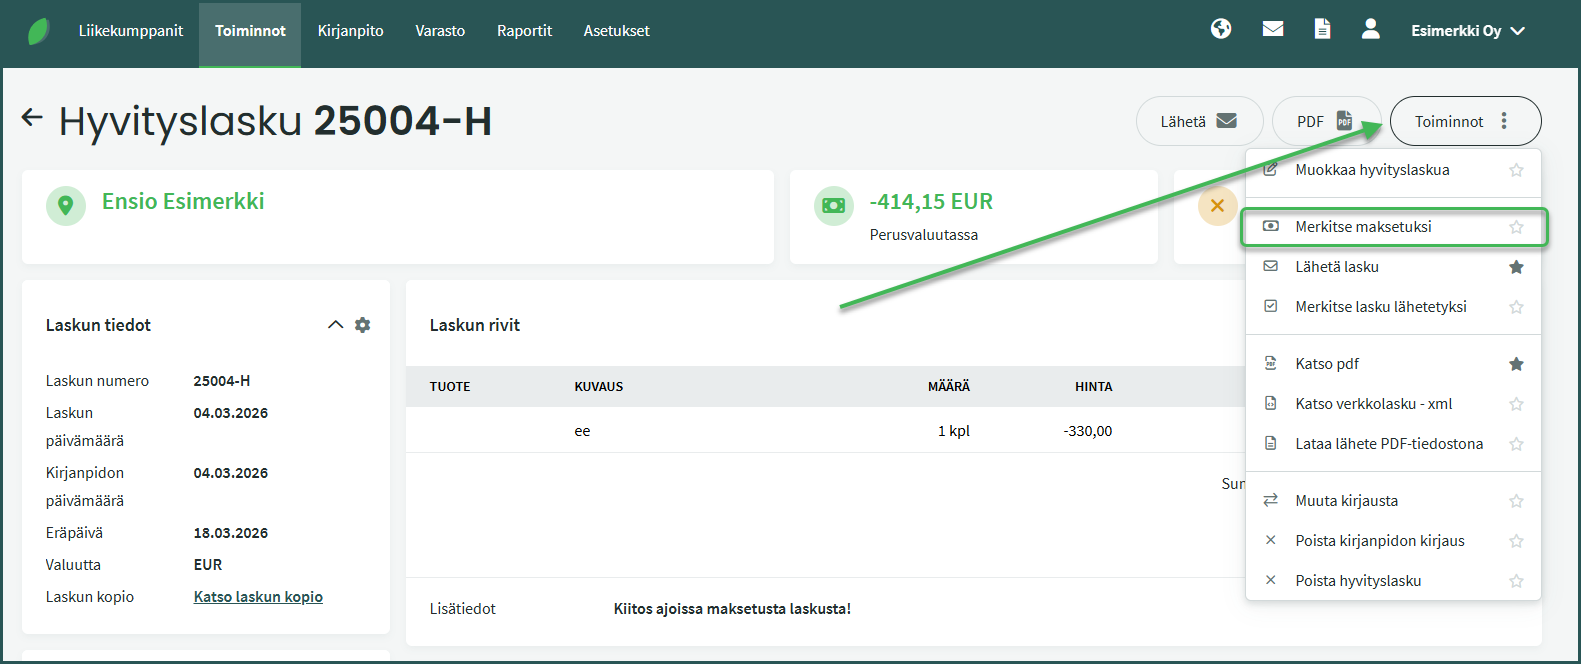
Select “New Payment“, choose “Credits” as the account, and save.
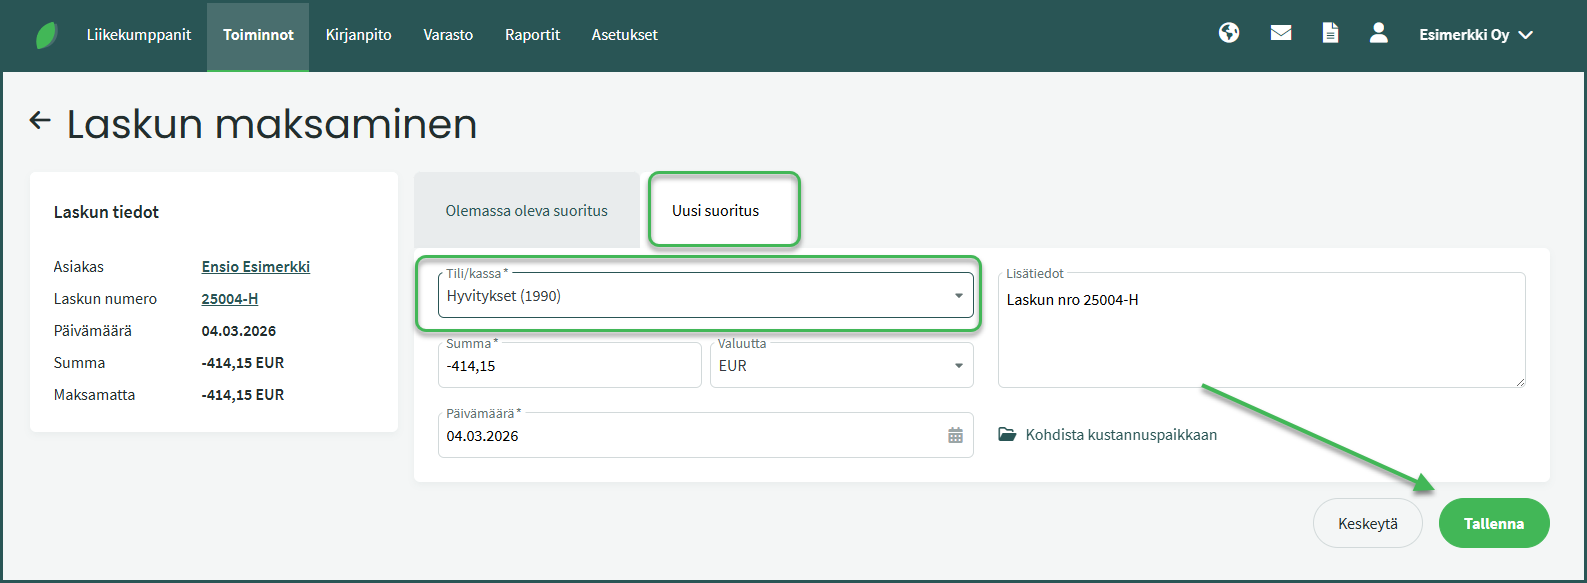
The credit note amount is shown as a negative value in this view.
Leave A Comment?