
This guide explains how to mark a purchase invoice as paid.
Quick guide
- Open the desired purchase invoice under Transactions > Purchase Invoices.
- Select Actions > Mark as Paid on the right.
- Choose the appropriate bank account or cash register and save.
DETAILED GUIDE
Marking a purchase invoice as paid
1. Purchase invoices are marked as paid under Transactions > Purchase Invoices.
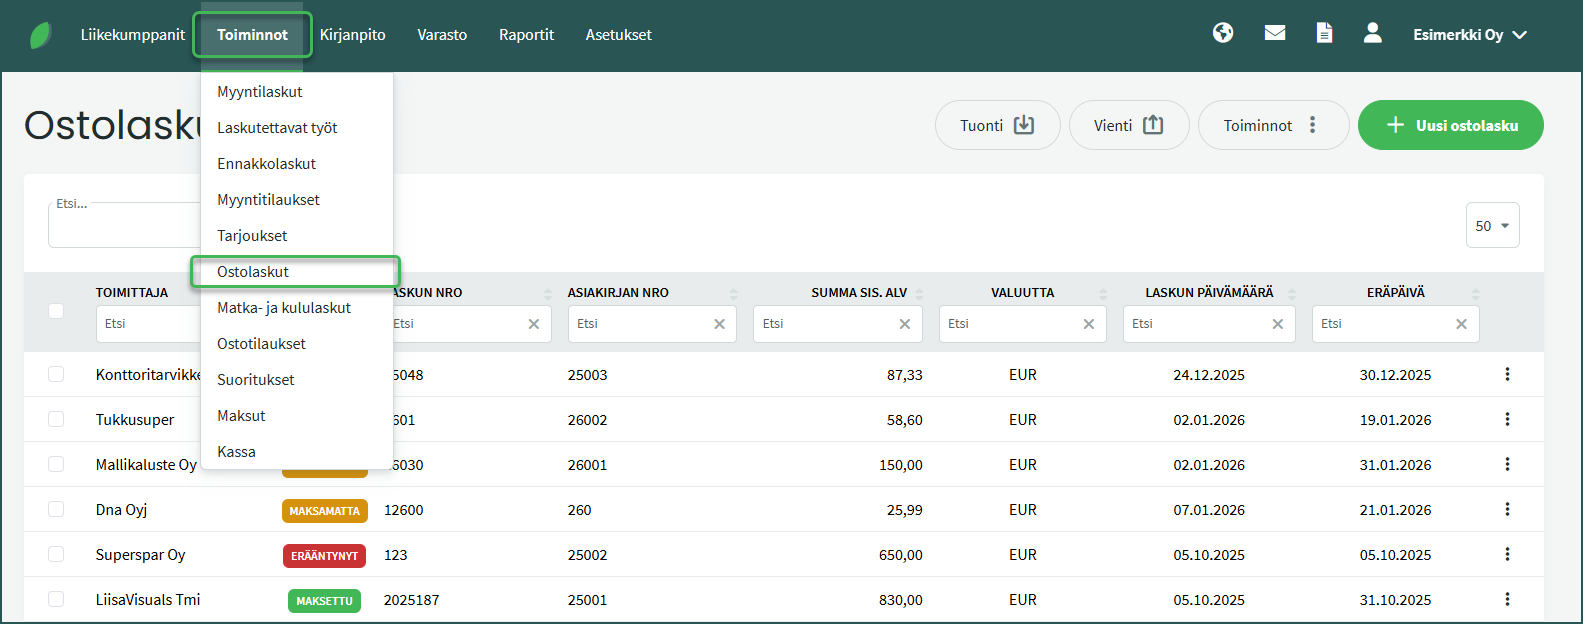
- Open the desired invoice by clicking on it.
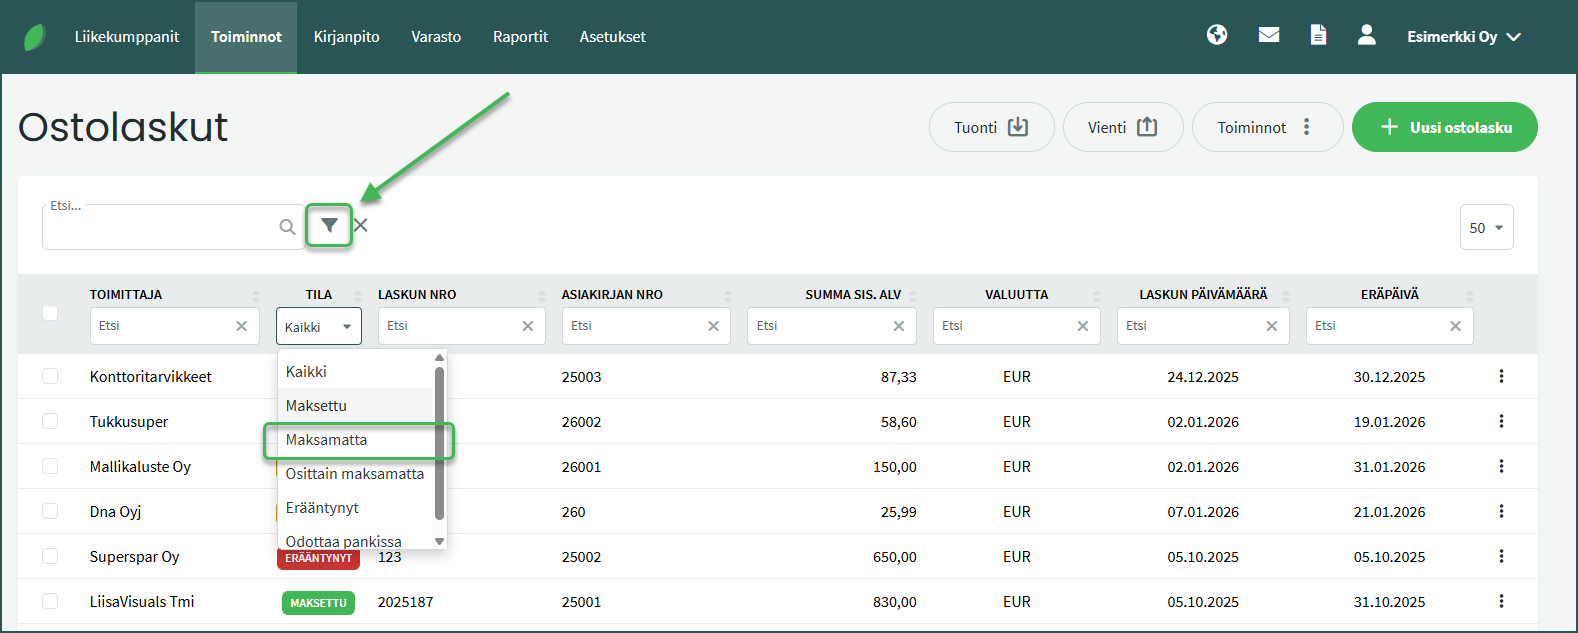
2. If you have many purchase invoices, you can filter them by clicking the filter icon to the right of the Search field.
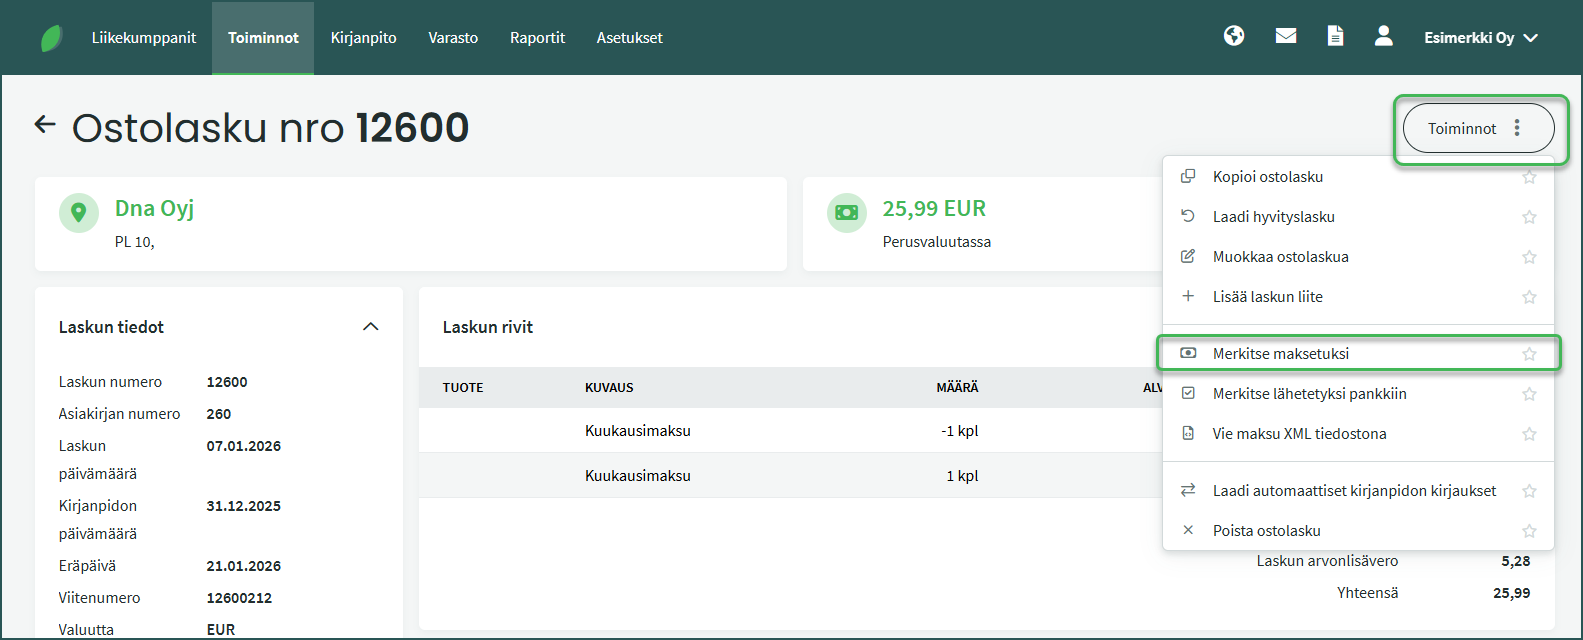
3. Once you have opened the desired purchase invoice, select “Mark as Paid” from the Actions menu.
4. In the view that opens, you can create a new payment for the purchase invoice or apply an existing payment to it.
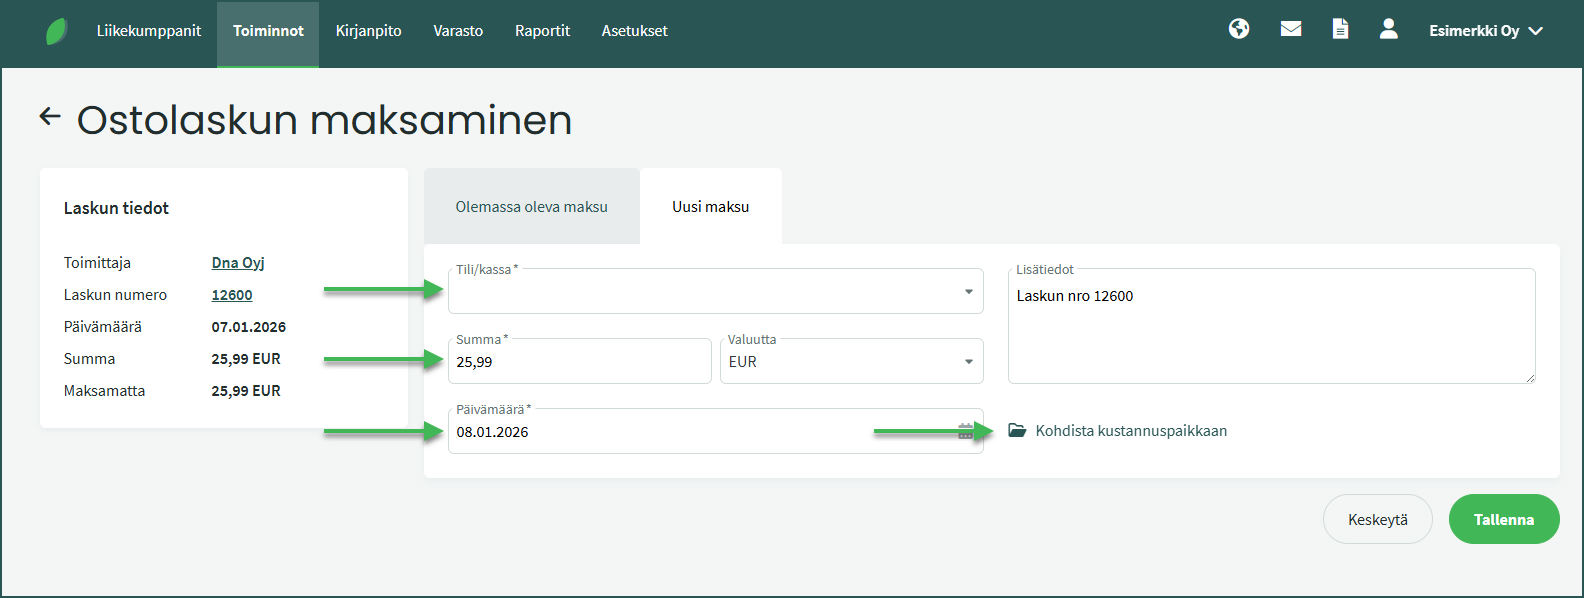
- Account/Cash register – Select the bank account or cash register from which the purchase invoice was paid.
- Read how to add bank accounts and cash registers to the software here.
- Amount – Enter the paid amount in the “Amount” field.
- If the payment is less than the invoice total, the invoice will remain in “Partially Paid” status until it is fully paid.
- If the payment is greater than the invoice total, the software marks the invoice as paid. The excess portion of the payment is attached to the supplier and is visible in the supplier details under Business Partners > Customers and Suppliers.
- Unapplied payments are also visible under Transactions > Payments.
- Date – Enter the date on which the invoice was paid.
- Assign to cost centre – You can assign the payment to a cost centre.
📢 Note! If the supplier has unapplied payments in the software, the software will automatically suggest them at this point (see detailed guide).
📢 Note! When you mark a purchase invoice as paid, the software creates an automatic accounting entry (posting) for the payment. You can view the created entry under Transactions > Payments.
Payment-related options in the Actions menu of the purchase invoice view
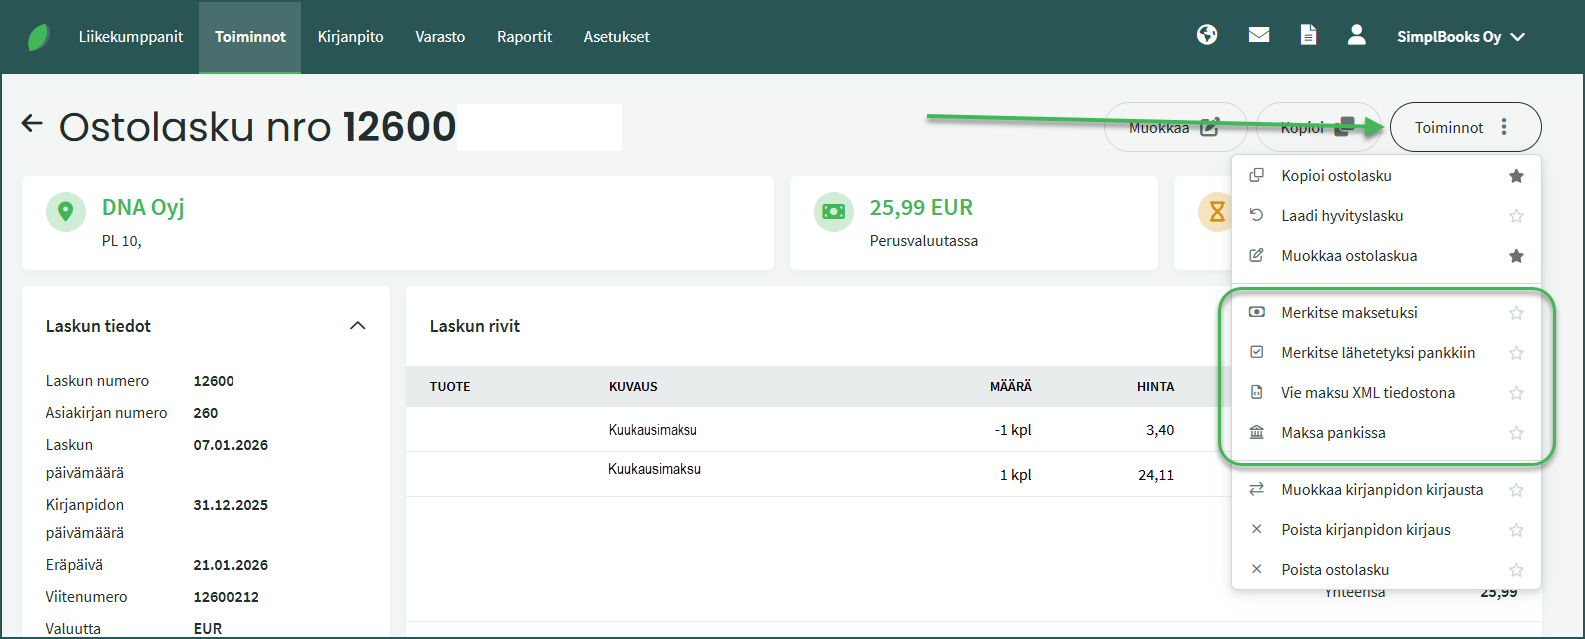
- Mark as Paid – You can apply an existing payment in the software to the invoice (e.g. imported from a bank or bank statement) or create a new payment. If the payment amount covers the full invoice total, the invoice will appear with the status “Paid“.
- Mark as Sent to Bank – Use this option if you have scheduled the payment of the purchase invoice in your online bank. The purchase invoice will then appear with the status “Pending at Bank“.
- Export Payment as XML File – This allows you to save the payment as an XML file to your computer.
- Pay via Bank – Use this option to send the payment to the bank. The purchase invoice will then appear with the status “Pending at Bank“. Payments are always confirmed using online banking credentials. If the confirmation is not completed, the payment will not be processed by the bank.
📢 Note! The Mark as Sent to Bank option does not send the payment to the bank — you must make the payment separately in your online bank. This option only helps distinguish invoices already scheduled for payment from others.
📢 Note! The Export Payment as XML File option does not send the payment to the bank — you must make the payment separately in your online bank.
📢 Note! The Pay via Bank option is only visible when a bank connection (Aiia) has been activated (see guide). Payments can only be confirmed by the user who created the integration.
Leave A Comment?