
This guide explains how to import a bank statement into SimplBooks.
Importing a bank statement speeds up your use of the software. Most payments and receipts will then be matched to invoices automatically, and you will not need to enter transactions manually.
You can import a bank statement into SimplBooks in CSV or XML format. Check in your online bank whether those file formats are available for download.
NOTE! SimplBooks also supports bank connections, which you can try free for 3 months. You can activate bank connections instantly using your online banking credentials, after which transactions and your bank account balance will appear in SimplBooks automatically. You can also pay invoices directly from the software. See the guide on activating bank connections.
1. IMPORTING A BANK STATEMENT INTO SIMPLBOOKS
Before importing a bank statement, you must download it to your computer from your company’s online bank. The file downloaded from your online bank must be in CSV or XML format.
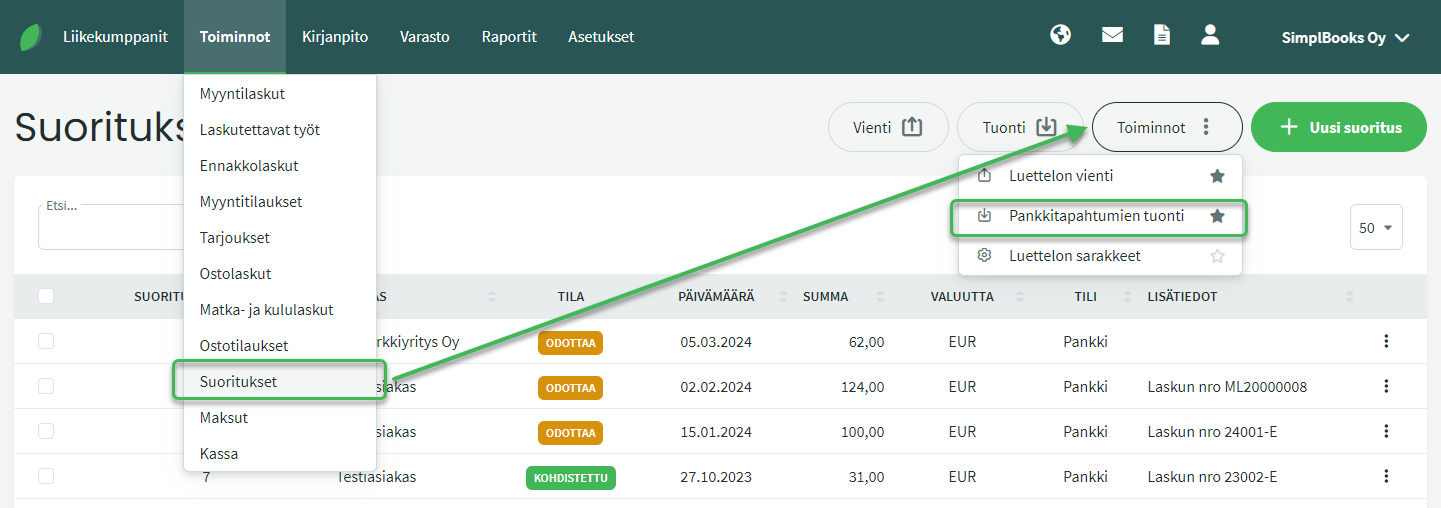
In the view that opens, select the bank statement file you saved to your computer earlier.
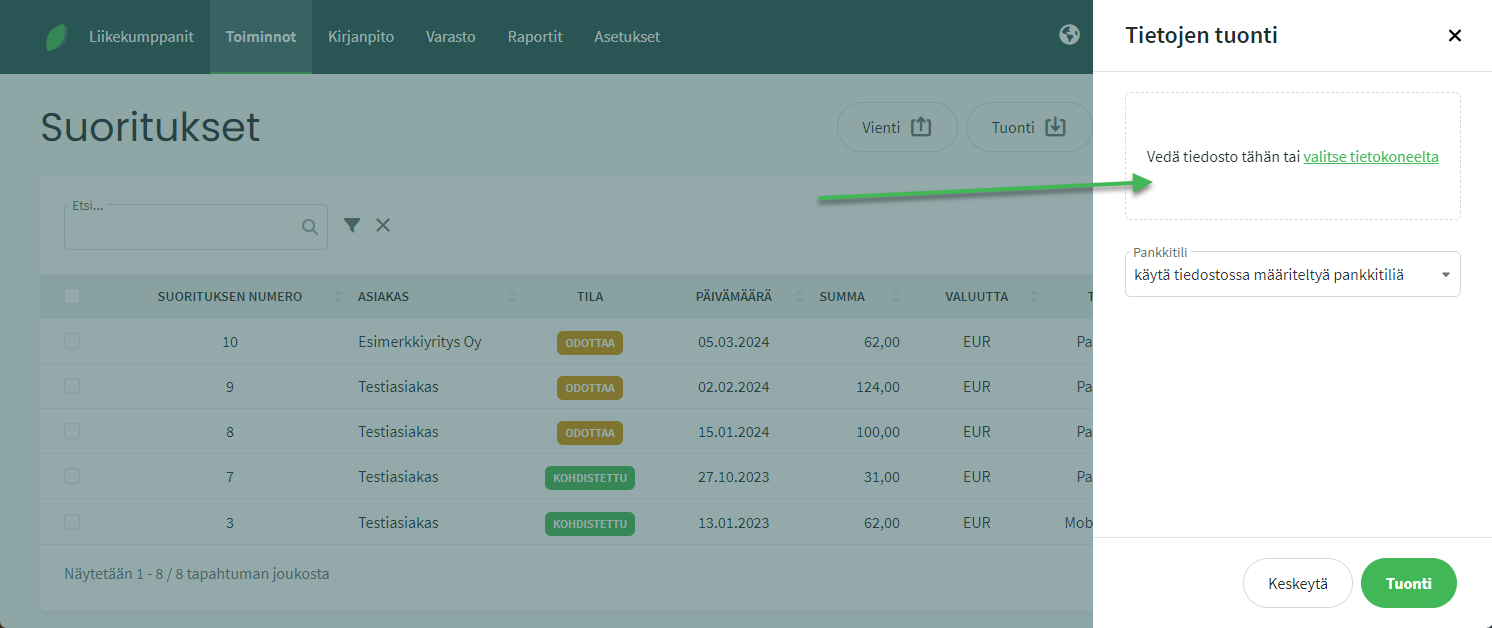
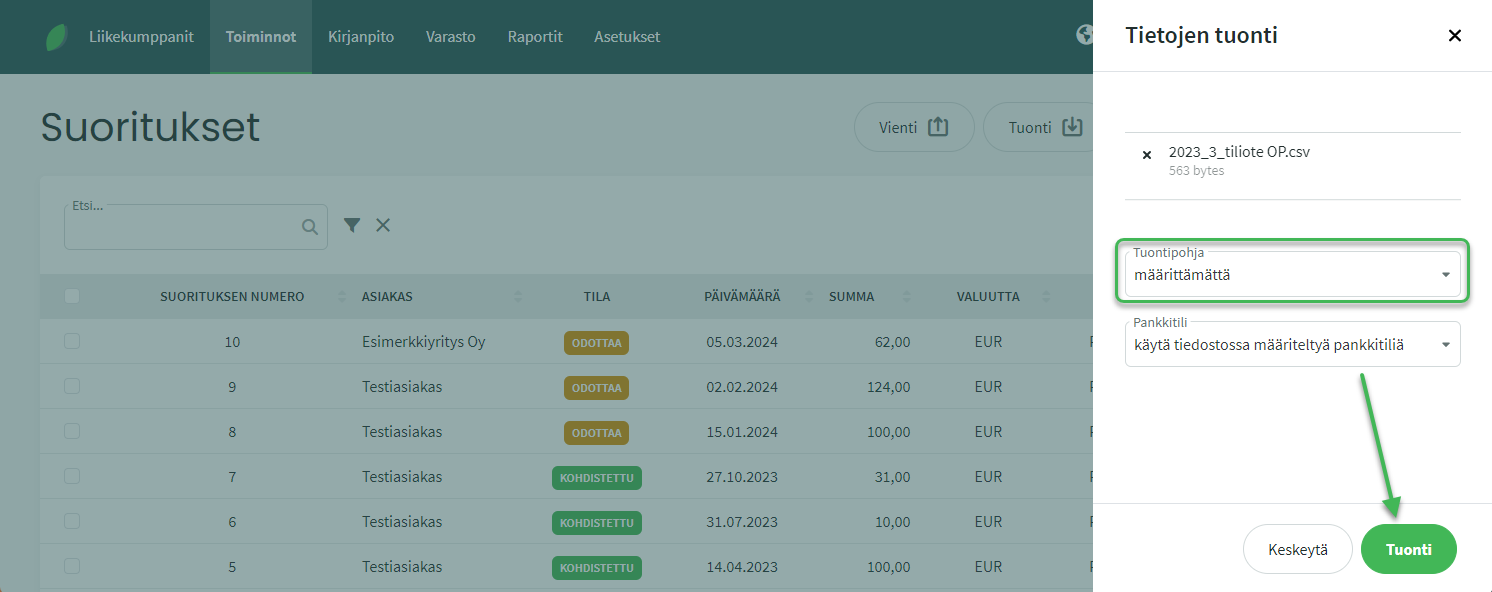
Once you have selected the bank statement file, you can also choose an import template you saved previously (saving a template is covered in section 2 of this guide), as well as the bank account.
- Using an import template is not mandatory, but it speeds up future imports.
- If needed, you can add or change bank accounts under Settings > Bank Accounts and Cash Registers. You can read more about bank account settings here.
Once you have selected the details, click “Import” at the bottom.
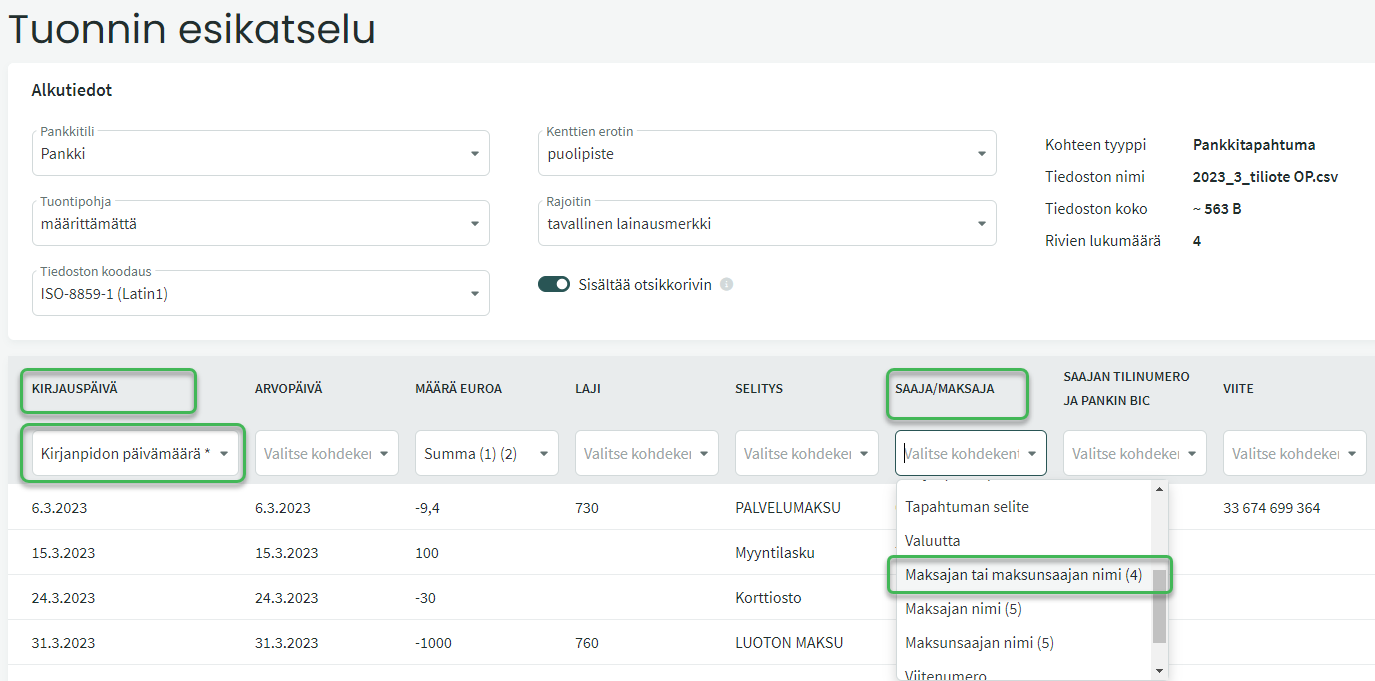
2. NAMING THE COLUMNS TO IMPORT
The import preview displays data divided into columns. You select headings for the columns from drop-down menus so that the software knows which data belongs in which field.
Select headings from the drop-down menu only for the following columns:
- POSTING DATE: Accounting date
- AMOUNT IN EUROS: Sum
- PAYEE/PAYER: Name of the payer or payee
- REFERENCE: Reference number
- MESSAGE: Transaction description
- ARCHIVE ID: Archive identifier (select only if the bank statement contains otherwise identical transactions)
Once you have selected headings for the columns, choose “Import and save template” from the bottom of the page (using the arrow next to the Import button). Give the template a name.
- Next time you can select the saved template in the first step of the import, and the column headings will be filled in automatically without needing to select them again.

If you do not want to save an import template, simply click “Import”.
3. PROCESSING BANK TRANSACTIONS
After importing the bank statement, the software matches the bank transactions — that is, the payments (expenses) and receipts (income) shown on the statement — to invoices in the system. Transactions for which no invoice is found automatically are processed manually.
See the guide on processing bank transactions here.
Leave A Comment?