
This guide explains how to enable e-invoicing in SimplBooks.
How do I enable e-invoicing?
To set up e-invoicing, you can either create a new Apix account or activate an existing Apix account. Both options are available directly within SimplBooks.
What does e-invoicing cost?
Activating e-invoicing is free and there are no fixed monthly fees. Sending and receiving e-invoices is charged on a per-use basis according to SimplBooks’ price list.
Guides for sending and receiving e-invoices
– Guide for receiving e-invoices here
– Guide for sending e-invoices here
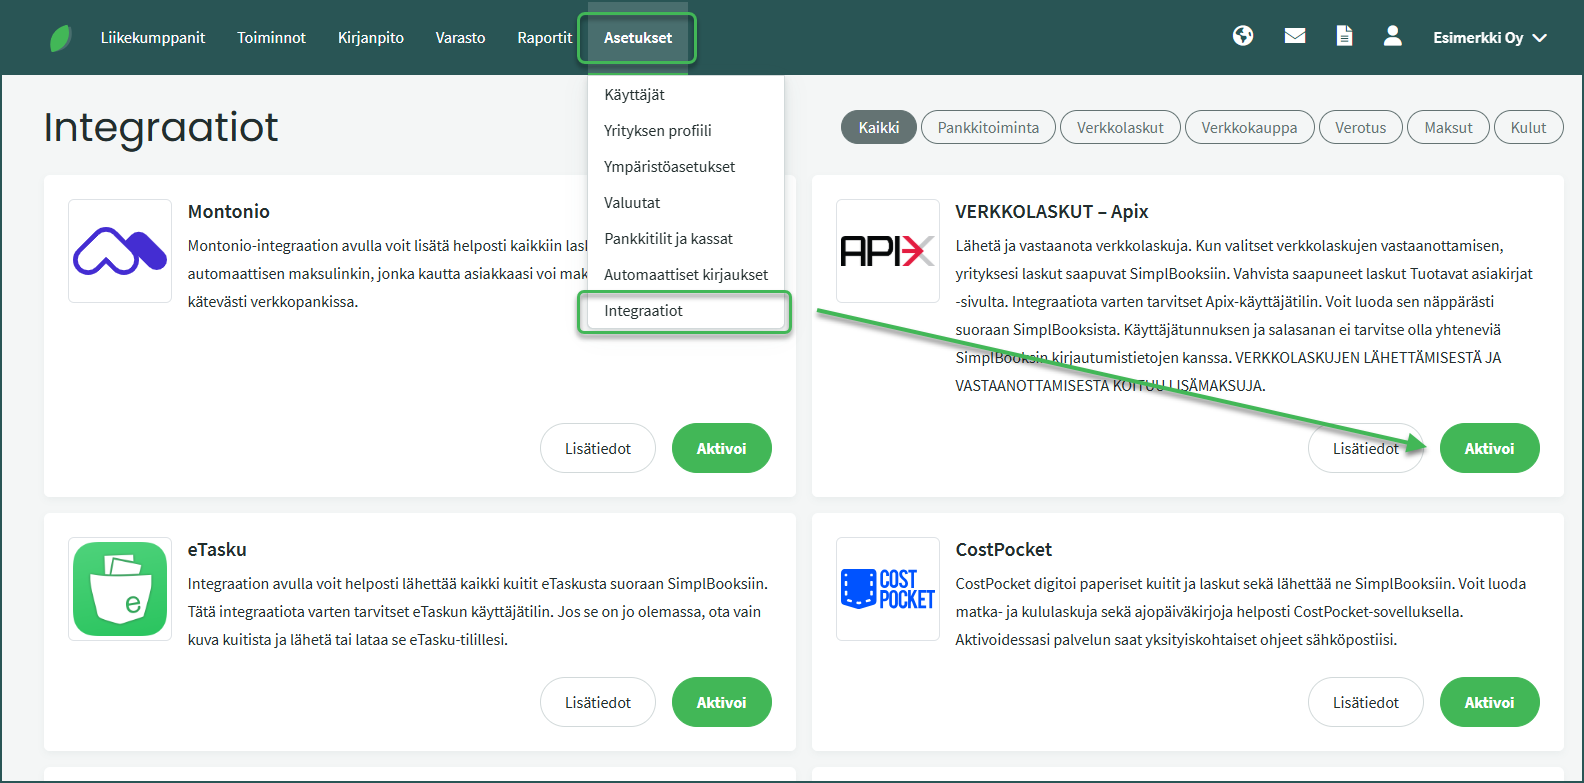
1. Activate Apix under Settings > Integrations > Apix
2. If you do not have an existing Apix account, select “New Apix user”
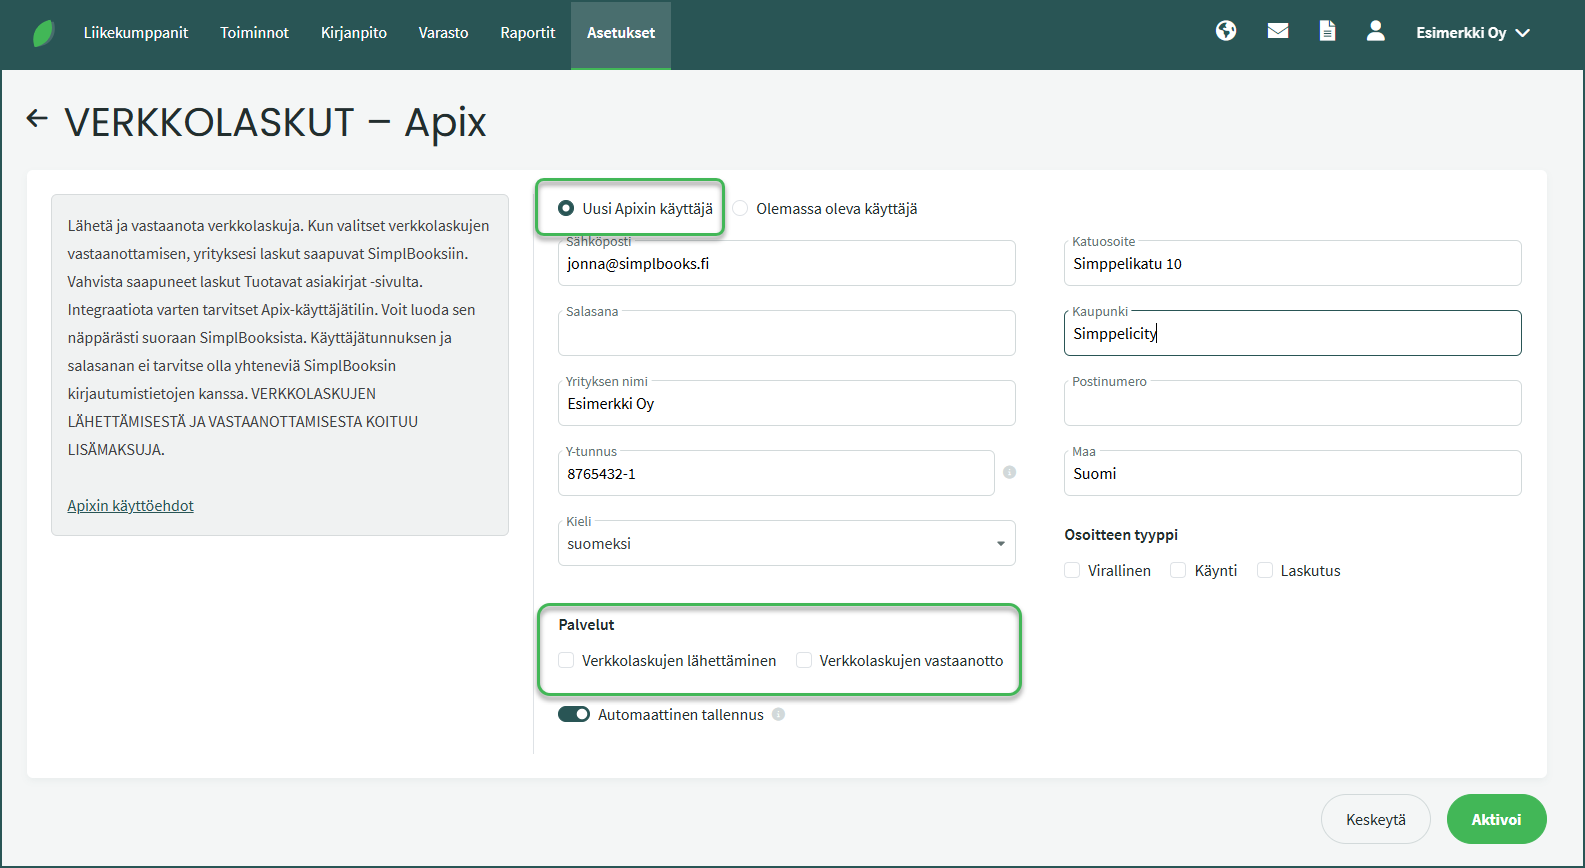
- Some information will be filled in automatically from the software. Complete the missing details and activate the integration using the Activate button at the bottom of the page.
- Choose whether you want to enable sending e-invoices, receiving e-invoices, or both.
3. You can also connect an existing Apix account to SimplBooks by selecting “Existing user”
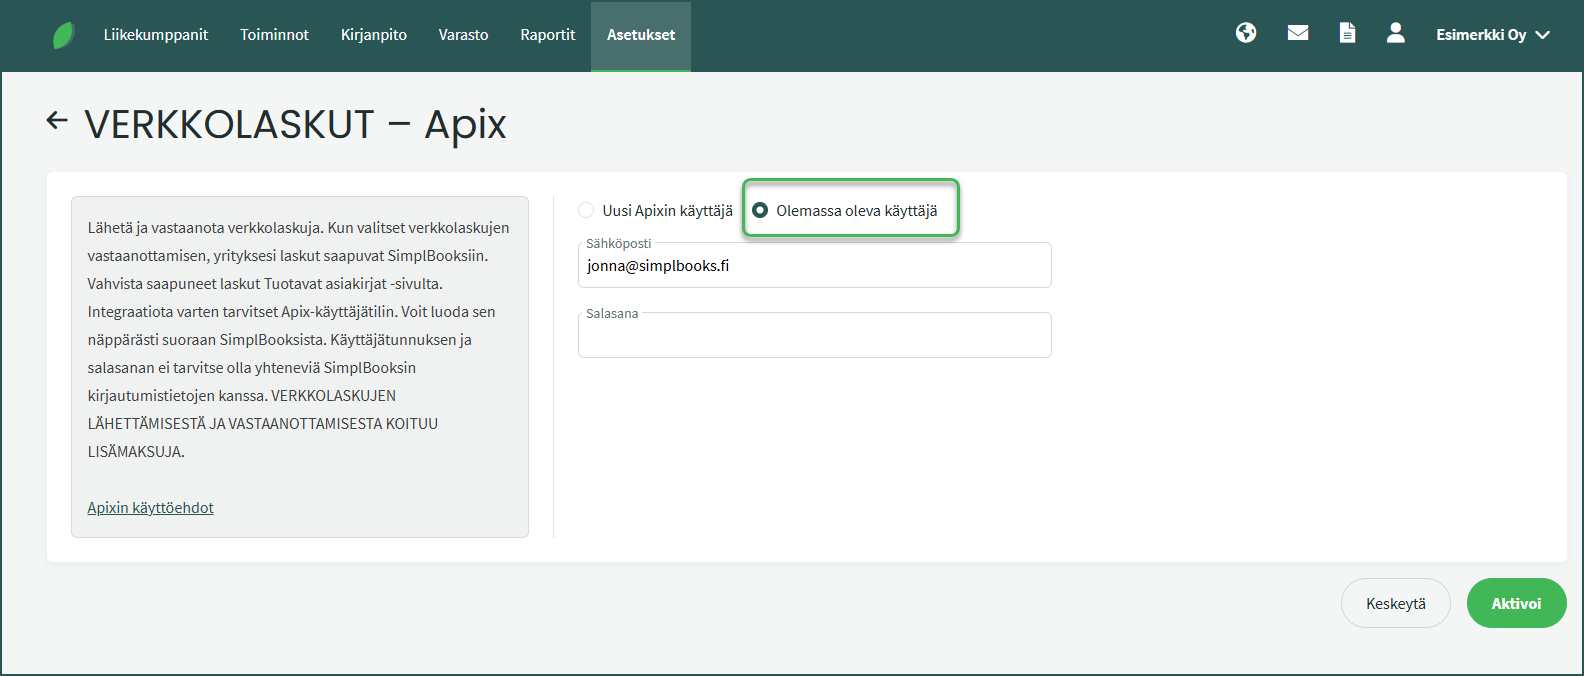
- Enter the email address and password that serve as your username.
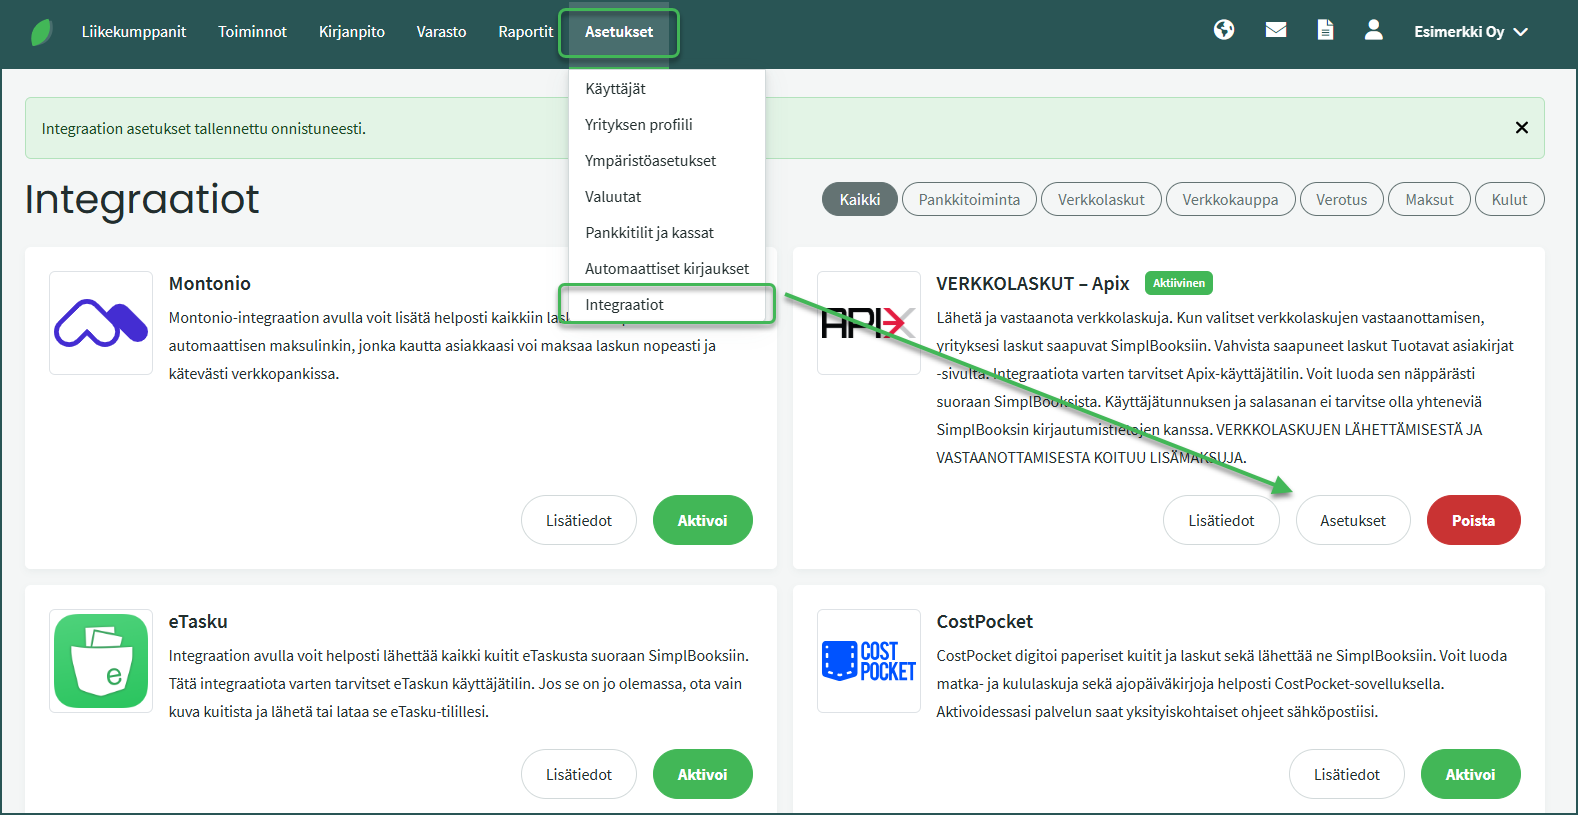
4. If you also enable receiving e-invoices, after activation you can view your company’s e-invoice addresses under Settings > Integrations > Apix > Settings.
Leave A Comment?