
An advance invoice is an invoice requesting payment before a product or service is delivered. An advance invoice is not the same as a sales invoice; instructions for creating a sales invoice can be found here.
Using advance invoices is not mandatory. An advance invoice can be created for, for example, 50% of the sale price. Once paid and the product delivered, a sales invoice is generated from the advance invoice for the remaining balance.
Quick guide:
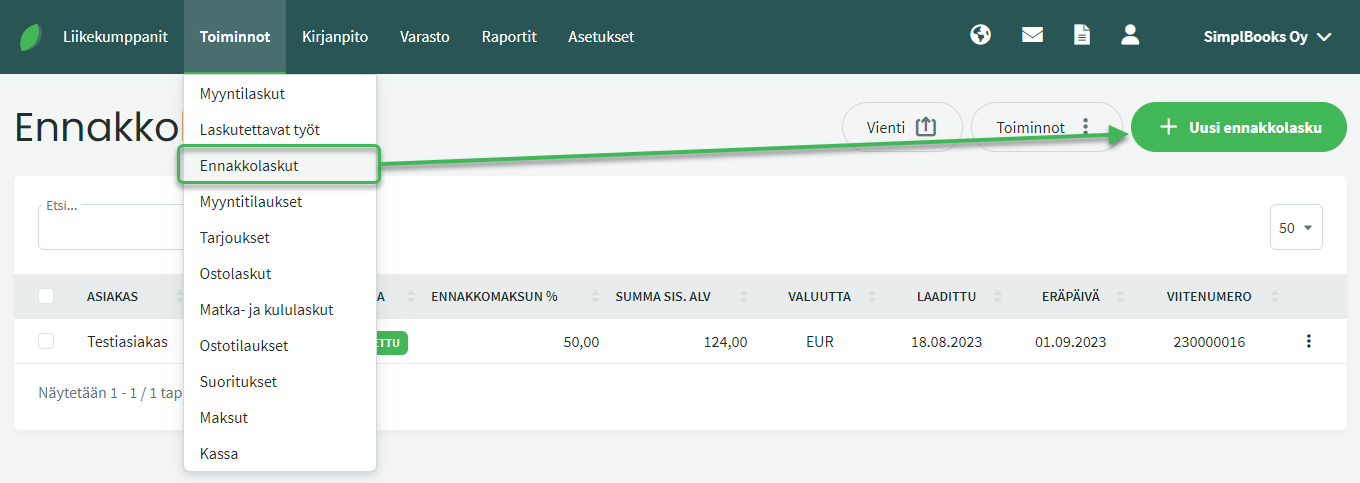
- Create an advance invoice under Actions > Advance Invoices > New advance invoice.
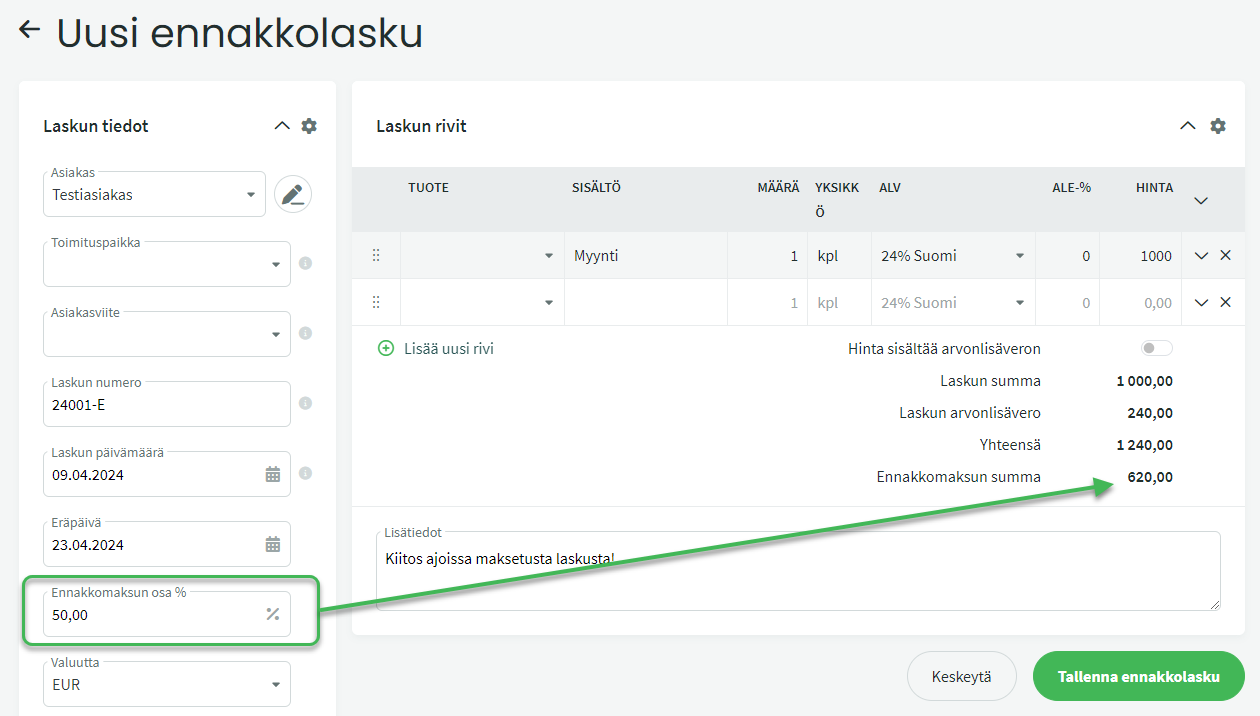
- Enter the full sale details on the invoice and set the advance payment percentage.
- Save and send the advance invoice to the customer.
- When payment arrives, mark the advance invoice as paid or match it to a bank transaction.
- Create a sales invoice from the advance invoice using the right-hand menu: Actions > Create sales invoice from advance invoice.
DETAILED GUIDE
The system generates the advance invoice number in the same way as a sales invoice number by default, but adds “-E” at the end of the advance invoice number.
An advance invoice is otherwise similar to a sales invoice, but you specify an advance payment percentage (50% by default). The advance invoice is created for the full sale amount, and the advance payment percentage determines how much is paid in advance.
More detailed instructions on, for example, additional invoice details, products, and VAT categories can be found in the sales invoice guide.
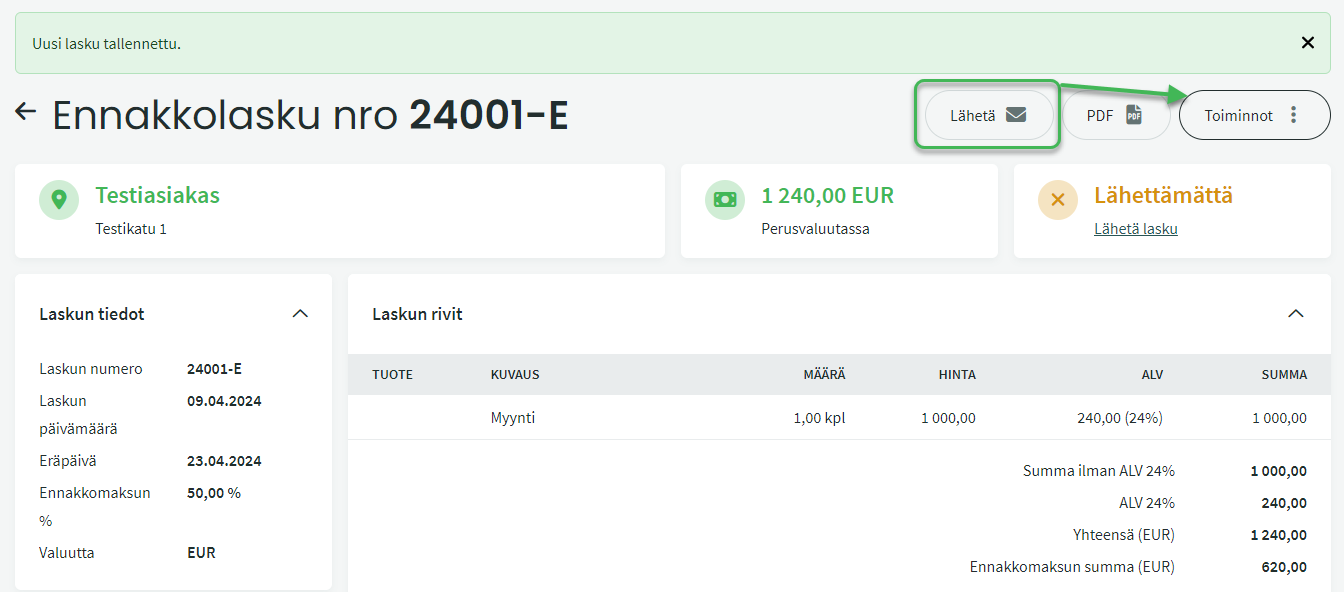
Once the advance invoice is ready, save it from the bottom of the page. You can then send the invoice to the customer by clicking “Send” on the right. The Send button is marked as a favourite by default, but if it is not directly visible, it can be found under Actions on the right.
MARKING AN ADVANCE INVOICE AS PAID
Open the desired advance invoice under Actions > Advance Invoices.

Select “Mark as paid” on the right.

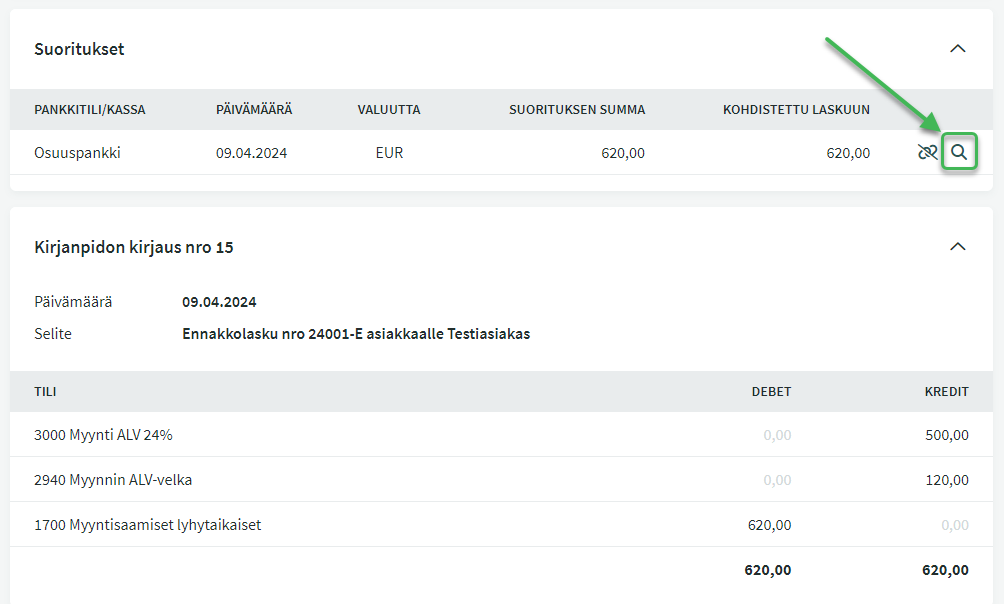
When the advance invoice is marked as paid, the system creates two automatic accounting entries (postings).
For the advance invoice:
- Debit: Accounts receivable
- Credit: The sales account specified on the invoice (+ any VAT account)
For the payment:
- Debit: Selected bank or cash account
- Credit: Accounts receivable
You can find the payment under Actions > Payments, or by clicking on it from the invoice. The invoice posting is visible at the bottom of the invoice view.
CREATING A SALES INVOICE FROM AN ADVANCE INVOICE
Open the desired advance invoice under Actions > Advance Invoices. Select “Create sales invoice from advance invoice” from the Actions menu on the right.
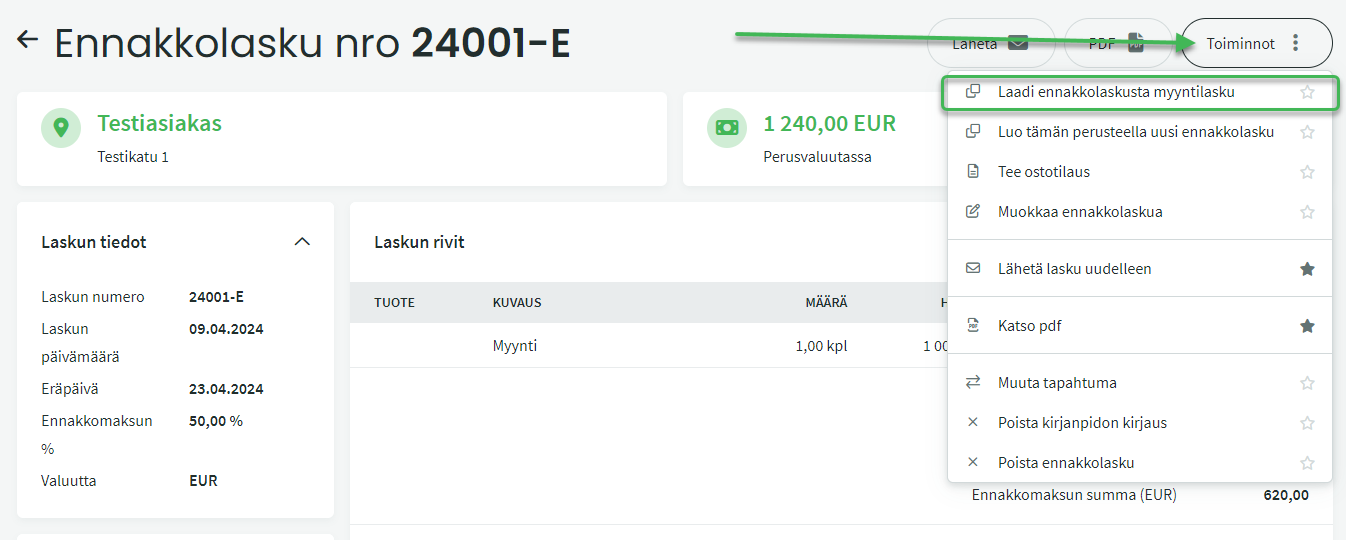
The sales invoice is created for the full sale amount, and the system deducts the advance payment amount from the total due. You can add lines to the sales invoice if needed, such as invoicing charges.
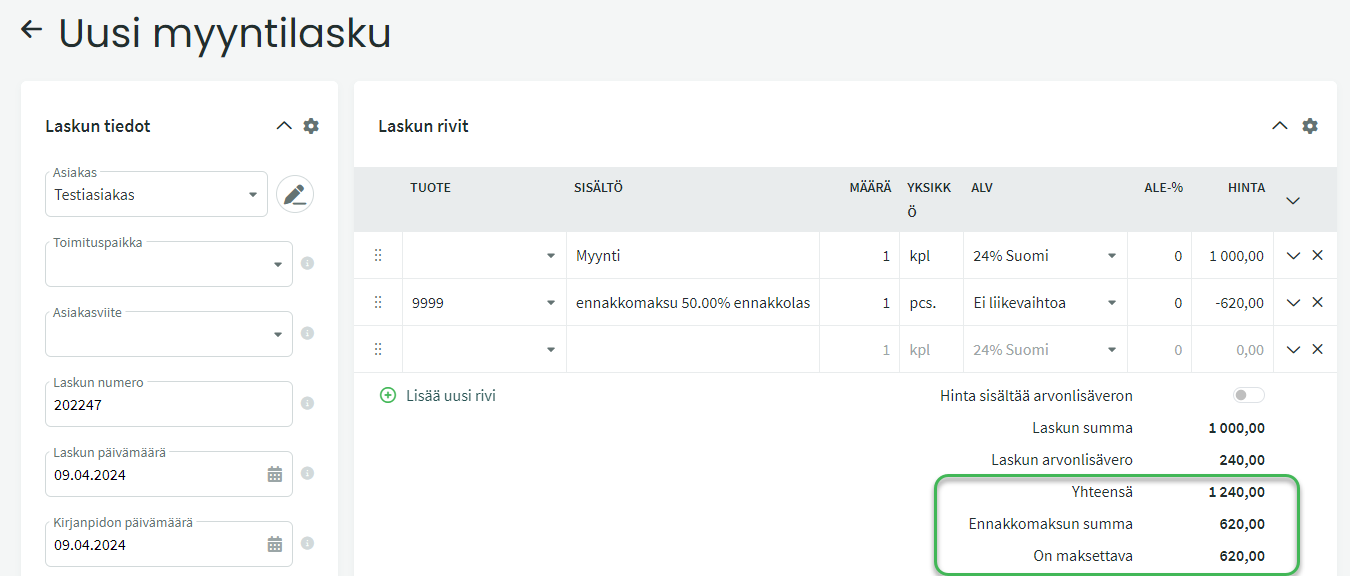
After saving the sales invoice, the system creates an automatic accounting entry (posting) for the amount due on the sales invoice:
- Debit: Accounts receivable
- Credit: The sales account specified on the invoice (+ any VAT account)
The posting is visible at the bottom of the sales invoice.
Leave A Comment?