
This guide explains how to create purchase invoices in SimplBooks.
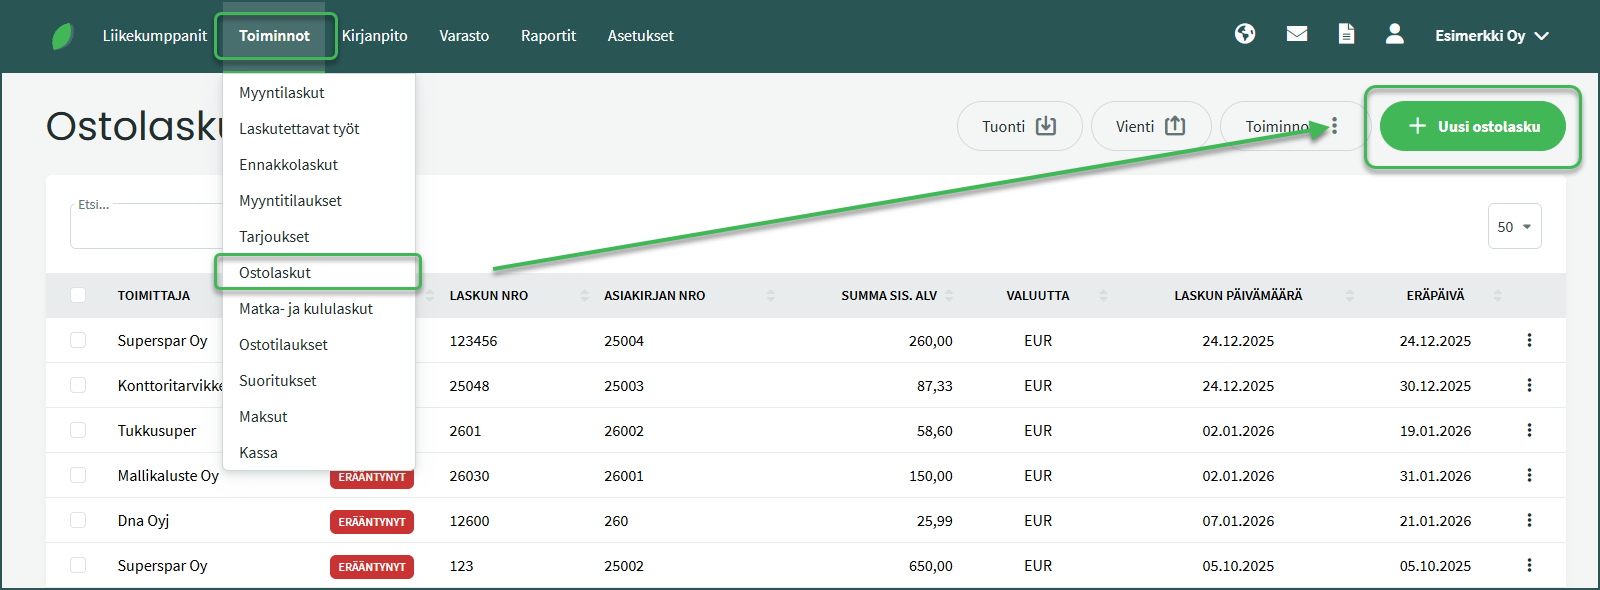
- Create a new purchase invoice from Functions > Purchase Invoices > New Invoice.
- Select a supplier or create a new supplier at this point.
- Fill in the invoice details. The purchase invoice number is a required field.
- Add the invoice line details.
- Save.
DETAILED GUIDE
A new purchase invoice is created from Functions > Purchase Invoices > New Purchase Invoice.
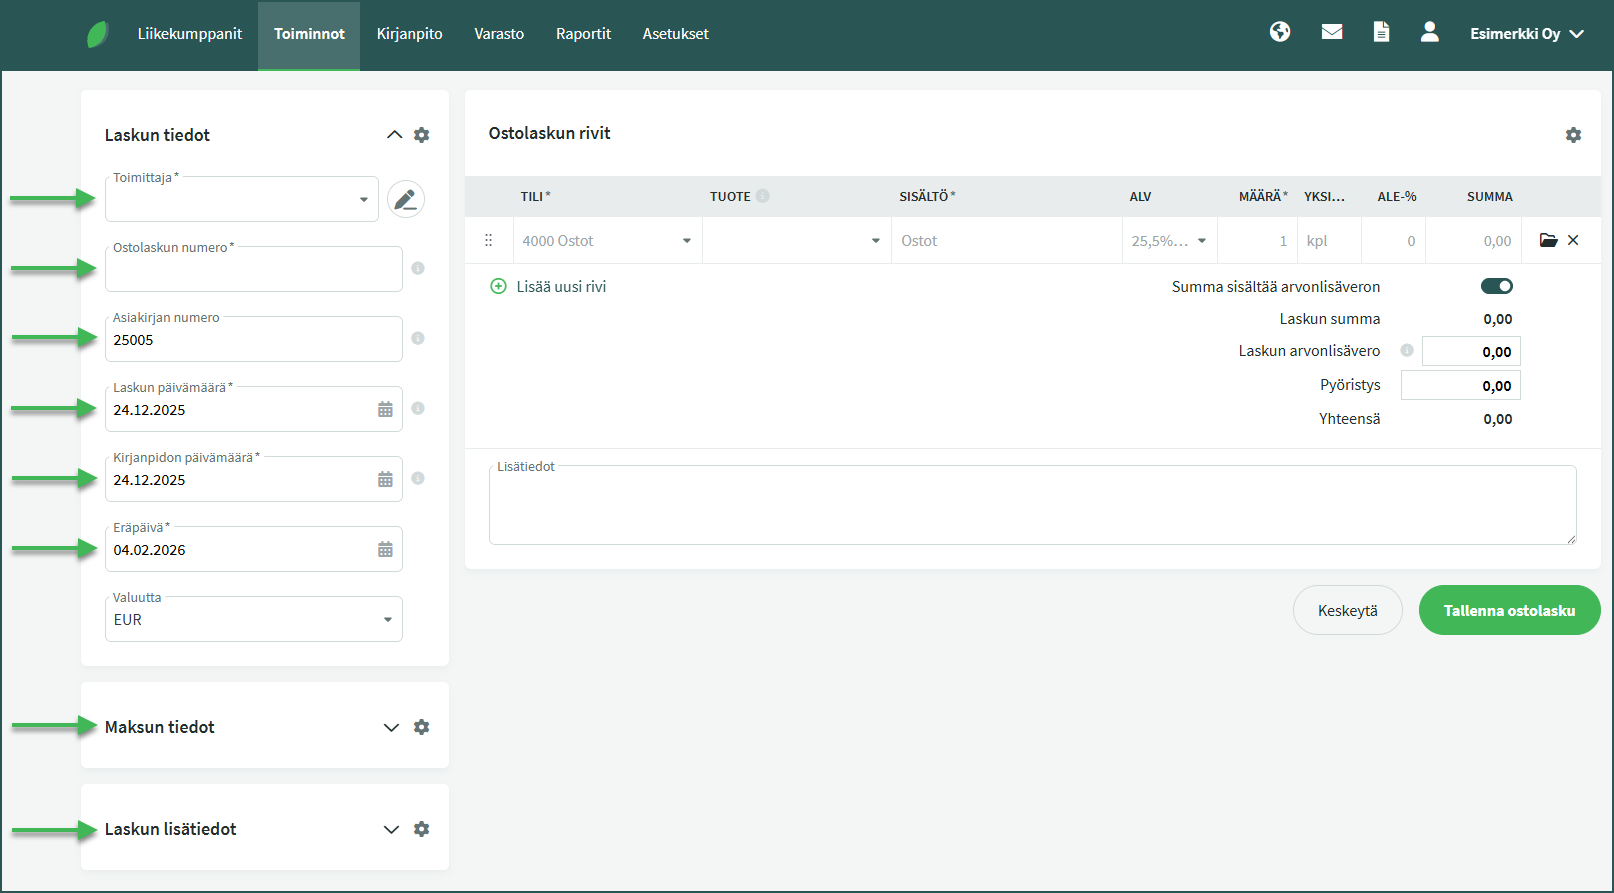
- Supplier – If the supplier is new, you can save the supplier’s details in the system at this point. The next time you create a purchase invoice from that supplier, the details can be filled in automatically by searching by supplier name. Supplier details can also be added and edited from Business Partners > Customers and Suppliers.
- Purchase invoice number – The purchase invoice number is a required field, but there are no specific format requirements. The invoice number can usually be found on the purchase invoice.
- Document number – The system generates the document number automatically. More information on changing the automatic numbering can be found here.
- Invoice date – This is usually shown on the purchase invoice. The system defaults to either the current date or the most recent purchase invoice date.
- Accounting date – This determines the date of the accounting entry.
- Due date – You can save a payment term in the supplier’s details, in which case the due date is determined automatically based on the invoice date and the payment term.
- Payment details – You can add the invoice reference number here, among other things.
- Additional invoice information – You can attach the invoice image or other supporting document as an attachment.
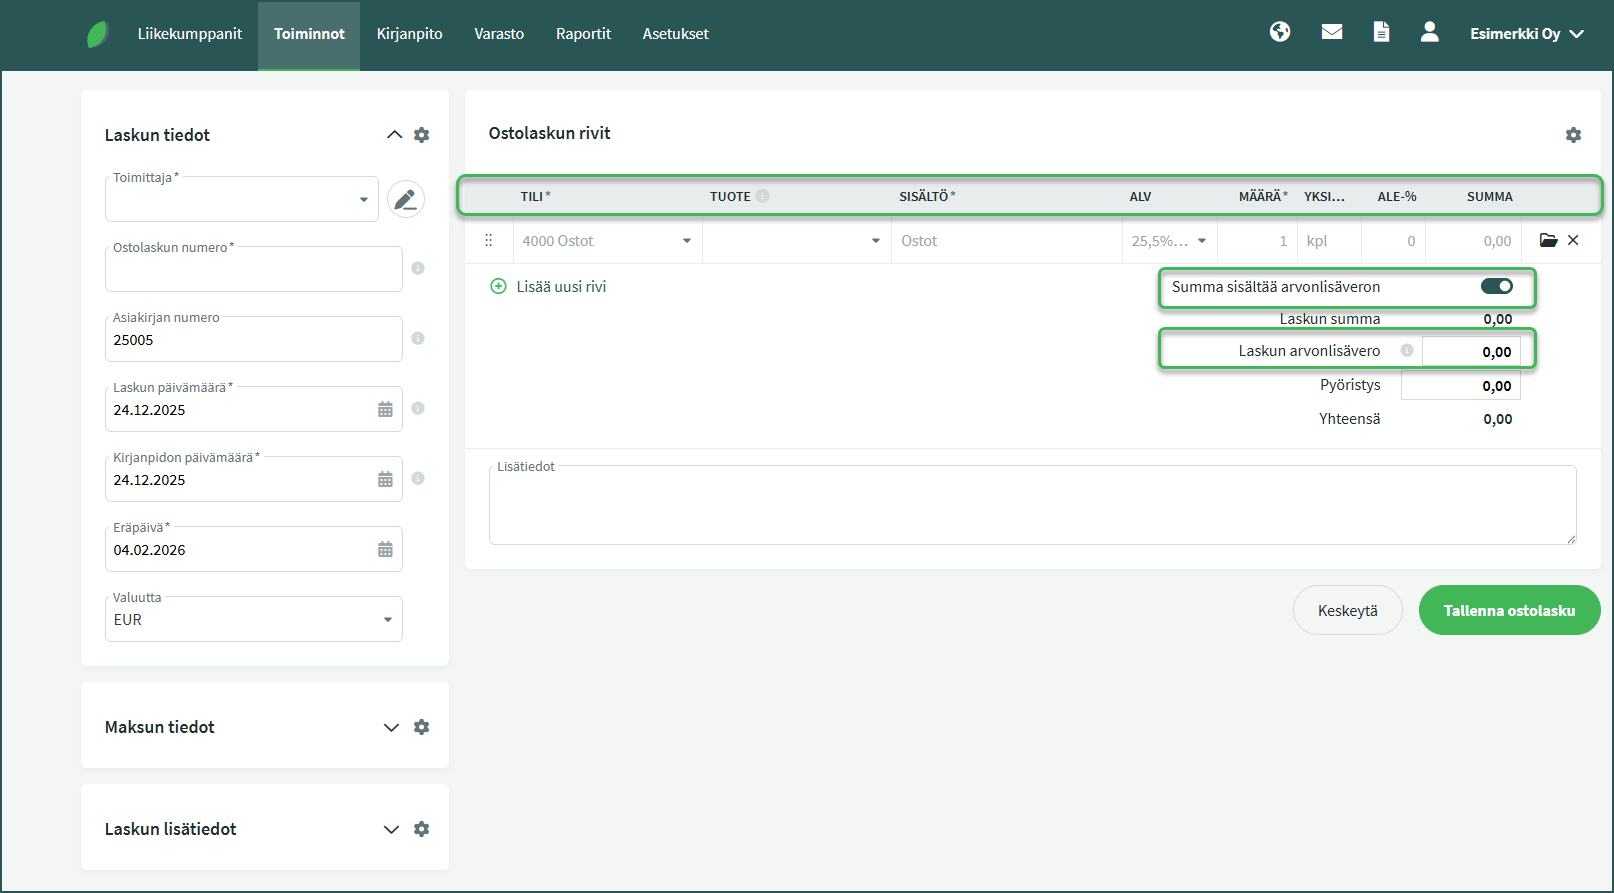
- Account – The expense account for the invoice, e.g. 4000 Purchases.
- Product (optional) – For example, if the item is a product being purchased for inventory and it has a product code saved in the system.
- Description – The system automatically fills in the account name here, but you can enter a more detailed description.
- VAT – Select the applicable VAT rate for the line.
- Quantity – The default value is 1 and does not need to be changed. The unit price of a single item is not entered on the invoice line.
- Unit – The default value is “pcs” and does not need to be changed.
- Discount-% (optional – Any applicable discount percentage.
- Amount – The total amount for the line.
More information on automatic postings can be found in the guide: Changing the automatic postings for sales and purchase invoices.
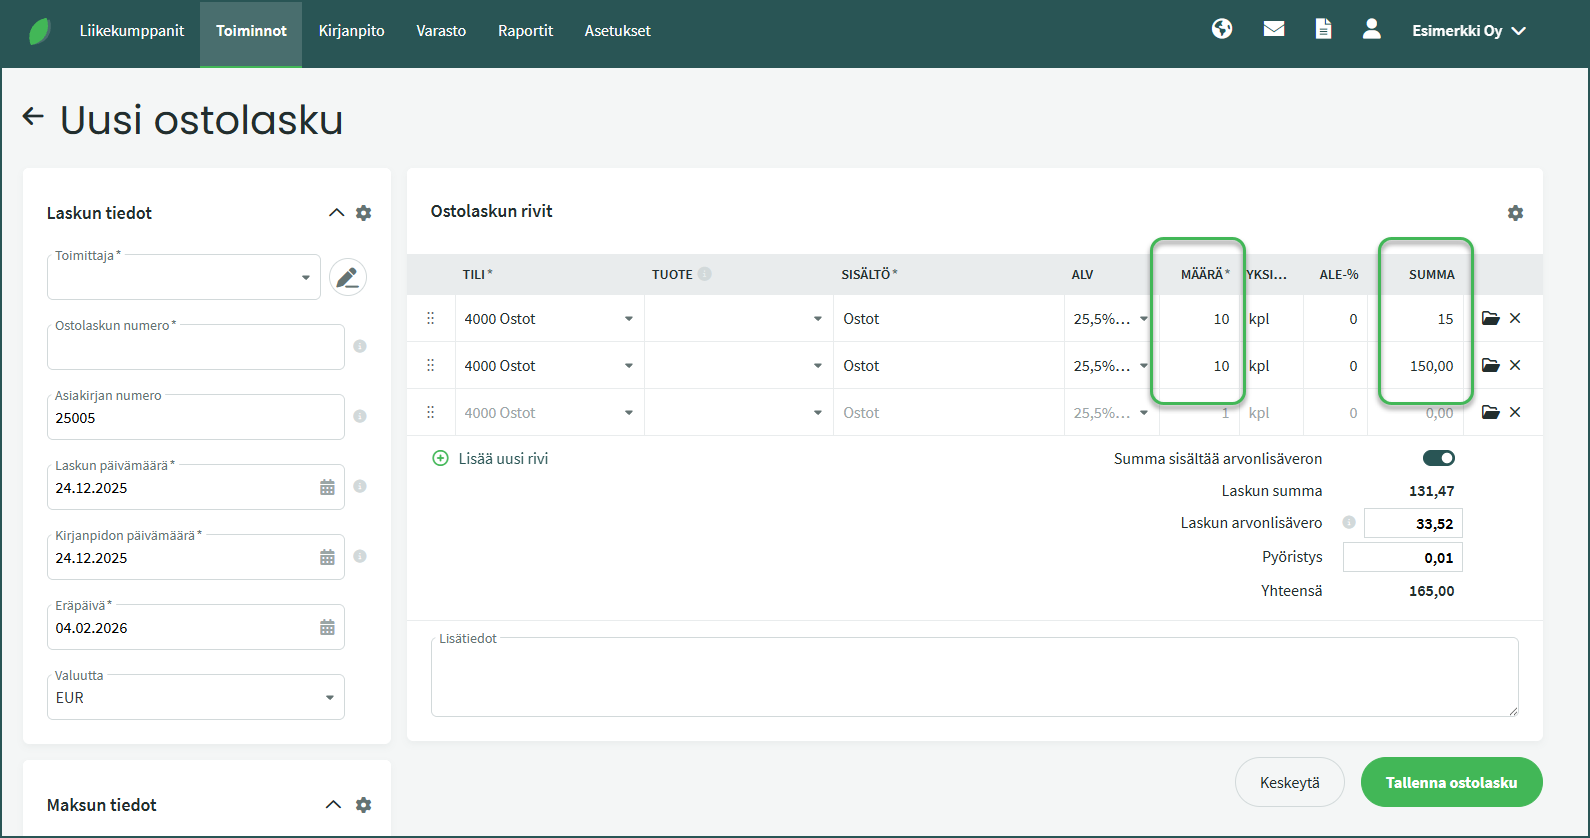
If you add multiple units of the same product on a single line (i.e. “Quantity” is more than 1), the calculation method depends on whether you enter the quantity or the amount first.
- If you enter the quantity first, for example 10 pcs, and then enter the amount, for example €15, the system interprets the amount as the total price. In this case the unit price becomes €1.50 and the total price is €15.
- If instead you enter the amount on the line first and only then the quantity, the system assumes the first amount entered is the unit price. In that case the total price becomes €150.
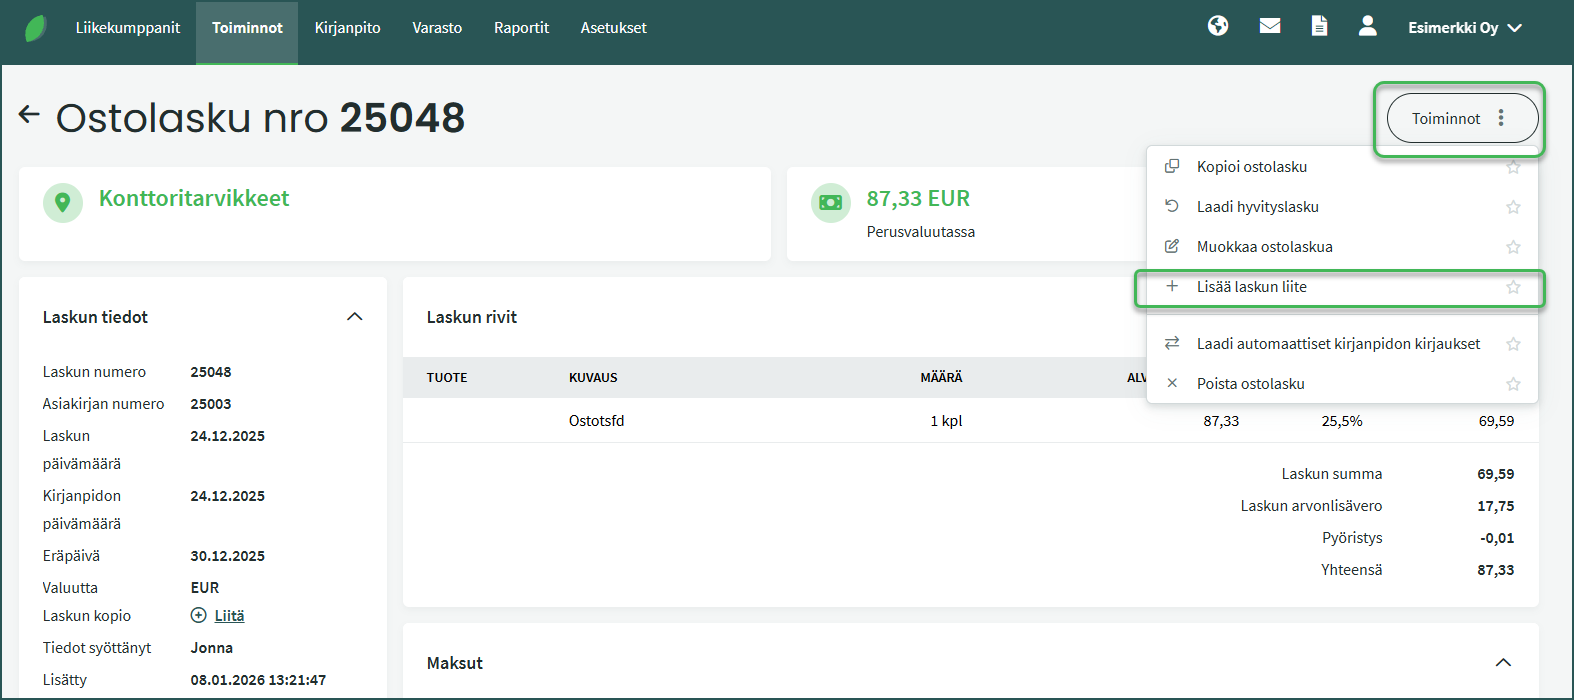
You can add an attachment to a purchase invoice after saving without needing to open the invoice in edit mode. Click on the purchase invoice and select from the right-hand panel Functions > “Add invoice attachment“.
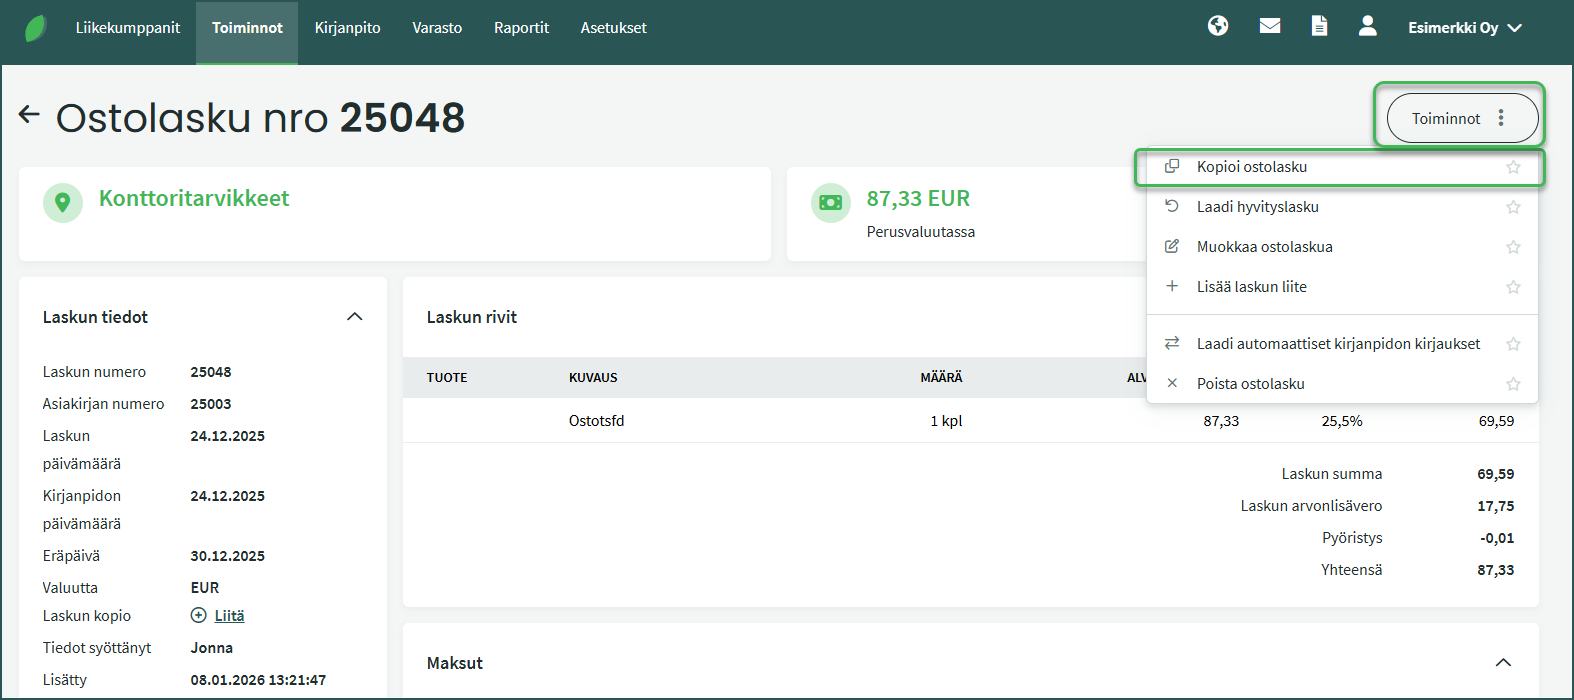
If you regularly purchase from the same supplier, it is worth creating a new purchase invoice by copying an existing one. This way the system automatically fills in a large portion of the purchase invoice details.
To create a new purchase invoice by copying, go to Functions > Purchase Invoices, select the invoice whose details you want to use. Once you have opened the relevant invoice, select Functions > “Copy purchase invoice” on the right.
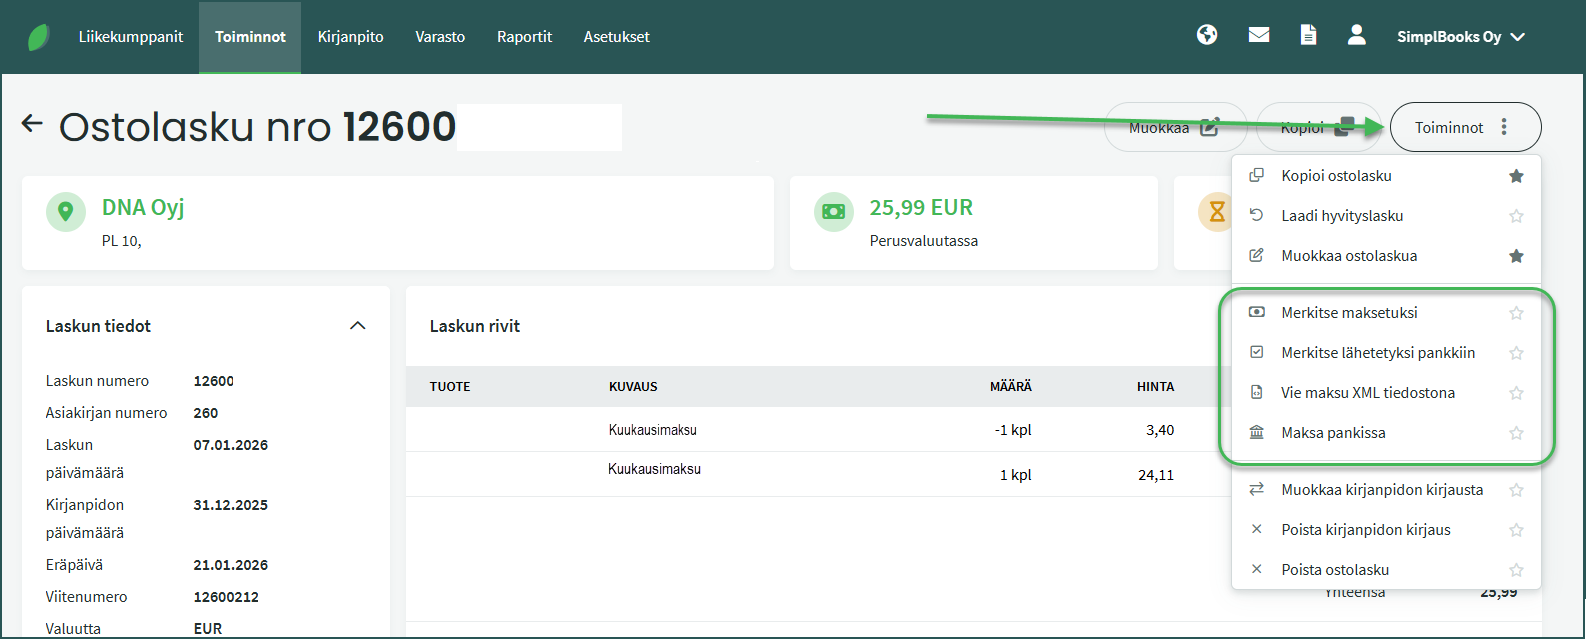
The Functions menu in the purchase invoice view contains various options related to paying purchase invoices.
- Mark as paid – You can match a payment already in the system (e.g. imported from a bank or bank statement) to the invoice, or create a new payment. If the payment amount covers the full purchase invoice amount, the invoice will appear with the status “Paid“.
- Mark as sent to bank – If you have scheduled the purchase invoice payment in online banking, you can use this function. The purchase invoice will then appear with the status “Awaiting bank“.
- Export payment as XML file – This allows you to save the payment XML file to your computer.
- Pay in bank – This function allows you to send the payment to the bank. The purchase invoice will then appear with the status “Awaiting bank“. Payments must always be confirmed with online banking credentials. If the confirmation is left incomplete, the payment will not be forwarded to the bank.
- Marking a purchase invoice as paid
- Paying purchase invoices from SimplBooks
- Changing automatic numbering for sales invoices, purchase invoices, quotes or inventory entries
- Changing the automatic postings for sales and purchase invoices
- Viewing and editing supplier details
- Contents of the accounts payable report
Leave A Comment?