
Inventory tracking should only be used if you want to know at all times how much stock you have on hand. Using inventory tracking adds complexity to bookkeeping, and we recommend using it only when it provides real business value.
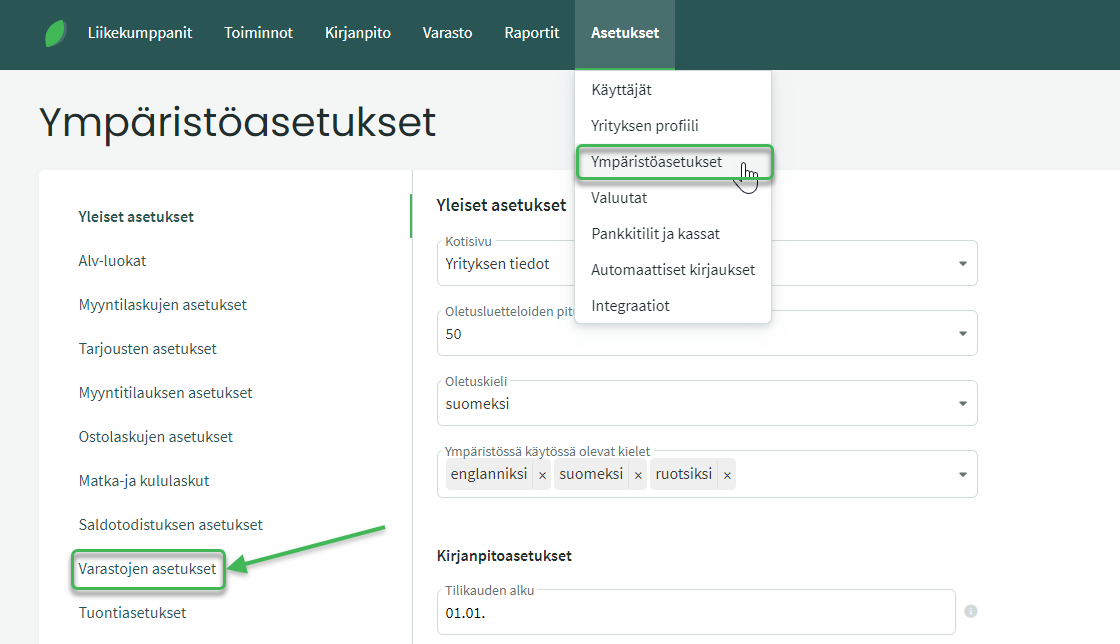
Before adding the opening inventory, a warehouse must already be set up in the program. See the instructions below.
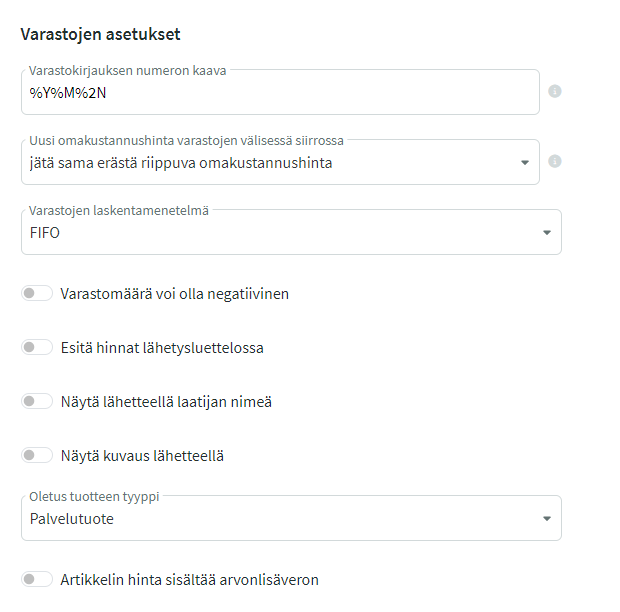
The automatic numbering format for inventory entries can be, for example: %Y%M%3N= 2404001 (meaning the first inventory entry of April 2024). You can read more about automatic numbering here.
There are three options for defining the cost price.
There are also three options for the inventory costing method. The FIFO method (First In, First Out) is commonly used.
Once you have selected the appropriate settings for your warehouses, save them and proceed to section B.
If you have existing stock before starting to use SimplBooks, you can add the opening inventory in two ways:
- manually, one warehouse at a time, or
- by importing balances as a CSV file.
IMPORTING OPENING INVENTORY FROM A FILE
The most convenient way to add the opening inventory is to import it as a CSV file. The required fields in the product list are the product code, name, unit, purchase price, and stock quantity.
- When importing the opening inventory from a file, the program also creates the products at the same time, so they do not need to be created separately.
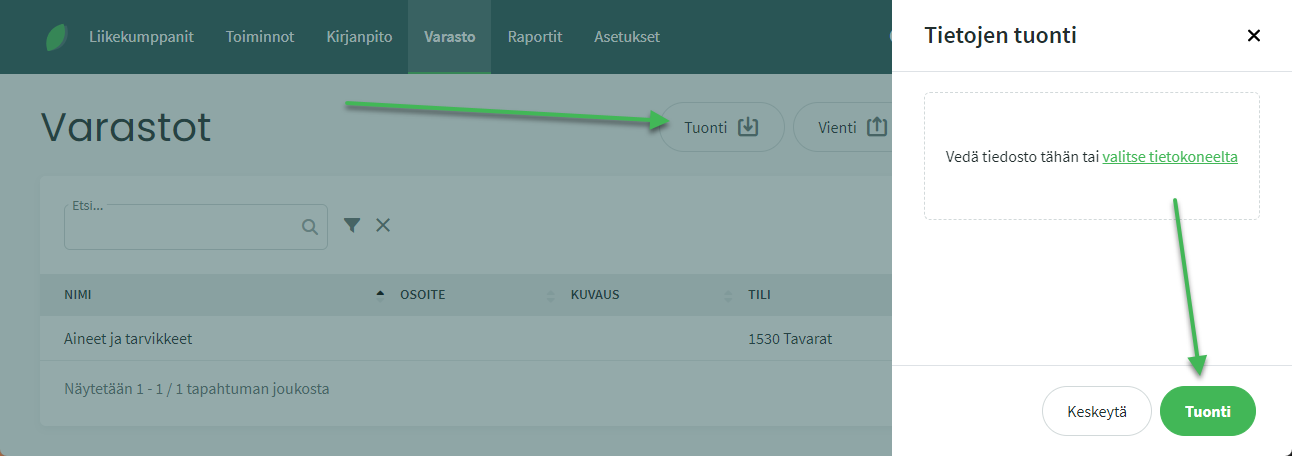
Select the file to import and click Import. The view that opens shows a preview of the data to be imported. Set the opening inventory date and select the warehouse. Then assign column headings to the data columns (at minimum, the required fields marked with an asterisk).
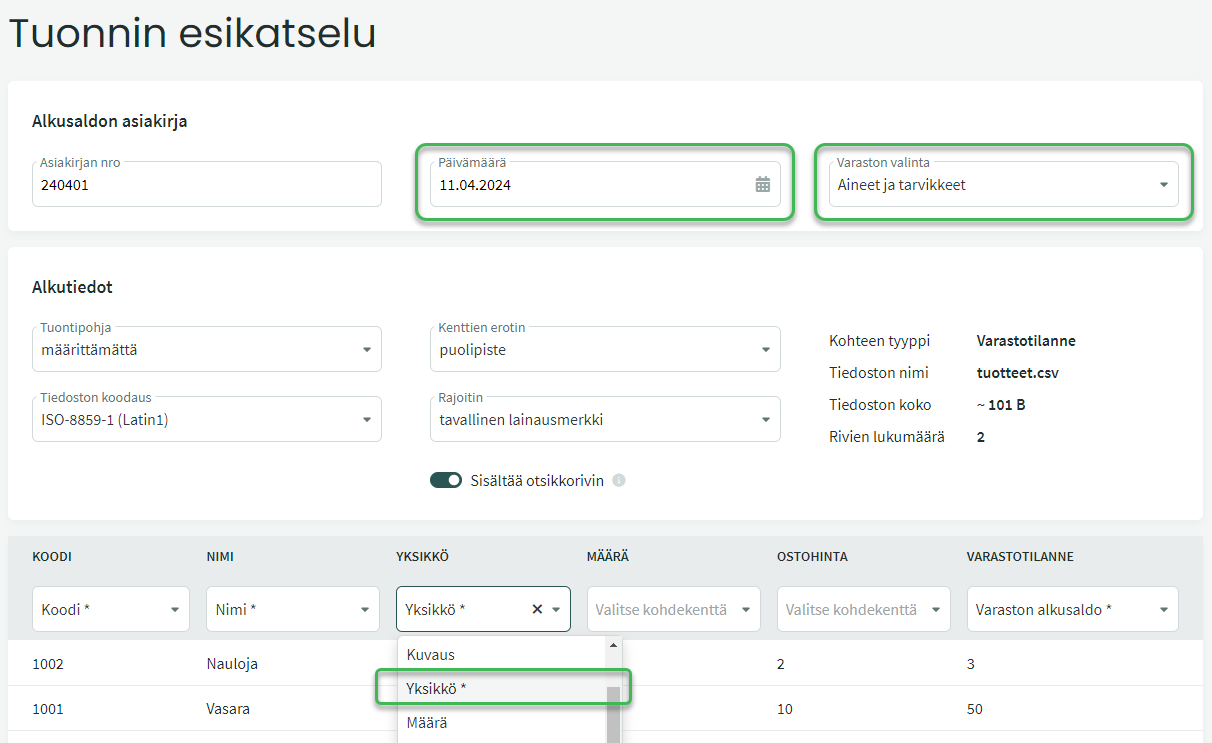
Once the required column headings have been set, click Import at the bottom. The program will create the products and save the opening balances for the warehouse.
ADDING OPENING INVENTORY MANUALLY
Before you can add the opening inventory manually, the program must have not only the warehouse but also the products. Products can be imported from a file or created one by one. See the guide for importing a product list here and for creating products individually here.
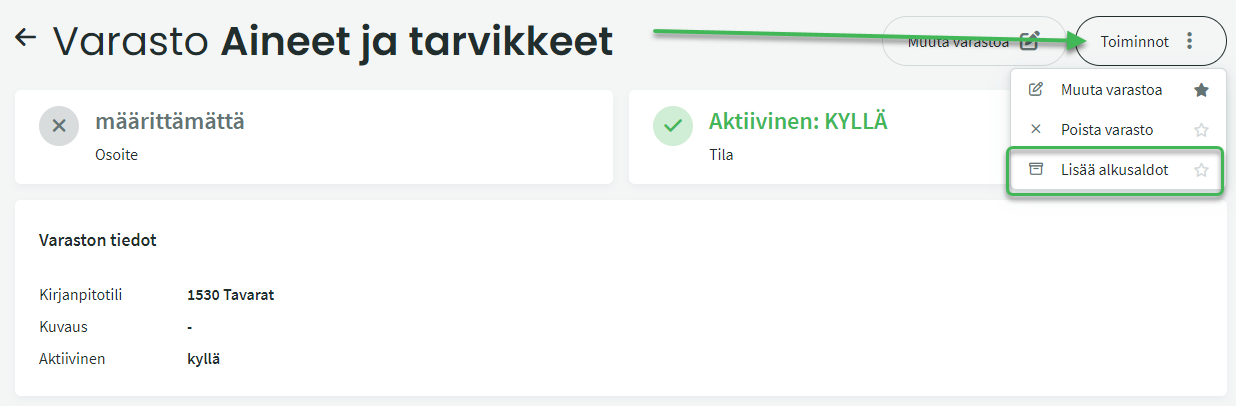
In the view that opens, select “Add opening balances” from the Actions menu on the right.
Set the opening inventory date and add products on separate rows. You can search for products by part of their name or code. If details have been saved to the product, the unit and cost price will be filled in automatically.
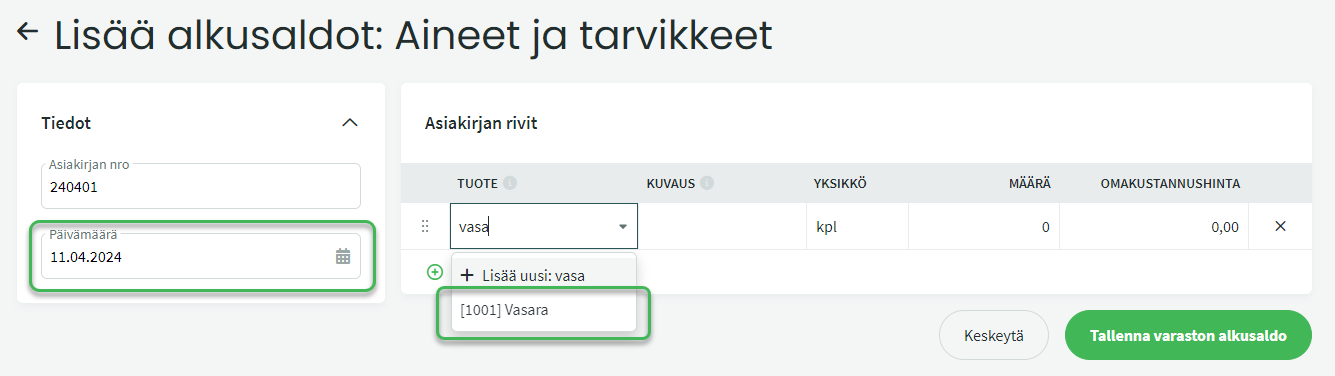
Once all the required products and details have been added, save the opening balance.
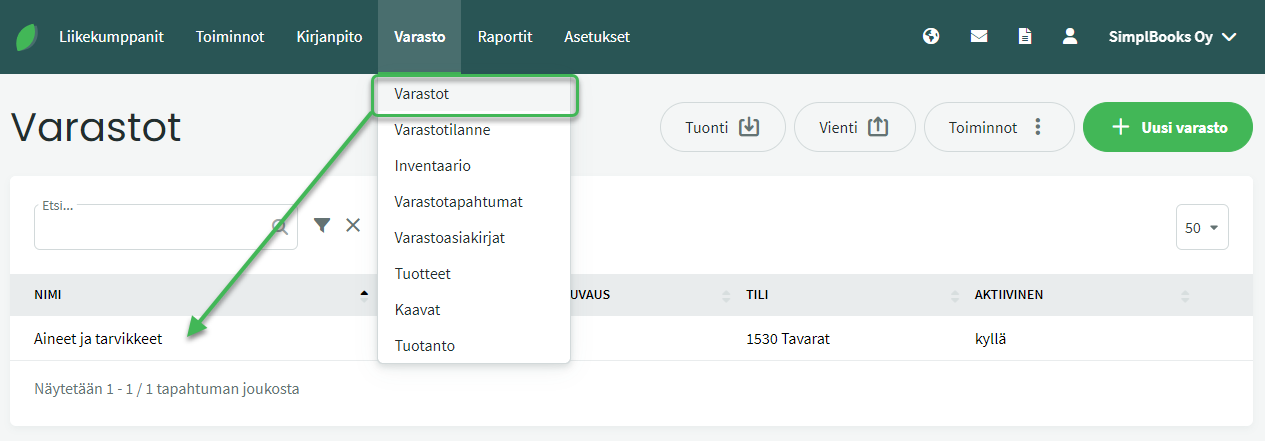
After adding the opening inventory, you can check the stock balance under Inventory > Stock Status.
Leave A Comment?