
This guide explains how to create new journal entries in SimplBooks.
Quick guide
- Create a journal entry under Accounting > Journal Entries > New Entry.
- Change the date if necessary and add a description for the entry.
- Fill in at least two lines and complete at least the Account, Credit, and Debit fields.
- Select the VAT rate if required and save the entry.
DETAILED GUIDE
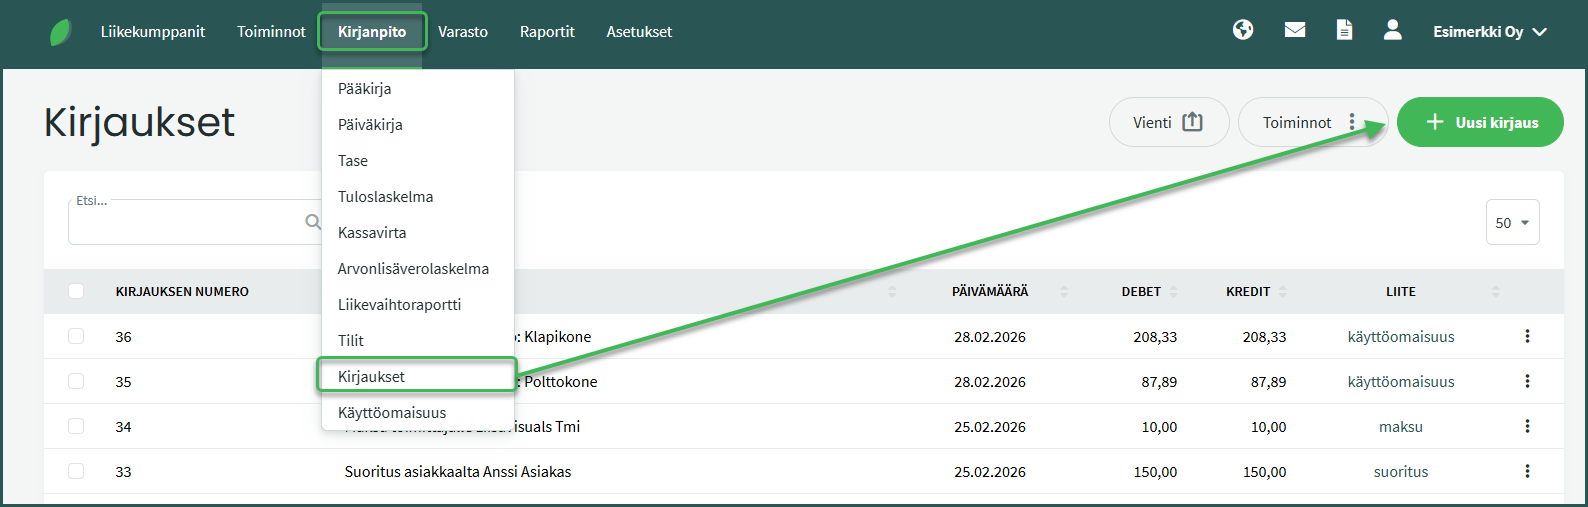
1. Journal entries are created under Accounting > Journal Entries > New Entry.
2. Enter the entry details

- Description – For example, the customer or supplier name, invoice number or subject, or another description of the accounting transaction.
- Date – For bank transactions, the payment date is used.
- Default entry – A default entry automatically fills in the entry description and the accounting accounts in the debit and credit columns. See the default entries guide here.
- Attachment – You can attach a receipt or a copy of an invoice to the entry for record-keeping purposes.
3. Add the accounts associated with the entry
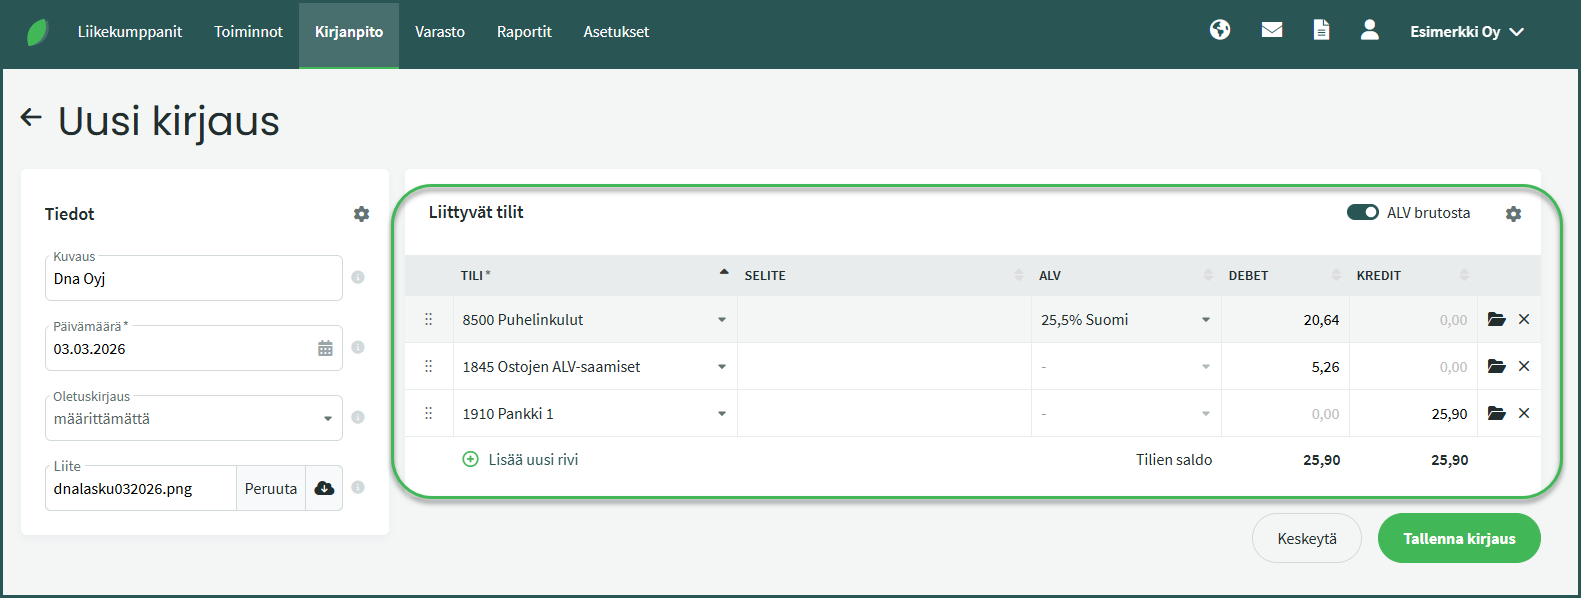
- Account – Select the accounting account from the dropdown. You can also search for an account by its number or name.
- Description – Optional additional information for the entry line.
- VAT – Select the VAT rate for the expense or income account if applicable. The software will then calculate the VAT amount automatically.
- Debit or Credit – The debit and credit amounts must be equal. On each line, enter the amount in only one field — either debit or credit.
- Calculate VAT from gross amount – By default, the software calculates VAT from the gross amount, but you can also select net calculation if preferred.
By default, an entry has one line. When you fill in the first line, the software automatically adds the remaining amount to a new line. Select the accounting account for the new line, add the VAT rate if required, and verify the amount. An entry must have at least two lines, and the debit and credit totals must match.
When the details are correct, save the entry. You can also edit the entry after saving if needed.
💡 Tip: Money leaves the bank account on the credit side and arrives on the debit side — meaning purchases are recorded on the credit side of the bank account and income on the debit side.
Leave A Comment?