
This guide explains how to create a new sales invoice and how you can reuse information from a previous sales invoice by copying it to a new invoice.
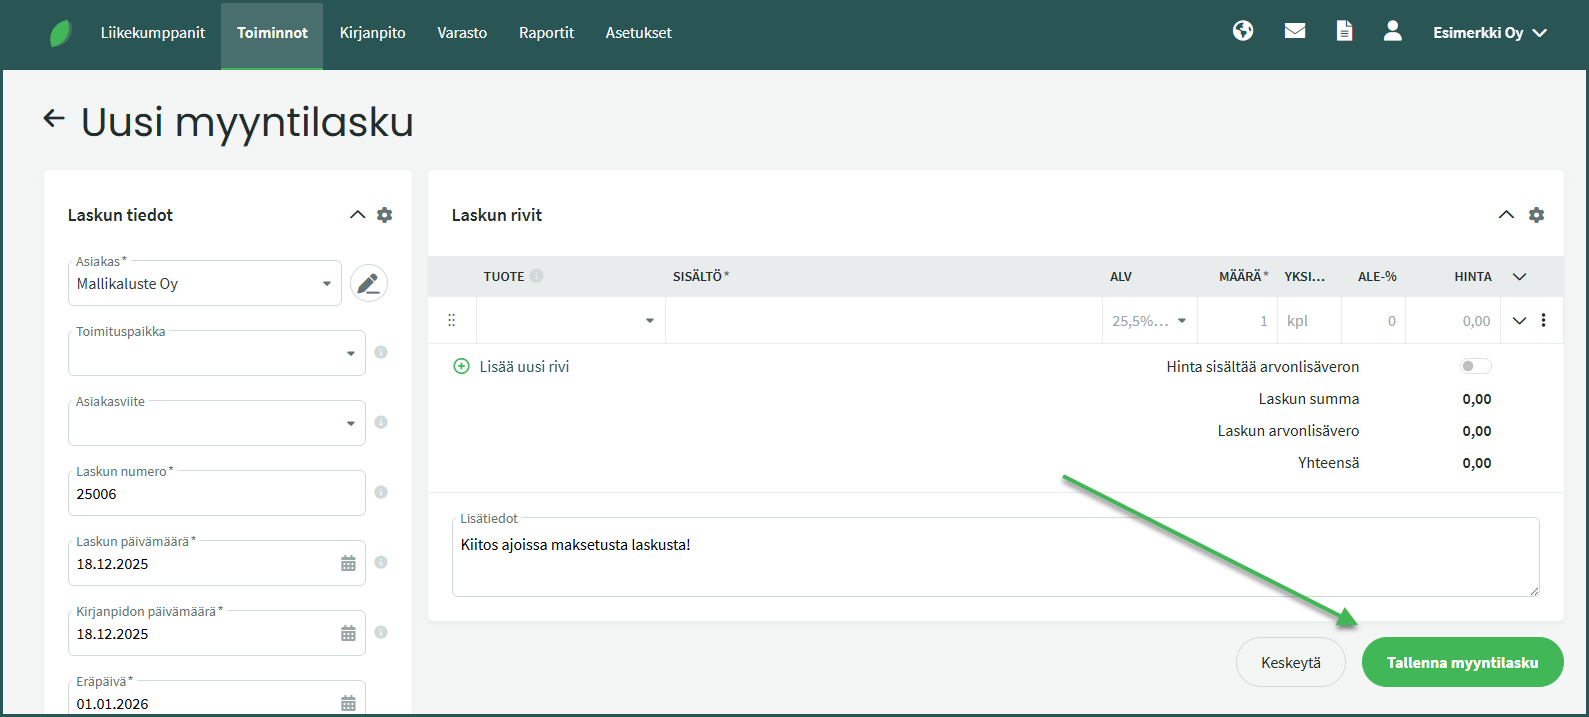
- A sales invoice is created under Transactions > Sales Invoices > New Sales Invoice.
- Fill in the customer details.
- You can create a new customer at this stage if the customer is not yet in the customer register.
- Required fields are name and street address.
- If you are sending the invoice as an e-invoice, the Business ID is also required.
- If you do not want to fill in the details, you can tick the “Private individual” option.
- Add the invoice line details.
- Required fields are description, quantity, and price.
- Save the sales invoice.
DETAILED GUIDE
A new sales invoice is created under Transactions > Sales Invoices > New Sales Invoice.

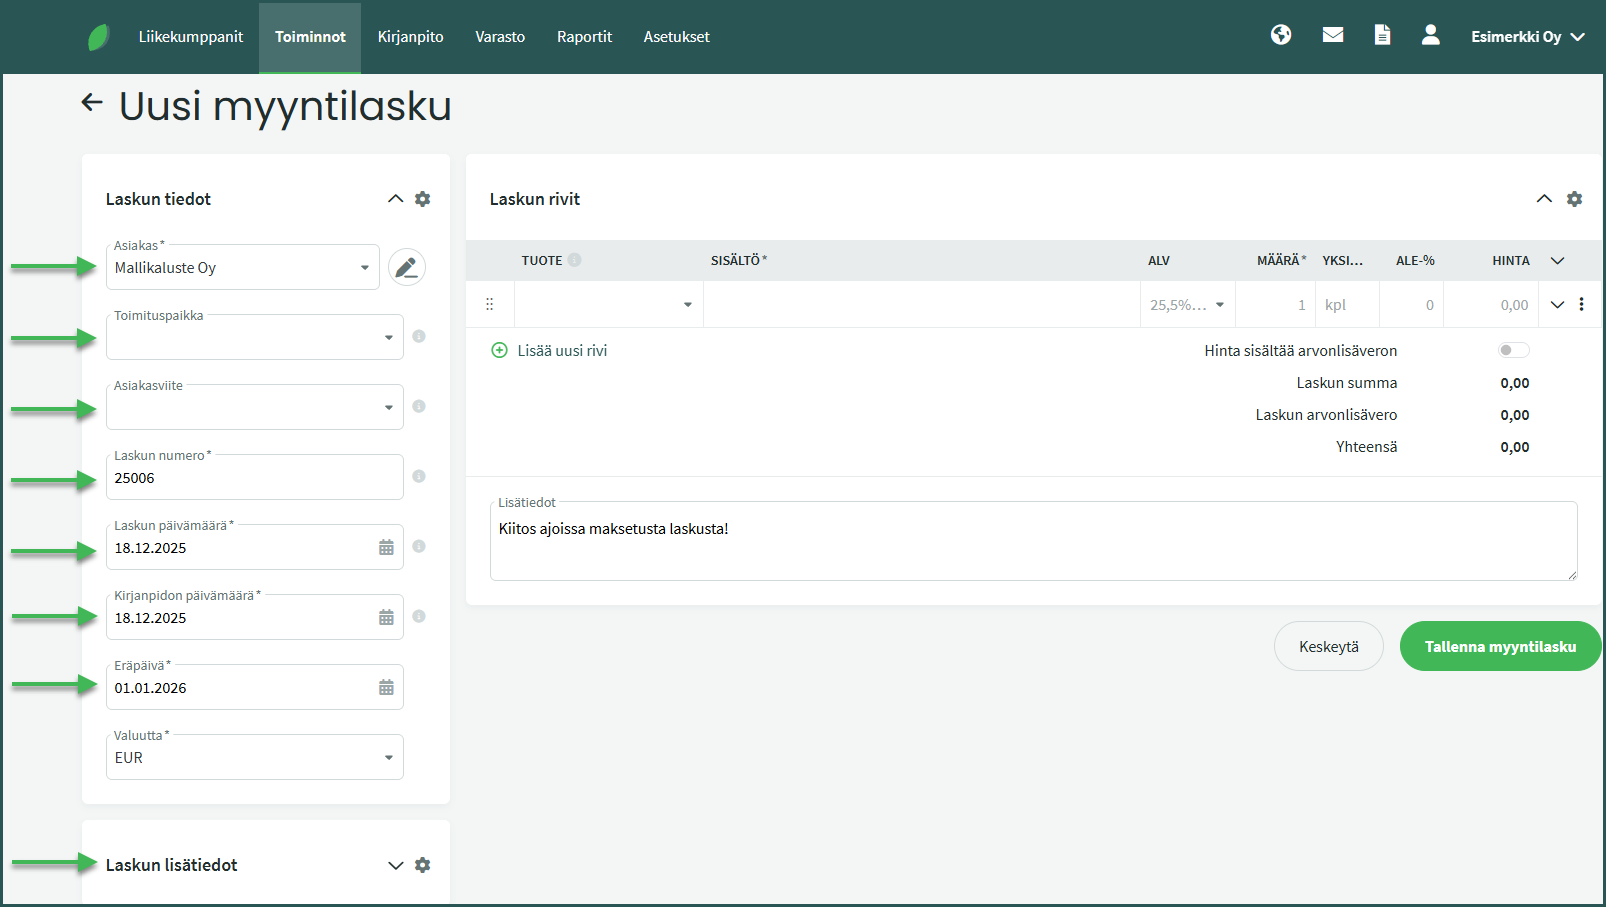
Invoice details
- Customer – You can select an existing customer or create a new customer in the customer register. Customer details can be supplemented and checked using the pencil icon. The program saves the customer’s details when they are entered for the first time. Next time, it is enough to select the customer’s name and the program will fill in the other details automatically. Customer details can also be edited and added under Business Partners > Customers and Suppliers. If you want to send the invoice as an e-invoice, the customer details must have a saved Business ID.
- Delivery location (optional) – If the delivery address differs from the address saved in the customer’s details, you can edit it here. The delivery location can be added under Business Partners > Delivery Locations > New Delivery Location.
- Customer reference (optional) – You can add the customer’s contact person, project, or other reference that makes it easier for the recipient to identify the invoice. The field is displayed by default in the address field of the sales invoice.
- Invoice number – The unique number of the invoice, which the program creates automatically. Settings related to numbering can be changed under Settings > Environment Settings > Sales Invoice Settings. You can read more about automatic numbering formats here.
- Invoice date – The date the invoice was created.
- Accounting date – This determines the date of the accounting entry.
- Due date – The program calculates the due date from the invoice date based on the default payment terms. You can set the default payment terms in the sales invoice settings and, if desired, you can also save payment terms that differ from the default in the customer’s details.
Additional invoice details
- Reference number – The program generates the reference number automatically after the invoice is saved. You can read more about reference number settings here.
- Late payment interest – You can specify a possible late payment interest rate on the invoice.
- Invoice language – You can select the invoice language (Finnish, English, or Swedish).
- Document template – You can select which invoice template you want to use for creating the invoice. Document templates can be edited and created under Settings > Environment Settings > Sales Invoice Settings.
- Primary bank account – You can select the primary bank account for the invoice. For e-invoices, only one bank account can be designated as the payee’s account, so the selected account will be used on that invoice.
1. Fill in the invoice line details
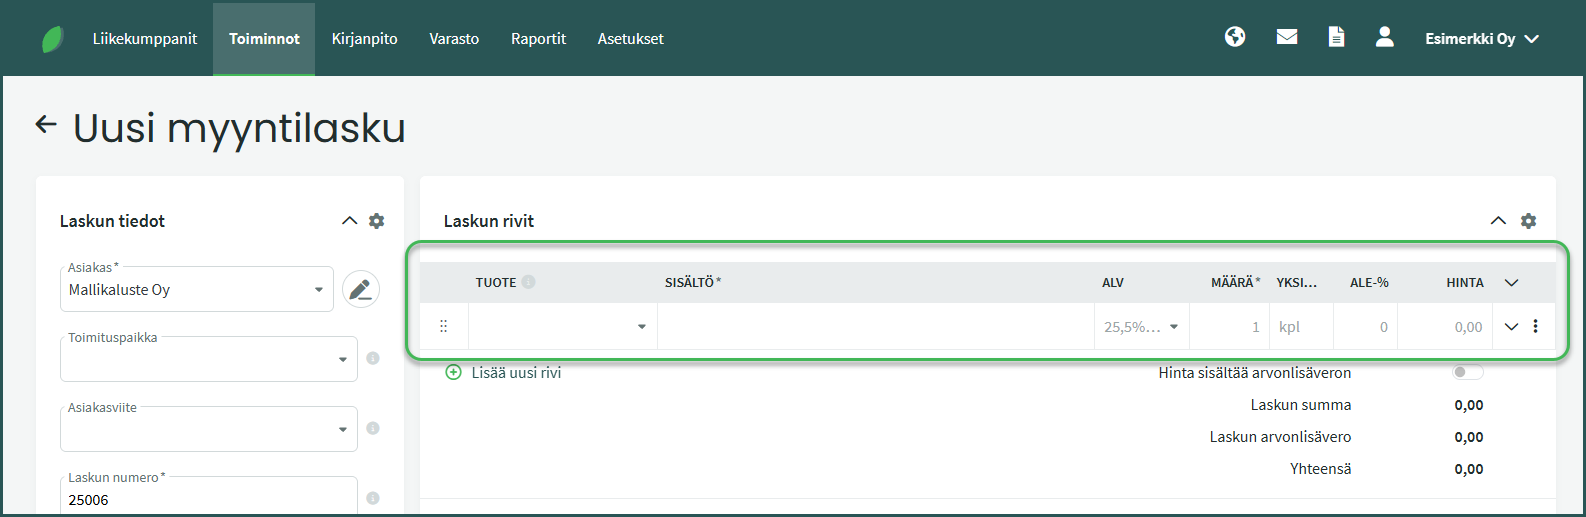
Required invoice line fields:
- Description – Description of the product or service being sold.
- Quantity – The quantity of products/services being sold on the line.
- Unit – The unit in which the product quantity is expressed (e.g. pcs, h, min, kg). Default is pcs.
- Price – The unit price of the product or service being sold.
Optional invoice line fields
- Product – If the product exists in the product register, you can select it from the dropdown menu. Details such as unit and price can be saved for the product and will be filled in automatically on the invoice. If you have not yet added the product being sold to the register, you can leave the field empty. More information about adding products to the register can be found here.
- VAT – The VAT rate of the product being sold.
- Discount % – A possible discount percentage. The program calculates the discount from the entered price.
2. Check the invoice line additional details
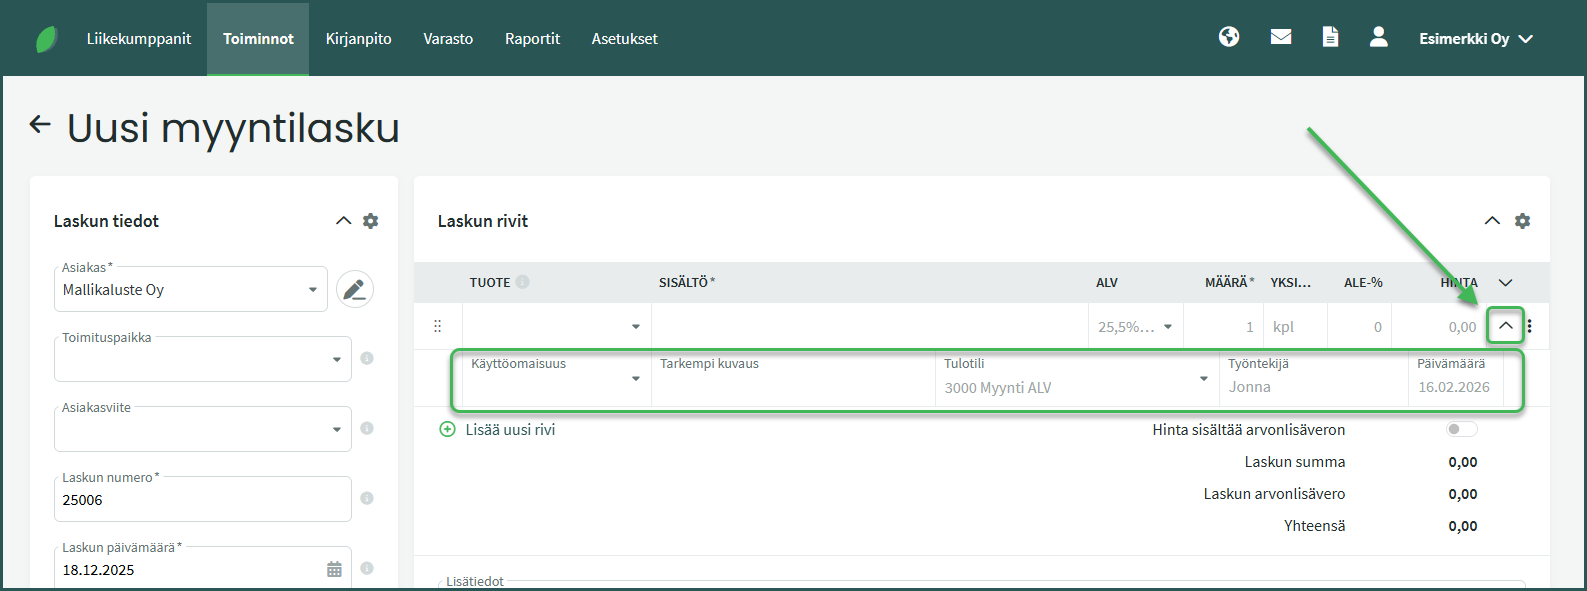
You can view the invoice line additional details by clicking the downward-pointing arrow at the end of the line. In the additional details you can see, for example, the sales accounting account, which the program selects based on the VAT rate. You can manually change the accounting account if needed.
You can also link the invoice to a fixed asset, add a more detailed description, an employee, and the sales date. The sales date is visible in the invoice line details but does not affect the accounting entries.
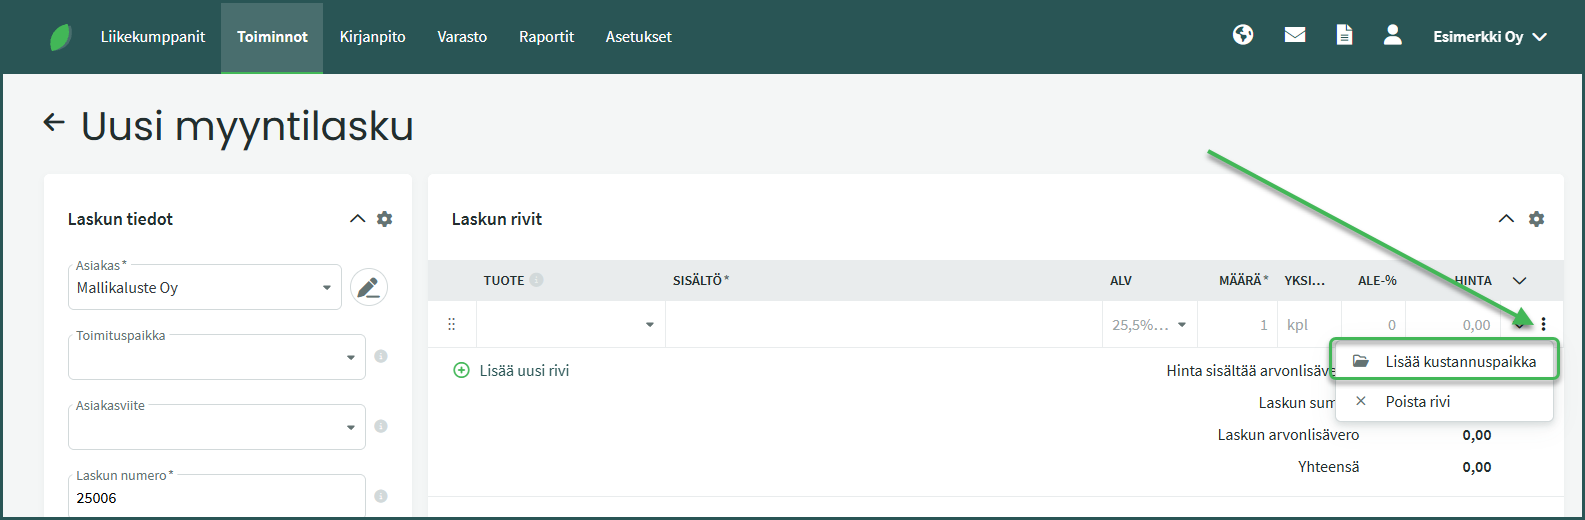
If you have added cost centres to the program, three dots will appear at the end of the invoice line instead of a cross. By clicking the three dots, you can add a cost centre to the invoice line.
6. Save the sales invoice from the bottom right corner
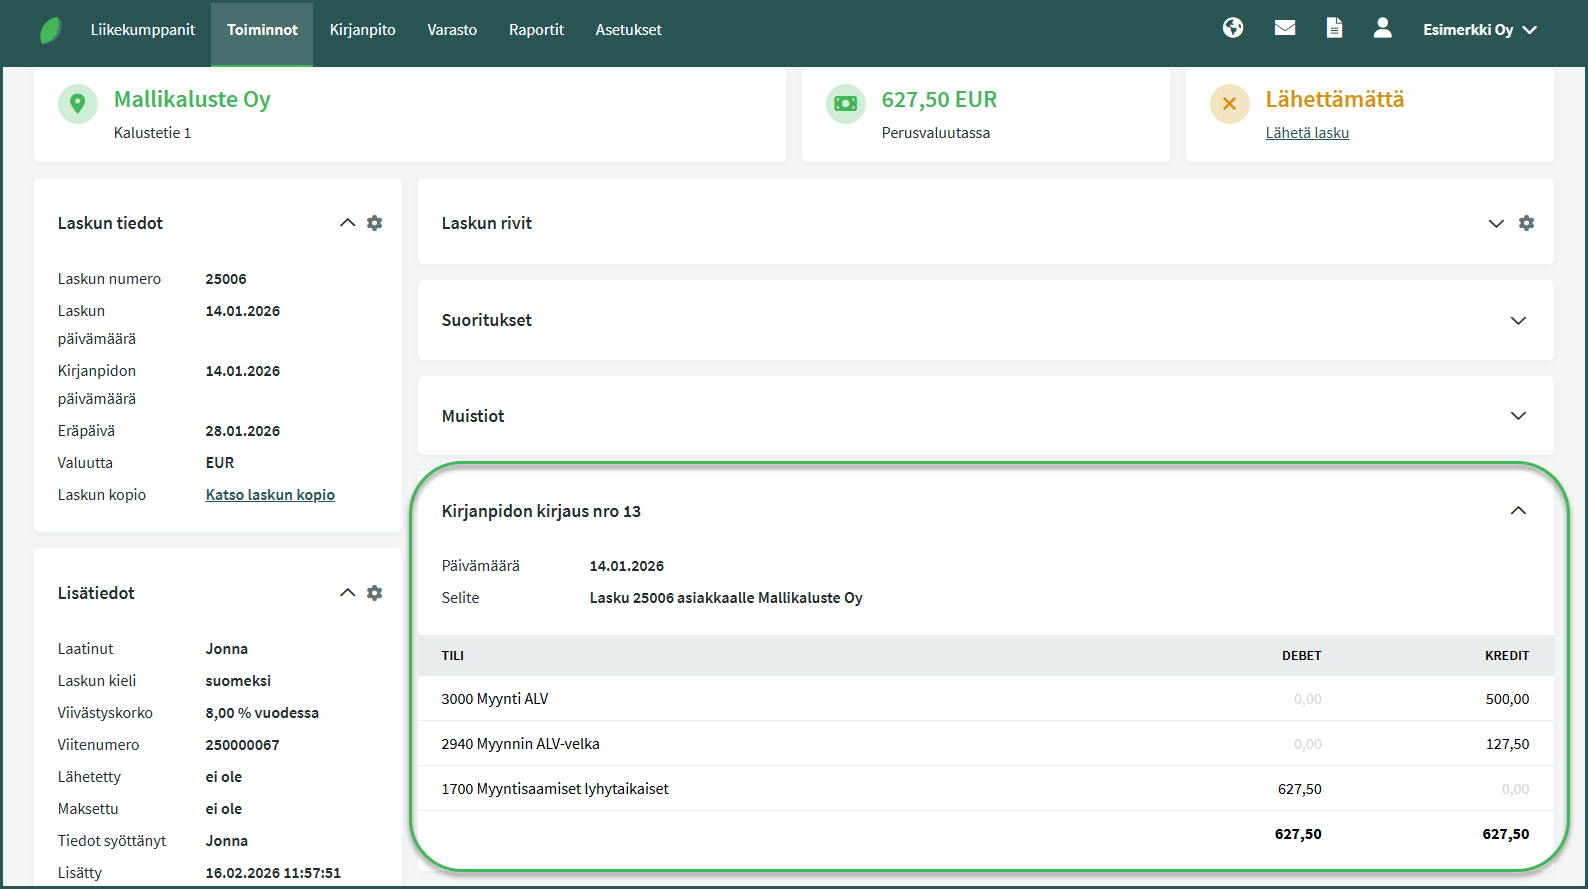
When a sales invoice is saved, the program creates an accounting entry (posting) for it automatically, provided that automatic postings are enabled and accrual-based accounting is in use. If cash-based accounting is in use, the entry is only created when the invoice is marked as paid.
The accounting entry is visible at the bottom of the invoice page after saving.
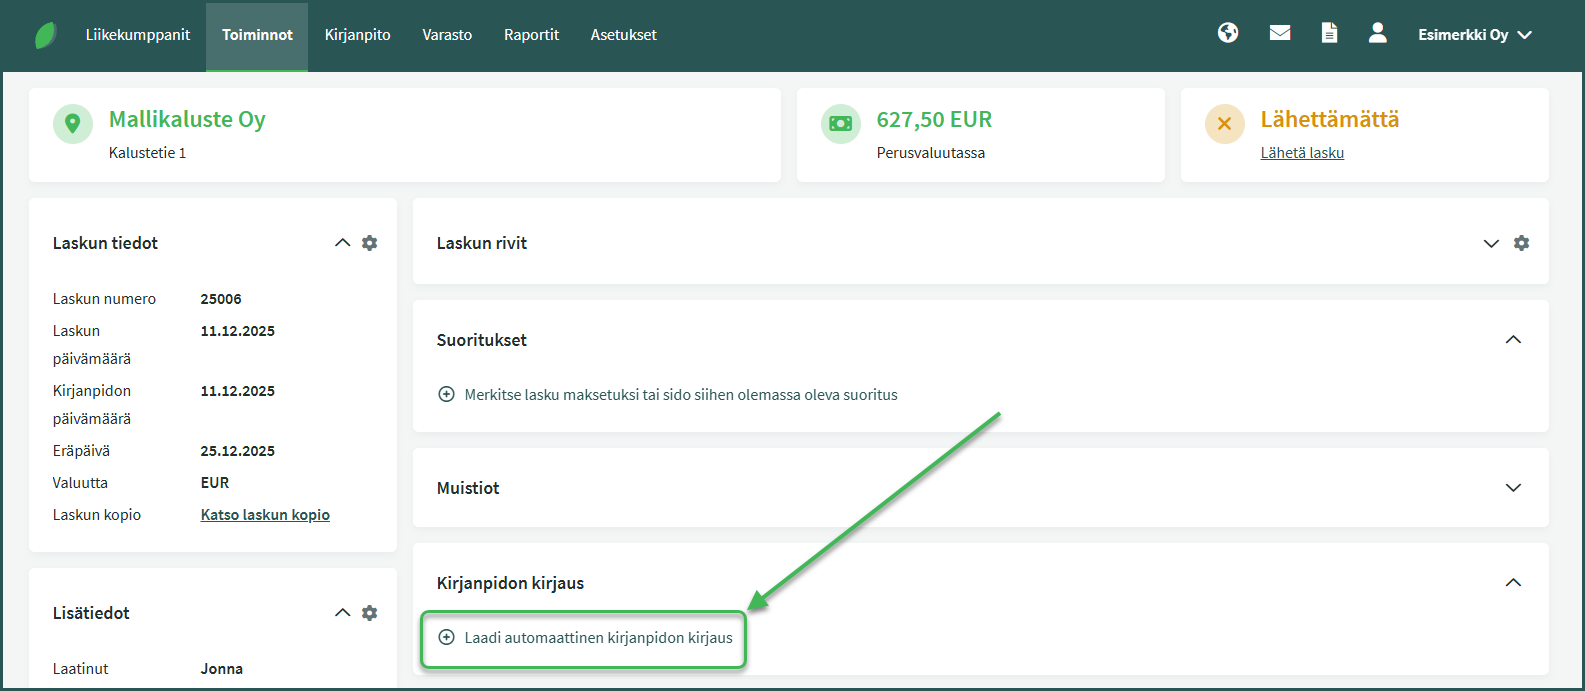
If the program does not create an accounting entry automatically, even though you are using accrual-based accounting, automatic postings are likely turned off. You can create the accounting entry by clicking “Create automatic posting” at the bottom of the page or from the Actions menu.
We recommend enabling automatic postings under Settings > Environment Settings so that entries are created automatically in the future. You can read more about automatic postings here.
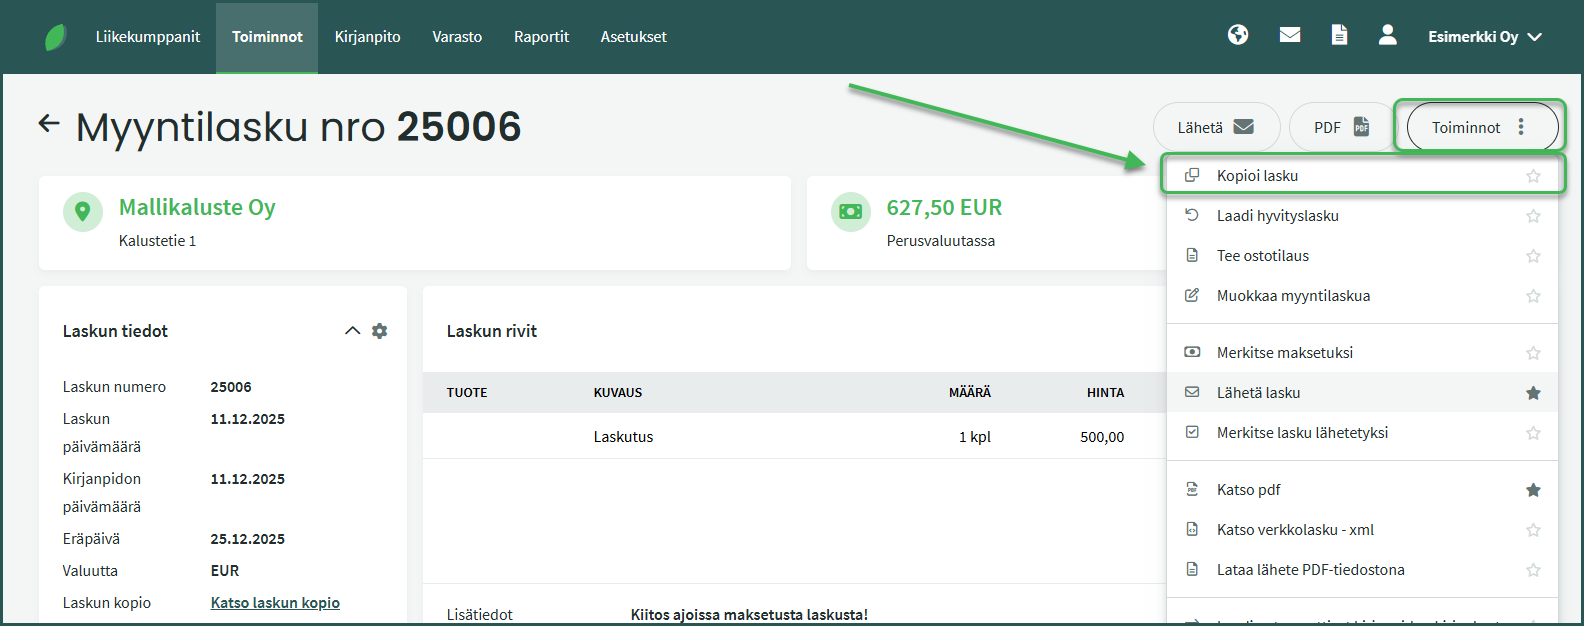
If you regularly sell to the same customer, you can reuse the details of a previous sales invoice by copying it. The program will then automatically fill in a large portion of the new invoice’s details.
Go to Transactions > Sales Invoices and open the invoice whose details you want to use. Select Actions > Copy Invoice from the right-hand side of the page.
When you copy an invoice, the program creates a new invoice with the same details. The invoice date defaults to either the current date or the date of the most recent sales invoice. The default date can be changed under Settings > Environment Settings > Sales Invoice Settings > Default Sales Invoice Date.
- Sending a sales invoice
- Setting up e-invoicing
- Marking a sales invoice as paid
- Adding a sales invoice template
- Adding a product for sale
- Why can’t a product be added to a sales invoice?
- Adding automatic reference numbering to sales invoices
- Adding company details to invoices and quotes
- Changing automatic numbering for sales invoices, purchase invoices, quotes, or inventory postings
- Changing automatic postings for sales and purchase invoices
Leave A Comment?